Category: Fitness & Exercise

  • How to Choose the Right Resistance Band Tension and Length for Your Strength Level

    How to Choose the Right Resistance Band Tension and Length for Your Strength Level

    If you have ever stood in front of a rack of colorful bands and wondered which one actually matches the strength you have right now, this guide is for you. It speaks to beginners who are just learning the feel of variable resistance, to lifters who want a portable option for travel or deload weeks, and to anyone rehabbing a joint who needs a smooth, joint-friendly load. The goal is simple: help you pick a band tension and length so every repetition feels challenging but doable, without guesswork.

    After reading, you will be able to:

    • Identify what the common color codes usually mean and why they can vary between brands
    • Test your current strength baseline with a few quick movements
    • Choose a band length that lets you move through a full range of motion without slack or overstretch
    • Apply simple progressive overload methods as you get stronger
    • Adjust setups for upper-body pushes, pulls, and lower-body patterns
    • Combine bands safely when a single band is too light or too heavy
    • Care for your bands so the resistance stays consistent over time

    If you have any medical conditions or recent injuries, consider checking with a healthcare professional before starting a new resistance routine.

    Understanding Resistance Band Color Coding Systems

    Resistance band color coding can feel like a secret language at first, but the logic is straightforward once you know what to look for. Most manufacturers follow a general progression where lighter colors represent lighter tension and darker colors indicate heavier resistance. A common sequence starts with yellow for extra light, moves through red and green for light to medium, then blue and black for heavy and extra heavy. Some brands add silver or gold at the top end for maximum tension. Because there is no universal standard, a red band from one company may feel closer to a green band from another. Many people find it helpful to treat the color as a rough guide rather than a precise promise.

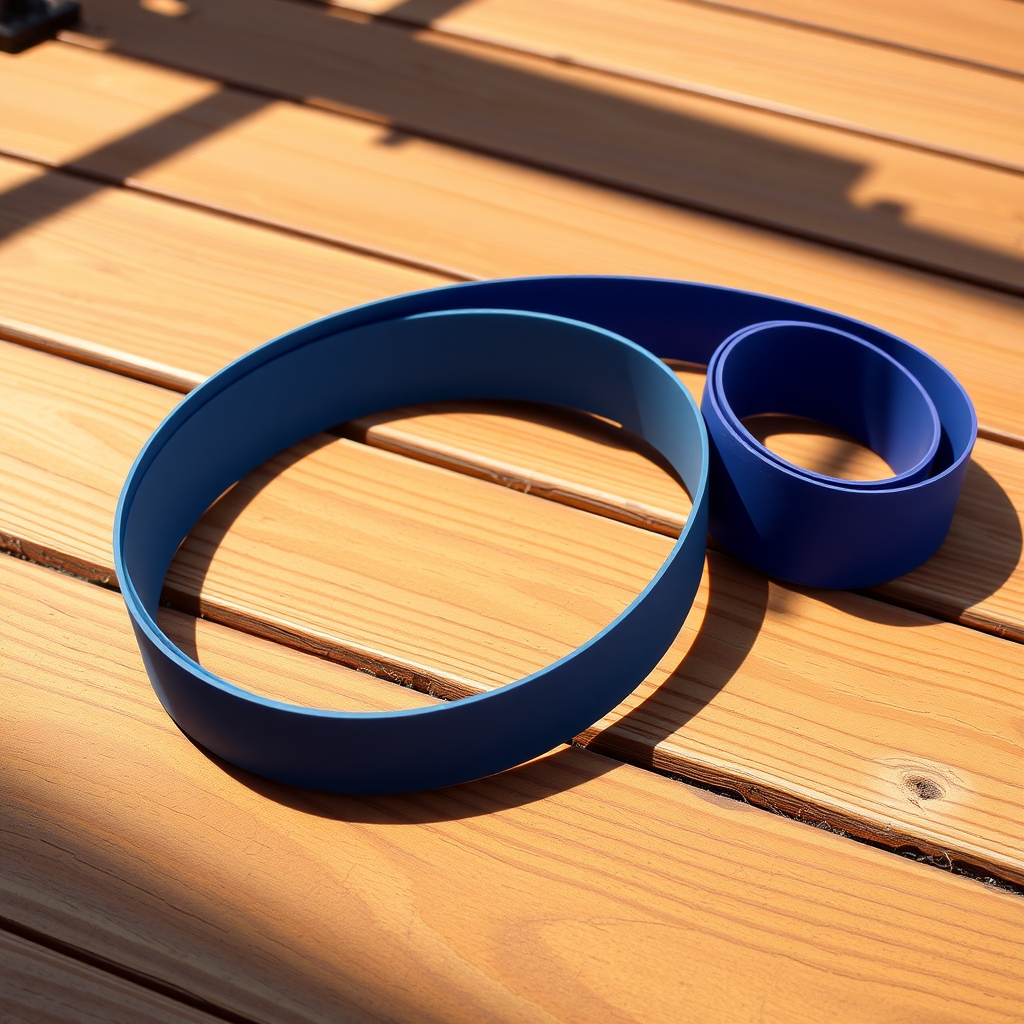
    Thickness and width matter just as much as hue. A thick, narrow loop labeled "light" can produce more force at full stretch than a wide, thin sheet labeled "medium." Check the product details for the tension range, usually listed in pounds or kilograms at 100 percent and 200 percent elongation. If that data is missing, you can test the band yourself by anchoring it and measuring how far you can stretch it with a known weight.

    • Yellow or tan: typically extra light, useful for mobility work or rehabilitation
    • Red: often light, good for high-rep accessory movements
    • Green: frequently medium, a versatile starting point for general strength
    • Blue: commonly heavy, suited for compound lower-body exercises
    • Black: usually extra heavy, for strong lifters or doubled-up setups
    • Silver or gold: maximum resistance, often used by advanced athletes

    When in doubt, buy a set that includes several colors so you can experiment. You may also want to verify the exact tension with a luggage scale or similar tool before relying on the band for structured training. If you have any joint concerns or previous injuries, checking with a doctor or physical therapist before loading a new band heavily is a wise step.

    Matching Band Tension to Your Current Strength Baseline

    Finding the right starting tension is less about the color printed on the band and more about how the resistance feels during the last few repetitions of a set. A practical baseline is to choose a band that allows you to complete 10 to 15 controlled reps with good form, where the final two reps feel challenging but not shaky. If you breeze through 15 reps without a noticeable increase in effort, the band is likely too light. If your form breaks down before eight reps, or you cannot move through the full range of motion, the tension is too high for that movement today.

    Many people find it helpful to test a band with a simple compound movement like a banded squat, chest press, or row before committing to a full workout. Perform a set slowly, paying attention to whether the resistance feels smooth throughout the entire motion or if there is a sudden spike that forces you to cheat. Bands produce variable resistance, meaning the load increases as the band stretches, so the hardest part of the rep is usually at the end range. Select a tension that lets you control that peak without locking out joints or shrugging shoulders.

    • Start with a light or medium band for upper-body pushing and pulling exercises
    • Choose a medium or heavy band for lower-body work like glute bridges or deadlifts
    • Keep a second, lighter band nearby for warm-up sets or accessory movements
    • Reassess your baseline every few weeks as strength improves

    If you have any joint concerns or are returning from injury, checking with a doctor or physical therapist before adding new resistance can help you select a safe entry point.

    Selecting Optimal Band Length for Exercise Range of Motion

    Band length changes how an exercise feels just as much as tension does. A band that is too short will hit its maximum stretch before you finish the movement, creating a sudden spike in resistance that can pull you out of good form. One that is too long may offer too little tension at the start, leaving the first half of the rep feeling empty. Most standard loop bands measure around 41 inches laid flat, which works well for many full-body moves, but your height, limb length, and the specific exercise all shift the ideal fit.

    For pressing or pulling movements where the band anchors behind you or overhead, you want enough slack to set up with light tension at the starting position. If the band is already tight before you move, the resistance curve gets distorted. For lower-body work like squats or hip thrusts, a longer band lets you stand on it with a comfortable stance width while still leaving room to descend fully. Many people find that having two lengths on hand — one standard loop and one extra-long or open-ended band — covers almost every scenario without forcing awkward setups.

    • Test a band by mimicking the full range of motion slowly before adding effort; the resistance should rise smoothly from start to finish.
    • If you feel a hard "wall" before lockout, the band is too short for that movement.
    • For anchored exercises, adjust your distance from the anchor point to fine-tune the starting tension without changing bands.
    • Taller individuals or those with longer limbs often benefit from 48-inch loops or linking two bands together.
    • Always inspect the band for wear near the anchor or foot contact points, as these areas stretch most and degrade fastest.

    A quick length check before each session takes seconds and keeps every rep productive.

    Progressive Overload Strategies with Variable Resistance Bands

    Progressive overload with resistance bands works differently than with fixed weights because the tension increases as the band stretches. This variable resistance means the hardest part of each repetition occurs at the end range, which can be used strategically. Start by mastering an exercise with a band that allows you to complete eight to twelve controlled repetitions with good form. Once you can perform the full set comfortably, you have a few practical options to increase the challenge.

    • Shorten the effective length by choking up on the band or anchoring it closer to your body, which raises the starting tension.
    • Add a second band of the same or lighter thickness to increase load without a dramatic jump.
    • Slow down the tempo, especially the lowering phase, to increase time under tension.
    • Increase the range of motion slightly if you have been working in a shortened pattern, ensuring the band still provides tension at the bottom.
    • Perform an extra set before moving to a thicker band.

    Many people find that cycling through these adjustments over several weeks creates steady progress while reducing joint stress. Because bands deliver peak resistance at lockout, they can highlight weak points in the top half of movements like presses or rows. If you notice form breaking down at the end range, reduce the tension or shorten the range until control returns. Tracking your band color, anchor position, and rep counts in a simple notebook helps you see patterns and plan the next small step. As always, check with a doctor or qualified professional if you have any underlying conditions or experience sharp pain during training.

    If you want this in more depth, our book Strength Training Fundamentals: Building Muscle and Confidence with Resistance Training covers it step by step.

    Adjusting Band Setup for Upper vs Lower Body Movements

    Upper body movements typically involve smaller muscle groups and shorter ranges of motion than lower body exercises, so the same band often feels significantly heavier when you press overhead or row compared to when you squat or hinge. Many people find it helpful to keep two or three bands on hand — light, medium, and heavy — and simply swap them as the exercise changes. For pressing and pulling variations, anchoring the band at chest height or slightly above usually creates a smooth resistance curve that matches the strength profile of the shoulder and elbow joints.

    Lower body work benefits from longer bands or heavier tension because the glutes, quads, and hamstrings produce much more force. Stepping on the band with both feet and widening your stance increases tension without changing equipment, while a single-foot anchor reduces load for unilateral moves such as split squats or Romanian deadlift variations. If the band slides during hip-dominant lifts, placing it across the upper back or using a fabric loop band can improve stability.

    • Test each new exercise with the lightest band first; add tension only when you can complete the target reps with control.
    • Keep the band path aligned with the limb moving — avoid angles that pull the joint sideways.
    • For mixed sessions, arrange bands in order of tension so transitions stay quick and the workout flows.

    If you have any joint concerns or previous injuries, check with a doctor or qualified therapist before loading heavily in end-range positions.

    Combining Multiple Bands for Customized Resistance Levels

    When a single band does not quite hit the sweet spot, stacking two or more bands lets you fine-tune resistance in small increments. Start by looping a lighter band alongside your primary one; the combined tension rises smoothly through the range of motion and often feels more natural than jumping to the next color. Many people find that pairing a thin band with a medium band gives them a usable step between standard sizes, especially for isolation moves like lateral raises or band pull-aparts where a large jump in load can break form.

    Keep the bands aligned so they stretch together rather than twisting independently. If you anchor them separately, place the anchors at the same height and distance to maintain even pull. For pressing or squatting patterns, you can also choke up on one band by shortening its working length while leaving the other at full length, creating a staggered resistance curve that loads the top of the movement more heavily.

    • Test combinations unloaded first to confirm the bands track evenly.
    • Note which pairings feel smooth for each major movement pattern so you can replicate them quickly.
    • Inspect each band for nicks or thinning before linking them, because a compromised band can snap under combined tension.

    Progress by adding a lighter band rather than swapping to a heavier single band, and remove bands one at a time as fatigue sets in during a session. If you have any joint concerns or prior injuries, check with a healthcare professional before increasing total load significantly.

    Maintaining Band Integrity for Consistent Tension Accuracy

    Resistance bands lose their calibrated tension when the material degrades, so a band that once provided thirty pounds of pull might deliver far less — or snap unexpectedly. Heat, sunlight, and repeated overstretching break down the latex or polymer structure faster than normal use. Store bands in a cool, dark drawer or bag rather than leaving them in a hot car, on a sunny windowsill, or near a radiator. After each session, wipe them with a damp cloth to remove sweat and skin oils, then let them air dry completely before putting them away.

    Inspect the entire length before every workout. Look for tiny tears, white stress lines, sticky or powdery surfaces, and any thinning near the ends where you anchor or grip. Even a small nick can propagate quickly under load. If you spot damage, retire that band; the cost of a replacement is far lower than the risk of a snap during a face pull or squat.

    • Rotate between two or three bands of the same tension so no single band absorbs every session’s volume.
    • Avoid stretching any band beyond two and a half times its resting length unless the manufacturer explicitly rates it for more.
    • Keep sharp edges — carabiners, rough door anchors, jewelry — away from the band surface.
    • Use a light dusting of cornstarch or talc on therapy-style flat bands if they start to stick together; skip petroleum-based lubricants, which degrade latex.

    If you have a latex allergy, choose non-latex synthetic bands and follow the same care routine. When in doubt about a band’s condition, replace it. Consistent tension depends on intact material, and intact material depends on simple, daily habits.

    Putting It Together

    Start your first week by picking one light and one medium band that match the color coding you learned earlier. Test each band with a simple move like a band pull-apart or a glute bridge to confirm the tension feels challenging but lets you finish 10 to 12 clean reps. If the last two reps feel shaky but controlled, you are in the right range.

    Plan three short sessions spaced a day apart. Each session can be 15 to 20 minutes and include four exercises: a push, a pull, a hinge, and a squat variation. Use the light band for upper body moves and the medium band for lower body moves. Keep a small notebook or phone note to record the band used, reps completed, and how the set felt.

    • Session 1: band chest press, band row, band deadlift, band squat
    • Session 2: band overhead press, band face pull, band hip thrust, band lunge
    • Session 3: repeat Session 1 but add one rep per set if it felt easy

    Check your bands before each workout for nicks or overstretch. If any exercise causes joint pain, stop and adjust the anchor point or band choice. Many people find this low volume approach builds confidence without excessive soreness. Consider checking with a doctor before starting if you have any existing injuries or medical conditions.

    More from the blog

    From FitLife Solutions

    Our book Strength Training Fundamentals: Building Muscle and Confidence with Resistance Training goes further, as a digital eBook (PDF and EPUB) you can read on any device.

    Browse all our practical health and fitness guides at fitlifesolutions.site.

    New practical health guides and articles on WhatsApp: follow our channel.

    Earn by sharing our books with your audience: join our affiliate channel on Telegram for one ready-to-post book a day.

    This article is for general information only and is not a substitute for professional medical advice. Talk to your doctor or another qualified health professional before changing your diet, exercise or health routine, especially if you have a medical condition or take medication.
  • How to Set Up an Ergonomic Laptop Workstation at a Kitchen Table

    How to Set Up an Ergonomic Laptop Workstation at a Kitchen Table

    Many people work from a kitchen table because it is the only flat surface available, but the standard height and hard chairs often lead to hunched shoulders, a tilted neck, and sore wrists after a few hours. This guide is for anyone who uses a laptop at a kitchen table — whether occasionally or every day — and wants to feel more comfortable without buying specialized office furniture.

    You will learn how to raise your screen to a better viewing height using books or boxes, choose and adjust a chair with cushions or towels for support, and position an external keyboard and mouse so your forearms stay relaxed. We also cover simple ways to manage glare from windows or overhead lights, keep cords from tangling, and build in regular movement breaks that fit into a busy household routine. If you share the table for meals, homework, or other tasks, you will find tips for quick setup and teardown. Check with a healthcare professional if you have persistent pain or specific medical concerns.

    Choosing the Right Chair and Adjusting Seat Height

    A sturdy chair with a supportive backrest makes the biggest difference when you’re working from a kitchen table. Dining chairs often have hard seats and straight backs that encourage slouching after an hour or two. If you have an office chair with adjustable height and lumbar support, bring it into the kitchen. If not, choose the chair with the most comfortable seat cushion and the highest back. A folded towel or small pillow placed at the small of your back can fill the gap between you and the chair, helping maintain the natural curve of your spine.

    Seat height matters more than most people realize. Sit so your feet rest flat on the floor with your thighs roughly parallel to the ground. If the chair is too high, place a sturdy box, a thick book, or a footrest under your feet. If it’s too low, add a firm cushion or folded blanket to raise your hips slightly above your knees. This angle opens the hip joint and reduces pressure on the lower back. Many people find that a seat depth allowing two to three fingers of space between the front edge and the back of the knees improves comfort during long sessions.

    • Test the height by typing a few sentences; your elbows should stay close to your body at about a 90-degree angle.
    • Keep shoulders relaxed, not hunched toward your ears.
    • Shift your weight occasionally and stand up for a minute every 30 to 40 minutes.

    If you experience persistent discomfort, consider checking with a healthcare professional for personalized guidance.

    Positioning the Laptop Screen at Eye Level

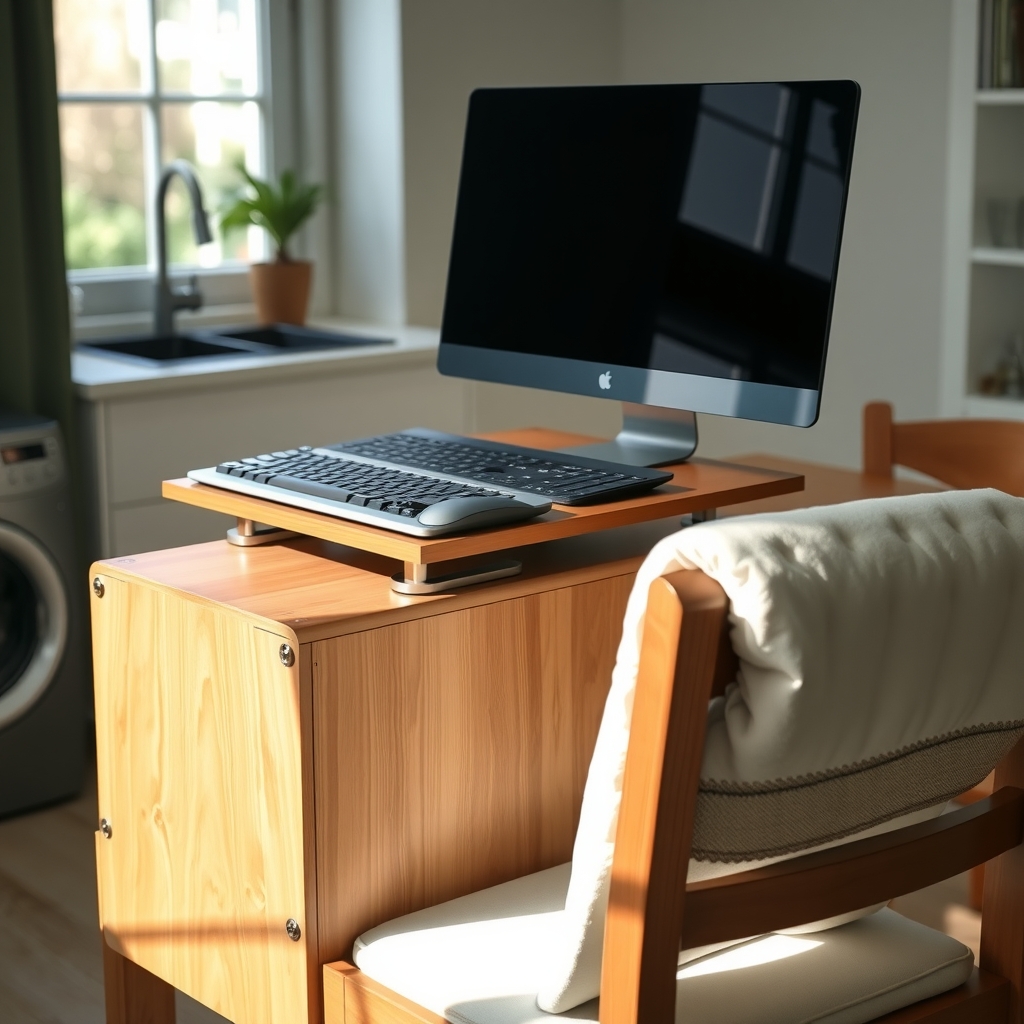
    The top of your laptop screen should sit at or just below eye level so your neck stays in a neutral position. At a kitchen table, the screen usually rests far too low, which encourages a forward head posture that can strain the neck and upper back over time. Raising the laptop is one of the simplest changes you can make, and you likely have what you need already. A sturdy stack of large books, a wooden cutting board placed on top of a box, or an upside-down storage bin can serve as a stable riser. Aim for a height where your gaze naturally falls on the upper third of the screen when you sit tall with relaxed shoulders.

    Stability matters as much as height. Wobbly stacks shift when you type, forcing subtle neck corrections that add up. Test your riser by pressing gently on the laptop corners; if it moves, widen the base or add a non-slip mat or damp towel between layers. Keep the screen about an arm’s length away — roughly 20 to 30 inches — so you can read text without leaning forward. If the screen feels too far once raised, increase the font size or display scaling rather than moving it closer.

    • Use cookbooks, a shoebox, or a small step stool as a base
    • Place a silicone trivet or shelf liner on top to prevent sliding
    • Tilt the screen back slightly (10–15 degrees) to reduce glare and match your line of sight
    • Check alignment by closing your eyes, sitting tall, then opening them — your eyes should land near the top of the browser tab bar

    Many people find this adjustment alone reduces end-of-day neck tightness. If discomfort persists, consider checking with a healthcare provider to rule out other causes.

    Using an External Keyboard and Mouse for Neutral Wrist Posture

    An external keyboard and mouse are the single most effective tools for protecting your wrists and shoulders at a kitchen table. When the laptop screen is raised to eye level, the built-in keyboard sits too high and too far back, forcing your shoulders to hike and your wrists to bend upward — a posture that often leads to fatigue or discomfort over time. Separating the input devices from the screen lets you keep your elbows close to your sides, bent at roughly 90 degrees, with forearms parallel to the floor and wrists floating in a neutral, straight line.

    Place the keyboard so its front edge sits just a few centimeters from the table’s edge, giving your palms room to rest lightly when paused. A rolled kitchen towel or folded dishcloth can serve as a makeshift palm support — just keep it low and soft so it cushions the heel of the hand without bending the wrist. The mouse belongs on the same level, close enough that your upper arm stays relaxed. If the table surface is too high even with a cushion, try placing the keyboard and mouse on a sturdy cutting board or baking sheet atop your lap — many people find this lowers the work surface just enough to open the elbow angle.

    • Choose a compact keyboard without a number pad to keep the mouse closer
    • Use a wireless set to avoid cable drag that pulls the wrist off-center
    • Keep the mouse speed moderate so small movements suffice
    • Swap the mouse to your non-dominant hand occasionally to distribute load

    If tingling, numbness, or persistent aching develops, consider checking with a doctor or occupational therapist — they can assess whether a vertical mouse, split keyboard, or other adaptation might help. Small adjustments here compound across hours of daily use.

    Managing Lighting to Reduce Glare and Eye Strain

    Natural light from kitchen windows can be a mood booster, but it often creates glare on a laptop screen, especially in the morning or late afternoon. If you face a window, the bright background forces your eyes to work harder to see the display. Turning your back to the window helps, but then sunlight may reflect off the screen like a mirror. A simple fix is to position the table perpendicular to the window so light comes from the side. Sheer curtains, a roller shade, or even a light bedsheet clipped to the window frame can diffuse harsh rays without darkening the room.

    Overhead kitchen lighting — often a single bright fixture — can cause its own problems. Cool-white LED bulbs tend to increase contrast and flicker subtly, which may contribute to eye fatigue. Swapping to a warmer bulb (around 2700–3000K) or adding a small desk lamp with a warm-toned LED can create a more balanced glow. Place the lamp to the side, not behind you, so it illuminates the keyboard and documents without bouncing off the screen.

    • Adjust screen brightness to match the surrounding light level — not brighter, not dimmer
    • Use a matte screen protector if reflections persist
    • Follow the 20-20-20 habit: every 20 minutes, look at something 20 feet away for 20 seconds
    • Blink consciously during long sessions to keep eyes lubricated

    If you wear glasses, ask your eye care provider about lenses with anti-reflective coating or a slight tint for screen use. Many people find these reduce strain during extended work periods.

    If you want this in more depth, our book Ergonomics: Designing Your Workspace for Health and Comfort covers it step by step.

    Organizing Cables and Accessories for a Clutter-Free Surface

    A tidy surface does more than look pleasant — it gives your arms room to move freely and keeps frequently used items within easy reach. Start by gathering every cable, charger, and peripheral into one loose bundle. Velcro ties, reusable twist ties, or even bread bag clips work well to group cords by device without damaging the insulation. Run the bundled cables along the back edge of the table and secure them with a strip of painter’s tape or a removable adhesive clip so they don’t dangle into your leg space or catch on chair wheels.

    Place a small tray, basket, or even a sturdy shoebox lid at one corner to corral the external keyboard, mouse, and any adapters when you step away. This keeps the main work zone clear for meals or homework and makes it fast to reset your ergonomic layout. If you use a laptop stand, tuck its folded legs or riser blocks into the same container.

    Keep only the essentials on the tabletop: laptop on its stand, external keyboard and mouse, a notebook, and a water bottle. Move rarely used items — spare cables, reference books, decorative objects — to a nearby shelf or countertop. A clean surface reduces visual distraction and lets you maintain the neutral wrist and arm positions you’ve set up, rather than reaching around clutter or hunching to see the screen.

    Incorporating Movement Breaks and Micro-Adjustments Throughout the Day

    Even with a well-arranged kitchen table setup, staying in one position for hours can leave you feeling stiff and fatigued. The body is designed to move, and regular changes in posture help maintain comfort and circulation throughout the workday. Aim to shift your position every 30 to 45 minutes, even if only for a minute or two. Stand up, roll your shoulders back, stretch your arms overhead, or walk to the sink for a glass of water. These brief pauses reset muscle tension and give your eyes a break from the screen.

    Micro-adjustments at the table also make a difference. Try alternating between sitting fully back in your chair and perching slightly forward with feet flat on the floor. If you have a sturdy countertop nearby, stand for a few minutes while reading emails or taking a call. A folded towel under your sit bones can tilt the pelvis slightly forward, encouraging a more natural spinal curve. Some people find that placing a small cushion behind the lower back provides a gentle reminder to avoid slumping.

    • Set a quiet timer or use a calendar reminder to prompt a posture check every half hour.
    • During video calls, stand or pace if the camera allows.
    • Perform simple neck rolls, wrist circles, and ankle pumps while waiting for files to load.
    • Keep a water bottle within reach; refilling it creates a natural movement break.

    If you experience persistent discomfort, numbness, or pain that does not improve with these adjustments, consider checking with a healthcare professional for personalized guidance. Small, frequent movements woven into your routine can help you stay more comfortable and focused while working from the kitchen.

    Adapting the Setup for Shared or Multi-Use Kitchen Spaces

    Kitchen tables pull double duty as homework stations, meal prep zones, and family gathering spots, so your ergonomic setup needs to be flexible enough to vanish in minutes. Start by choosing lightweight, portable supports for your laptop — a sturdy cookbook stack, a wooden cutting board on a box, or a foldable laptop stand that slides into a drawer. Keep your external keyboard and mouse in a designated basket or bin nearby so they can be tucked away before dinner. A single power strip with a long cord lets you unplug one device and move the whole charging station to a counter outlet when the table is needed for meals.

    If you share the space with others, agree on a simple “reset” routine. For example, everyone returns their gear to a specific shelf or rolling cart at the end of their work block. A small rolling cart with shelves can hold your monitor riser, keyboard, mouse, and notebook, then wheel into a corner or pantry when not in use. Use a tablecloth or placemat as a visual boundary for your workspace; when it’s folded up, the table signals it’s back to kitchen duty.

    Consider these quick-transition habits: – Store riser materials in a labeled magazine file on a nearby shelf – Keep a microfiber cloth handy to wipe the table surface before and after work sessions – Use cable ties or Velcro straps that stay attached to cords so nothing gets lost – Set a phone alarm five minutes before a shared meal to prompt pack-up

    Many people find that a consistent, low-effort teardown process makes them more willing to maintain good posture during work time, knowing the kitchen can easily return to its primary role. If you experience persistent discomfort, check with a healthcare professional for personalized guidance.

    Putting It Together

    Start by gathering what you already own: a stable chair, a few sturdy books or a small box, a separate keyboard and mouse if you have them, and a lamp with a shade. Spend the first evening arranging these pieces on the kitchen table so the top of the screen sits at eye level, the keyboard lets your forearms rest parallel to the floor, and the mouse stays close enough that your shoulder stays relaxed. Use a folded towel as a seat cushion if the chair is too low, and prop your feet on a thick catalog or step stool if they don’t reach the floor.

    • Day 1–2: Work in 45-minute blocks. Set a timer. When it rings, stand, stretch your arms overhead, roll your shoulders back, and look at something across the room for 20 seconds.
    • Day 3–4: Notice where you feel tension — neck, wrists, lower back. Adjust one thing at a time: raise the screen another inch, slide the keyboard closer, add a rolled towel for lumbar support.
    • Day 5–7: Keep the rhythm. Clear the table completely at the end of each work session so meals and work don’t blur together. If something still feels off after a week, consider whether a different chair or a laptop stand would help, and check in with a healthcare provider if discomfort persists.

    More from the blog

    From FitLife Solutions

    Our book Ergonomics: Designing Your Workspace for Health and Comfort goes further, as a digital eBook (PDF and EPUB) you can read on any device.

    Browse all our practical health and fitness guides at fitlifesolutions.site.

    New practical health guides and articles on WhatsApp: follow our channel.

    Earn by sharing our books with your audience: join our affiliate channel on Telegram for one ready-to-post book a day.

    This article is for general information only and is not a substitute for professional medical advice. Talk to your doctor or another qualified health professional before changing your diet, exercise or health routine, especially if you have a medical condition or take medication.

  • How to Perform a Bodyweight Squat, Push-Up, and Plank With Proper Form

    How to Perform a Bodyweight Squat, Push-Up, and Plank With Proper Form

    Whether you are brand new to strength training or returning after a break, this guide is for anyone who wants to build a resilient body using nothing but the floor beneath your feet. No equipment, no gym membership, and no prior experience are required — just a willingness to learn the details that make basic movements effective and sustainable.

    By the end of this article, you will be able to: – Set up and execute a bodyweight squat, push-up, and plank with confidence – Recognize the most common form breakdowns before they become habits – Adjust each exercise to match your current mobility and strength level – String the three movements together into a short, balanced session you can do at home

    These three exercises form a foundation that carries over to daily tasks like lifting groceries, pushing a door, or maintaining posture at a desk. Many people find that mastering the basics first makes every future workout feel smoother and safer. If you have any existing injuries or medical conditions, consider checking with a healthcare professional before starting a new routine.

    Mastering the Bodyweight Squat Setup and Descent

    Stand with your feet roughly shoulder-width apart, toes turned out slightly so they track naturally with your knees. Many people find it helpful to imagine a tripod of pressure under each foot: the base of the big toe, the base of the little toe, and the center of the heel. Gently screw your feet into the floor without actually moving them; this creates a subtle external rotation torque at the hips that stabilizes the pelvis. Keep your chest proud and your gaze forward, not down. Inhale through your nose, bracing your core as if preparing for a light push to the midsection.

    Initiate the descent by sending your hips back and down simultaneously, rather than driving the knees forward first. Think of sitting into a low chair behind you. As you lower, allow your knees to track in line with your middle toes. Your torso will lean forward naturally to counterbalance the hips moving back; this is expected and safe provided your spine stays neutral. Aim to lower until your thighs are roughly parallel to the floor, or as deep as you can control without your lower back rounding or your heels lifting.

    Key checkpoints during the descent: – Weight stays centered over the midfoot, not the toes. – Knees do not collapse inward. – Lower back maintains its natural curve. – Shoulders remain down and back, not shrugged toward the ears.

    If you feel pinching in the hips or knees, shorten the range of motion and reassess your stance width. As always, check with a doctor if you have existing joint concerns before loading deep flexion.

    Executing the Ascent and Common Squat Faults to Avoid

    Driving upward begins the moment you hit your lowest controlled depth. Press the floor away through the midfoot and heel, keeping the knees tracking over the toes rather than collapsing inward. Imagine your hips and chest rising at the same pace so the torso angle stays consistent; if the hips shoot up first, the lower back takes on extra load. Exhale steadily as you stand, finishing tall with the glutes engaged but not hyperextended. A brief pause at the top lets you reset before the next repetition.

    Common faults often show up when fatigue sets in. Watch for these patterns:

    • Knees caving inward (valgus collapse), which shifts stress to the knee ligaments
    • Heels lifting off the floor, indicating limited ankle mobility or a forward weight shift
    • Chest dropping toward the thighs, turning the squat into a hip hinge
    • Lower back rounding or overarching at the bottom or top
    • Rushing the tempo and losing tension in the core

    If any of these appear, reduce the range of motion or slow the tempo until the pattern cleans up. Filming a set from the side and front can reveal subtle shifts you cannot feel. Many people find that a box or chair behind them provides a depth cue and builds confidence. As always, if you experience sharp joint pain or have a history of knee or hip issues, check with a qualified healthcare professional before continuing.

    Establishing the Push-Up Starting Position and Hand Placement

    A solid push-up begins long before the first repetition. Start on your hands and knees on a comfortable surface, then extend your legs back so your weight rests on your hands and the balls of your feet. Your hands should sit just outside shoulder width, with fingers spread comfortably and middle fingers pointing roughly forward. Many people find that turning the hands out slightly, about fifteen to thirty degrees, eases wrist strain. Press the palms firmly into the floor, imagining you are trying to grip the ground; this engages the forearms and stabilizes the shoulder girdle.

    Set your shoulders by actively pushing the floor away, which protracts the shoulder blades slightly and creates a stable base. Avoid letting the chest collapse toward the floor or the shoulder blades pinch together aggressively. Your head stays neutral, gaze directed a few inches in front of your fingertips, keeping the cervical spine in line with the thoracic spine. Engage the glutes and brace the abdominals as if preparing for a light punch to the midsection; this locks the pelvis into a posterior tilt and prevents the lower back from sagging or the hips from hiking high.

    Check these alignment points before you descend:

    • Wrists stacked roughly under shoulders or slightly forward
    • Body forming a straight line from the crown of the head through the heels
    • Elbows angled about forty-five degrees away from the torso, not flared to ninety degrees
    • Feet hip-width apart or slightly wider for balance

    If the wrists complain, elevate the hands on a sturdy bench, a countertop, or push-up handles to reduce extension demand. You can also perform the setup from the knees, maintaining the same upper-body alignment, to build confidence and strength gradually. As with any new movement, check with a doctor if you have existing shoulder, elbow, or wrist concerns before loading the joint.

    Controlling the Push-Up Eccentric and Concentric Phases

    Lower your body with intention rather than letting gravity do the work. From the top position, inhale and pull yourself toward the floor by actively engaging your back muscles, as if you were rowing the ground. Keep your elbows tracking at roughly a forty-five-degree angle from your torso, not flared wide to ninety degrees. Your chest should lead the way, touching the floor or hovering just above it, while your hips and shoulders move as one unit. Many people find that imagining a string pulling the crown of the head forward helps prevent the chin from jutting down or the lower back from sagging.

    Press back up with a strong exhale, driving the palms into the floor as if you are trying to push the earth away. Focus on squeezing the chest and triceps at the top without locking the elbows aggressively. The shoulder blades should protract fully at the finish, wrapping around the rib cage. If the hips hike up or the head drops during the press, reset before the next repetition.

    Common breakdowns to watch for: – Elbows flaring wide, placing stress on the shoulder joint – Lower back arching or hips sagging during the descent – Incomplete range of motion, stopping well short of the floor – Holding the breath, which reduces core stability

    Move slowly enough to feel each phase. Quality repetitions build strength more effectively than rushed sets. If wrist discomfort arises, try gripping dumbbells or using push-up handles to keep the joint neutral. As always, check with a doctor if you have existing shoulder or wrist conditions before adding volume.

    Building the Plank Foundation: Alignment and Breathing

    The plank looks deceptively simple, but the details determine whether you are building core stability or simply hanging on your joints. Start on your forearms and knees. Place your elbows directly under your shoulders, forearms parallel, and hands relaxed — either flat on the floor or lightly clasped. Step your feet back one at a time, tucking your toes under. Your body should form a straight line from the crown of your head to your heels.

    Engage the entire chain. Press the floor away through your forearms so your upper back stays broad, not sinking between the shoulder blades. Gently draw your belly button toward your spine without holding your breath. Squeeze your glutes and press your thighs together; this locks the pelvis in a neutral position and prevents the lower back from arching. Keep your chin slightly tucked, gaze at the floor a few inches ahead of your hands, and maintain a long neck.

    Breathing is the rhythm that sustains the hold. Inhale slowly through the nose, expanding the ribcage laterally. Exhale fully through the mouth while maintaining the abdominal tension you created on the inhale. This diaphragmatic pattern keeps intra-abdominal pressure steady and prevents the shallow, panicked breathing that leads to early fatigue.

    Quick alignment checklist: – Elbows under shoulders, forearms parallel – Shoulders away from ears, upper back broad – Neutral pelvis, glutes engaged – Straight line from head to heels – Controlled nasal inhale, full oral exhale

    If you feel strain in the lower back or shoulders, drop to your knees and rebuild the alignment from there. Many people find that shorter, high-quality holds transfer better to other movements than long, shaky ones. As always, check with a healthcare professional if you have existing back or shoulder concerns before adding planks to your routine.

    Progressing Plank Duration and Identifying Form Breakdown

    Once you can hold a solid plank for about twenty to thirty seconds with steady breathing, you can begin extending the duration in small increments. Add five to ten seconds each session or each week, depending on how your body responds. Many people find that several shorter sets with brief rest periods produce better quality work than one long hold that deteriorates toward the end. For example, three sets of thirty seconds with thirty seconds of rest often yields more total time under tension with cleaner alignment than a single ninety-second effort that sags in the final third.

    Watch for the telltale signs that form is breaking down. The hips tend to drift upward or sag downward first, which shifts load away from the core and into the lower back or shoulders. The head may jut forward or drop, compressing the neck. Shoulders often creep toward the ears, and the elbows can unlock slightly, turning the hold into a bone-on-bone lockout rather than muscular engagement. Breathing frequently becomes shallow or held, which spikes intra-abdominal pressure and reduces stability.

    • If the hips sag, reset by gently tucking the pelvis and re-engaging the glutes.
    • If the shoulders rise, actively press the floor away and widen the collarbones.
    • If the neck strains, bring the gaze slightly down and back to lengthen the cervical spine.
    • If breathing feels forced, shorten the hold and prioritize full inhales and exhales.

    When any of these cues appear consistently, end the set. Quality repetitions build capacity faster than grinding through compromised positions. If you have a history of back, shoulder, or wrist issues, check with a healthcare professional before increasing volume or intensity.

    Integrating All Three Movements Into a Cohesive Routine

    Now that you have practiced each movement individually, you can combine them into a simple, repeatable session that fits into a busy schedule. A straightforward approach is to treat the three exercises as a mini circuit: perform a set of squats, move directly into a set of push-ups, and finish with a plank hold. Rest for sixty to ninety seconds, then repeat the sequence for two to four total rounds depending on how you feel that day. This structure keeps the heart rate modest while giving each muscle group a brief recovery window before it works again.

    If you prefer a time-based format, set a timer for ten to fifteen minutes and cycle through the movements at a controlled pace, focusing on quality over quantity. Many people find that an every-minute-on-the-minute style works well — start a set of squats at the top of the minute, push-ups at the next minute, and a plank at the third minute, then repeat. Adjust the rep counts or hold durations so you finish each effort with a few seconds to transition and breathe.

    • Warm up with a few minutes of marching in place, arm circles, and bodyweight good mornings before the first round.
    • Keep a water bottle nearby and sip as needed.
    • If any joint feels sharp discomfort, reduce the range of motion or switch to an easier variation such as an elevated push-up or a shorter plank.
    • Track how many rounds you complete or how long you hold the plank so you can see gradual progress over weeks.

    Listen to your body and scale the session up or down as needed. If you have any existing injuries or medical conditions, check with a healthcare professional before starting a new routine. Consistency with good form will always serve you better than occasional intensity.

    Putting It Together

    Start with two short sessions this week, spaced at least one full day apart. Many people find that a Monday and Thursday rhythm works well, but any schedule you can repeat is fine. Each session takes roughly ten minutes including warm-up and rest. Begin with five minutes of easy movement — marching in place, arm circles, bodyweight good mornings — to raise your temperature and lubricate the joints.

    • Bodyweight squat: 2 sets of 8 to 10 reps, resting 60 seconds between sets
    • Push-up (hands elevated on a counter or sturdy bench if needed): 2 sets of 6 to 8 reps, resting 60 seconds
    • Plank: 2 holds of 15 to 20 seconds, resting 45 seconds

    Focus on the cues you practiced: feet rooted, hips moving back on the squat; elbows tracking at roughly 45 degrees on the push-up; a straight line from head to heels on the plank. If form slips — knees caving, hips sagging, lower back arching — stop the set, rest, and try again next time. Write down how each set felt; a simple note like "squats smooth, push-ups shaky on last rep" is enough.

    Listen to your body. Soreness that fades within a day or two is normal; sharp joint pain is a signal to stop and check with a doctor or qualified professional before continuing. Consistency beats intensity in week one.

    More from the blog

    From FitLife Solutions

    Browse all our practical health and fitness guides at fitlifesolutions.site.

    New practical health guides and articles on WhatsApp: follow our channel.

    Earn by sharing our books with your audience: join our affiliate channel on Telegram for one ready-to-post book a day.

    This article is for general information only and is not a substitute for professional medical advice. Talk to your doctor or another qualified health professional before changing your diet, exercise or health routine, especially if you have a medical condition or take medication.

  • How to Measure Exercise Intensity Using the Talk Test and RPE Scale

    How to Measure Exercise Intensity Using the Talk Test and RPE Scale

    If you have ever wondered whether you are pushing hard enough during a workout or if you are accidentally overdoing it, this guide is for you. It is written for anyone who exercises — whether you walk the dog, ride a bike, lift weights, or attend group classes — and wants a reliable way to gauge effort without buying a heart-rate monitor or smartwatch. You do not need a background in exercise science, just a willingness to pay attention to your breathing and how hard the work feels.

    By the end of this article you will be able to:

    • Use the Talk Test to identify low, moderate, and high intensity zones in real time
    • Apply the modified 1 to 10 RPE scale to rate perceived exertion during any activity
    • Match Talk Test cues with RPE numbers so you can cross-check your intensity on the fly
    • Adjust both tools for different fitness levels, environments, and exercise types
    • Track trends over weeks and months to see meaningful progress

    These methods are simple, free, and always available. As with any new exercise approach, consider checking with a healthcare professional before making significant changes to your routine.

    Understanding the Talk Test: Principles and Practical Application

    The talk test is one of the most accessible tools for gauging exercise intensity because it relies on something you already do naturally: breathe and speak. The underlying principle is straightforward. As effort increases, your breathing rate and depth change to meet oxygen demands, which directly affects how easily you can form words. At low intensities, you can hold a full conversation without pausing for breath. As you move into moderate territory, speaking in complete sentences becomes possible but requires noticeable effort, and you might need to take a breath mid-sentence. At high intensities, you can only manage a few words at a time before needing to inhale.

    To apply this in real time, try reciting a familiar passage — like the Pledge of Allegiance or a short poem — every 10 to 15 minutes during your workout. Notice not just whether you can speak, but how comfortable it feels.

    • If you can speak in paragraphs easily, you’re likely in a very light recovery zone.
    • If you can speak in full sentences but hear your breathing between phrases, you’re in a moderate, sustainable aerobic zone.
    • If you’re reduced to short phrases of three to five words, you’re approaching a challenging but controlled threshold effort.
    • If single words are all you can manage, you’re in a high-intensity zone best reserved for short intervals.

    Many people find this method intuitive once they practice it a few times. It works across activities — walking, cycling, swimming, rowing — without any equipment. If you have a respiratory or cardiovascular condition, check with a doctor before relying solely on this method to guide intensity.

    Decoding the RPE Scale: From Borg's Original to the Modified 1-10 Version

    The Rating of Perceived Exertion scale gives you a structured way to put a number on how hard your body feels like it is working. The original version, developed by Gunnar Borg, runs from 6 to 20. Those numbers were chosen deliberately: a rating of 6 corresponds roughly to a resting heart rate of 60 beats per minute, while 20 aligns with a maximum effort near 200 beats per minute. In practice, you select the number that matches your overall sense of strain, combining breathing effort, muscle fatigue, and how heavy the work feels. Many people find the 6–20 range a bit abstract at first, especially if they are not used to thinking in those increments.

    The modified 1–10 scale keeps the same concept but uses a more intuitive range. Here, 1 represents complete rest and 10 represents the absolute hardest effort you can imagine. The middle ground works like this:

    • 2–3: Light effort, easy to maintain for a long time
    • 4–5: Moderate effort, noticeable but comfortable
    • 6–7: Vigorous effort, breathing deepens and conversation shortens
    • 8–9: Hard to very hard effort, sustainable only for short periods
    • 10: Maximal effort, cannot be held more than a few seconds

    Both scales ask you to rate the whole-body feeling, not just tired legs or heavy breathing alone. If you are new to RPE, try anchoring your 5 or 6 to a familiar steady-state pace, then build your personal reference points from there. As always, check with a doctor before starting a new exercise program if you have any health concerns.

    Correlating Talk Test Zones with RPE Values for Real-Time Monitoring

    The talk test and RPE scale become most useful when you can move between them fluidly during a workout. A practical way to link them is to think in three broad zones. In the easy zone, you can speak in full sentences without pausing for breath; this usually aligns with an RPE of 2 to 3, where effort feels light and sustainable for a long time. In the moderate zone, you can still talk, but sentences get shorter and you need to take a breath every few phrases; this tends to match an RPE of 4 to 6, where you are working noticeably but can maintain the pace. In the hard zone, talking drops to a few words at a time or single-word answers; this corresponds to an RPE of 7 to 9, where effort feels strong to very strong and conversation is difficult.

    • Easy: full sentences, RPE 2–3
    • Moderate: broken sentences, RPE 4–6
    • Hard: few words or single words, RPE 7–9

    During a session, check in every few minutes. Ask yourself whether you could recite a short sentence comfortably. If yes, you are likely in the easy to low-moderate range. If you hesitate or shorten your phrases, you have moved into moderate. If you can only manage a word or two, you are in the hard zone. Use the RPE number to fine-tune: a 5 feels like you could go a while longer; a 7 feels like you could hold it for only a few more minutes. Many people find that saying a familiar phrase out loud — such as a line from a song or the pledge of allegiance — gives a quick, repeatable benchmark. If you have a health condition or are new to structured exercise, check with a doctor before relying on these cues for high-intensity work.

    Applying Both Methods During Steady-State Cardio Sessions

    During a steady-state cardio session — whether you are jogging, cycling, rowing, or swimming at a consistent pace — the talk test and RPE work together like a built-in dashboard. Start the first five to ten minutes at a conversational rhythm where you can speak in full sentences without pausing for breath. This typically aligns with an RPE of 2 to 3 and signals that your aerobic system is warming up efficiently. If you notice your sentences shortening or you need to inhale mid-phrase, you have likely drifted toward the upper end of moderate intensity, around RPE 4 to 5. That zone is sustainable for 30 to 60 minutes for most people and is where many people find the greatest cardiovascular benefit without excessive fatigue.

    Periodically check in every ten minutes or so. Ask yourself: can I still hold a conversation? Does the effort feel like a 5 or creeping toward a 6? If breathing becomes labored enough that you can only manage a few words at a time, you have probably crossed into vigorous territory (RPE 7 to 8). For steady-state goals, dial back slightly until you return to that comfortable-but-purposeful range. Environmental factors such as heat, humidity, or altitude can shift these cues, so rely on how you feel rather than pace alone.

    • Use the first segment to establish your baseline talk-test zone.
    • Reassess at regular intervals rather than continuously.
    • Adjust speed, resistance, or incline to keep RPE in the 4 to 6 window.
    • Note how the same perceived effort feels different across modalities.

    If you have any cardiovascular conditions or are new to structured exercise, check with a doctor before targeting specific intensity zones. Over time, you may notice that the same RPE corresponds to a faster pace or higher power output — a clear sign your fitness is improving.

    Using the Talk Test and RPE for Interval and High-Intensity Training

    When the pace quickens and rest periods shrink, the talk test and RPE become even more valuable because heart rate often lags behind the actual effort. During a hard interval, you might only manage a single word or a sharp exhale before the next breath. That fragmented speech lines up with an RPE of 8 to 9, where conversation is essentially impossible and the focus narrows to maintaining form. In the recovery window, speech should return to short sentences within thirty to sixty seconds, reflecting an RPE drop to 3 or 4. If you still cannot string a few words together after ninety seconds, the work interval was likely too aggressive or the rest too short.

    Many people find it helpful to anchor each interval type to a talk-test cue. For short sprints of ten to thirty seconds, expect only gasps or a single syllable — RPE 9 to 10. For longer repeats of one to three minutes, you may squeeze out two to three words per breath — RPE 7 to 8. For threshold efforts of four to ten minutes, broken phrases of four to six words are typical — RPE 6 to 7. Use these cues to adjust the next repeat in real time rather than waiting for a post-workout review.

    • Warm up until you can speak in short sentences comfortably (RPE 3 to 4).
    • During each hard bout, note the longest phrase you can utter without losing rhythm.
    • In recovery, watch for the return of short sentences before launching the next round.
    • If speech does not recover as expected, extend the rest or reduce the intensity of the following interval.
    • Cool down until full conversation feels easy again (RPE 1 to 2).

    Environmental heat, altitude, and fatigue from previous sessions can all shift these markers, so treat the cues as daily guides rather than fixed rules. If you have any cardiovascular concerns or feel unusual symptoms such as dizziness or chest discomfort, check with a doctor before continuing high-intensity work.

    Adjusting for Fitness Level, Environment, and Exercise Modality

    Your perception of effort shifts as your fitness improves, so the same pace that once left you breathless may eventually feel comfortable enough for full sentences. This means the talk test boundaries and RPE anchors you rely on today will drift over time, and that drift is a useful signal of adaptation rather than a flaw in the methods. Many people find it helpful to recalibrate every few weeks by repeating a short benchmark effort — such as a five-minute brisk walk or easy jog — and noting the breathing pattern and RPE that correspond to each zone.

    Environmental conditions also reshape the relationship between breathing, perceived exertion, and physiological intensity. Heat, humidity, and altitude increase the cardiovascular strain at any given workload, so you may reach a "difficult conversation" breathing pattern at a slower pace than usual. In those situations, trust the talk test and RPE over speed or power numbers; they reflect the actual stress your body is managing. Cold air can have a similar effect for some individuals, especially if it triggers airway sensitivity.

    Exercise modality changes the muscle groups recruited and the mechanical demands, which alters how effort feels at equivalent cardiovascular loads. Cycling, rowing, swimming, and running each produce distinct breathing rhythms and local fatigue sensations, so an RPE of 5 on the bike may not match an RPE of 5 in the pool. Consider these adjustments:

    • Re-establish talk test zones when switching primary activities for more than a few weeks
    • Use the first session in a new modality to map breathing cues to the 1–10 scale
    • Account for equipment factors such as bike fit or shoe cushioning that can shift perceived effort
    • If you have a medical condition that affects breathing or heart rate response, check with a doctor before relying solely on subjective measures for intensity prescription

    Tracking Progress Over Time with Combined Subjective Metrics

    One of the most valuable aspects of using the Talk Test and RPE together is that they create a longitudinal record of your fitness that no single gadget can provide. Because both tools rely on your internal perception, they capture the nuance of how effort feels on a given day — accounting for sleep quality, stress, hydration, and cumulative fatigue. Over weeks and months, you may notice that a pace that once left you gasping at RPE 7 now feels like a comfortable RPE 5 where you can speak in short sentences. That shift is a reliable signal that your aerobic capacity is improving.

    To make this tracking practical, keep a simple log. After each session, note the activity, duration, the highest RPE you hit, and the Talk Test zone you occupied for the bulk of the workout. You might also jot down a one-word context cue such as "tired," "fresh," or "hot." Patterns emerge quickly:

    • A steady-state run that used to sit at RPE 6 with broken phrases now sits at RPE 4 with full sentences.
    • Interval recoveries that once required three minutes to drop to conversational breathing now take ninety seconds.
    • The same hill repeat feels like RPE 8 instead of RPE 9, and you can utter a short phrase at the top.

    These subjective shifts often appear before changes in speed or heart-rate data. They also help you spot creeping fatigue; if your usual easy day suddenly feels like RPE 6 and you can only manage single words, it may be time for a lighter week. Many people find that reviewing this log monthly reinforces consistency and highlights progress that feels invisible day to day. As always, if you notice persistent unusual breathlessness or discomfort, check with a healthcare professional to rule out underlying issues.

    Putting It Together

    Start by picking three cardio sessions and two strength days for the coming week. Keep each cardio bout between twenty and thirty minutes so you can focus on the cues without rushing. Before the first session, write down the RPE numbers that match the three talk zones — easy conversation, broken sentences, and single words — on a small card or phone note you can glance at mid-workout.

    • Day 1: steady walk or bike at a pace where you can speak in full sentences; aim for RPE 3–4.
    • Day 2: bodyweight circuit; after each set rate the effort on the 1–10 scale and note whether breathing lets you talk in short phrases.
    • Day 3: rest or gentle mobility work.
    • Day 4: repeat a steady session, but nudge the pace until sentences break; target RPE 5–6.
    • Day 5: interval day — thirty seconds harder (single-word breathing, RPE 7–8) followed by ninety seconds easy (full sentences, RPE 3–4); do four rounds.
    • Day 6: optional light activity such as hiking or swimming; stay in the conversational zone.
    • Day 7: rest and review your notes.

    At week’s end, look for patterns: did the same pace feel easier, or did you need to go faster to hit the same RPE? Adjust next week’s intensities by one level up or down based on those observations. If any session leaves you dizzy, unusually short of breath, or sore beyond normal fatigue, check with a healthcare professional before continuing.

    More from the blog

    From FitLife Solutions

    Browse all our practical health and fitness guides at fitlifesolutions.site.

    New practical health guides and articles on WhatsApp: follow our channel.

    Earn by sharing our books with your audience: join our affiliate channel on Telegram for one ready-to-post book a day.

    This article is for general information only and is not a substitute for professional medical advice. Talk to your doctor or another qualified health professional before changing your diet, exercise or health routine, especially if you have a medical condition or take medication.

  • How to Build a Simple Morning Mobility Routine for Stiff Joints

    How to Build a Simple Morning Mobility Routine for Stiff Joints

    If you wake up feeling like your joints need a few minutes — or longer — before they move smoothly, you are not alone. Morning stiffness is common after periods of inactivity, especially if you live with arthritis, past injuries, or simply spend long hours sitting. This guide is for anyone who wants a gentle, realistic way to ease into the day without forcing range of motion or adding stress to sensitive areas.

    You do not need equipment, a lot of space, or previous experience with mobility work. The routine takes about ten minutes and focuses on slow, controlled movements that encourage synovial fluid circulation and prepare your body for everyday tasks like bending, reaching, and walking.

    After reading this article, you will be able to:

    • Understand why stiffness tends to peak in the morning
    • Assess your current range of motion without pushing into pain
    • Choose low-impact movements that support joint lubrication
    • Follow a simple sequence that flows from head to toe
    • Use breath to help your nervous system relax into mobility
    • Track small improvements over time without complicated tools
    • Adjust the routine on days when energy is low or symptoms flare

    If you have a diagnosed condition or new, unexplained joint pain, check with your doctor before starting any new movement practice.

    Why Morning Stiffness Happens and What It Signals

    Morning stiffness often feels like your body has temporarily forgotten how to move. After hours of stillness, the fluid that cushions your joints — synovial fluid — becomes thicker and less evenly distributed. At the same time, muscles and connective tissues cool down and shorten slightly, while low-level inflammation from daily wear or conditions like arthritis can settle around the joints overnight. The result is that first-morning resistance: a sensation of tightness, creaking, or reluctance to bend fully. This isn't necessarily a sign of damage; it's often your body's way of asking for a gradual warm-up before taking on the day.

    Many people notice stiffness most in the spine, hips, knees, shoulders, and hands. It may be more pronounced after a day of unusual activity, poor sleep, or during colder weather. Paying attention to patterns can offer useful clues. For example: – Stiffness that eases within 15 to 30 minutes of gentle movement often suggests mechanical factors like inactivity or mild osteoarthritis. – Stiffness lasting an hour or more, especially with swelling or warmth, may point to inflammatory conditions such as rheumatoid arthritis or ankylosing spondylitis. – Symmetrical joint involvement (both wrists, both knees) is more typical of systemic issues, while one-sided stiffness often follows injury or overuse.

    If morning stiffness is new, worsening, or accompanied by unexplained fatigue, fever, or weight changes, it's wise to check with a healthcare provider. They can help rule out underlying conditions and guide safe movement choices. For most people, though, a consistent, low-effort mobility routine is a practical first step toward smoother starts.

    Assessing Your Current Range of Motion Safely

    Before you begin any new movement practice, take a few minutes to understand where your body is today. This is not a test you pass or fail; it is a snapshot that helps you choose movements that feel supportive rather than stressful. Start by sitting or standing in a comfortable position. Gently turn your head side to side, noticing how far you can look over each shoulder without strain. Roll your shoulders forward and back, feeling for any catching or grinding sensations. Reach one arm overhead, then the other, observing whether the motion feels smooth or if there is a point where you naturally want to stop.

    Move down the chain. While seated, straighten one knee at a time and flex your ankle, pointing and flexing the foot. Circle each ankle slowly. Stand and hold a counter for balance, then shift your weight onto one leg and swing the other gently forward and back like a pendulum. Try a small hip circle in each direction. Finally, attempt a gentle forward fold, letting your arms dangle toward the floor, and notice where you feel the first sign of resistance — hamstrings, lower back, or calves.

    • Move slowly and stop at the first sensation of stretch, not pain.
    • Breathe steadily; holding your breath often signals you have gone too far.
    • Compare sides, but expect small differences; asymmetry is normal.
    • Write down or mentally note any joints that feel especially stiff, swollen, or unstable.

    If any movement produces sharp pain, swelling that appears quickly, or a feeling that a joint might give way, pause and check with a healthcare professional before continuing. This baseline will make the next steps more effective and safer.

    Choosing Low-Impact Movements for Joint Lubrication

    The goal of a morning mobility routine is to coax synovial fluid into the joint spaces so surfaces glide more easily. Think of it like warming honey — gentle, repetitive motion changes the viscosity of the fluid without stressing the tissues that are still stiff from sleep. Movements that take a joint through its comfortable mid-range, rather than pushing into an end-range stretch, tend to be the most lubricating. Many people find that slow, rhythmic circles, figure-eights, and gentle rocking motions encourage this process better than holding a static position.

    Start with the joints that typically feel the tightest: neck, shoulders, spine, hips, knees, ankles, and wrists. For the neck, slow side-to-side turns and ear-to-shoulder tilts keep the motion smooth. Shoulders respond well to large, slow backward circles and scapular protraction-retraction drills. The spine benefits from cat-cow variations, seated or standing trunk rotations, and lateral flexion. Hips often loosen with standing hip circles, supported knee hugs, or a gentle figure-four rocking motion. Knees and ankles appreciate controlled heel-to-toe rocks, ankle circles, and mini-squats to a comfortable depth. Wrists and fingers wake up with wrist circles, tendon glides, and light finger extension-flexion waves.

    • Move each joint for 30 to 60 seconds before transitioning.
    • Keep the pace unhurried; speed creates momentum that bypasses the control you want.
    • Stop if you feel sharp or pinching pain; a dull ache that eases with motion is usually acceptable.
    • Breathe naturally, letting the exhale support relaxation around the joint.

    If any movement consistently aggravates a specific joint, check with a doctor or physical therapist before continuing. The routine should leave you feeling more fluid, not more sore.

    Structuring a 10-Minute Sequence That Flows Naturally

    A smooth flow keeps the routine feeling manageable instead of like a chore list. Start with the joints that tend to stiffen most overnight — often the neck, shoulders, and spine — then work outward toward the hips, knees, ankles, and wrists. This proximal-to-distal order follows how the body naturally wakes up and reduces the chance of overloading a cold joint. Aim for about one minute per movement, moving slowly enough to notice sensation without pushing into sharp discomfort.

    • Neck circles and gentle chin tucks (60 seconds)
    • Shoulder rolls forward and back, then arm circles (60 seconds)
    • Cat-cow or seated spinal flexion and extension (60 seconds)
    • Standing or seated hip circles, alternating sides (60 seconds)
    • Knee hugs or gentle heel slides lying down (60 seconds)
    • Ankle circles and toe spreads (60 seconds)
    • Wrist circles and finger fans (60 seconds)
    • Full-body reach and slow side bends (60 seconds)
    • March in place or step-touch with arm swings (60 seconds)
    • Three slow breaths standing tall, noticing how you feel (60 seconds)

    Transition between moves with a breath or two rather than stopping completely. If a particular area feels especially tight, you may linger there a little longer and shorten another segment. Many people find it helpful to keep a timer nearby so they stay within the ten-minute window without watching the clock. On days when energy is lower, you can do the whole sequence seated or even in bed. As always, check with a doctor or physical therapist if you have specific joint conditions or recent injuries before starting any new movement practice.

    Incorporating Breathwork to Enhance Mobility Gains

    Breathing patterns directly influence how your nervous system responds to movement. When joints feel stiff, it's common to hold your breath or take shallow breaths, which can increase tension in the surrounding muscles. Shifting to slow, intentional breathing signals safety to your body, allowing tissues to relax and joints to move more freely. Many people find that syncing breath with motion creates a rhythm that makes the routine feel less mechanical and more supportive.

    Try inhaling as you prepare for a movement or lengthen the spine, then exhaling as you gently deepen into a stretch or rotate a joint. For example, during a slow neck circle, inhale while lifting the chin slightly and exhale as you lower the ear toward the shoulder. This pattern encourages a natural pause at the end range without forcing it. If a movement feels restricted, stay there for a few breath cycles rather than pushing further. The exhale often creates a subtle release that isn't available through force.

    A few practical cues to explore: – Inhale through the nose for a count of four, feeling the ribs expand sideways – Exhale through the mouth for a count of six, imagining tension leaving the joint – Keep the breath smooth, without pausing or gasping – If you feel lightheaded, return to natural breathing and pause the movement

    Breathwork isn't separate from mobility work — it's part of the same conversation with your nervous system. Over time, this awareness may carry into other parts of your day, helping you notice when you're bracing during routine tasks. As always, check with your doctor if you have a respiratory or cardiovascular condition before changing breathing patterns significantly.

    Tracking Progress Without Overcomplicating the Process

    Noticing small changes over time helps you stay motivated and adjust your routine, but tracking doesn't need to become another chore. A simple weekly check-in works well for many people. Pick one consistent morning, perhaps a weekend day when you're not rushing, and spend two minutes noting how your body feels before and after the sequence. You might jot down a few words in a notebook or phone note: "hips tight, shoulders easier" or "knees creaky, better after circles." Over weeks, these brief entries reveal patterns without demanding daily effort.

    If you prefer something visual, a paper calendar with a single symbol per day — like a check mark for completed, a star for feeling noticeably looser, a wavy line for a stiff day — gives you a quick snapshot at a glance. Some people find it helpful to track just three things: – Whether you did the routine – One area that felt different afterward – One area that still feels stuck

    This keeps the focus on awareness rather than performance. If you notice a joint consistently staying stiff or feeling worse after certain movements, that's useful information to share with a physical therapist or doctor. Progress isn't always linear; some weeks feel smoother than others. The goal is to build a habit of listening to your body so you can make small, informed tweaks — like adding an extra hip circle or skipping a wrist stretch on a flare day — without second-guessing yourself.

    Adapting the Routine for Flare-Ups and Energy Levels

    Some mornings your joints feel cooperative, and other days they send a clear signal to back off. Learning to read those signals and adjust on the fly keeps the habit alive without adding irritation. Start by doing a quick mental scan before you even sit up: rate your overall stiffness on a simple scale of one to five, note any sharp or hot sensations, and ask how much energy you genuinely have. If the score is low and the discomfort is a dull, familiar ache, the full sequence usually feels good. If a specific joint is shouting or your energy is basement-level, treat the routine as a menu rather than a prescription.

    • Cut the sequence in half: pick the three movements that target your stiffest areas and do each for thirty seconds instead of a minute.
    • Reduce range of motion: stay in the pain-free zone, even if that means barely moving.
    • Swap weight-bearing moves for supported versions — try cat-cow on the bed instead of the floor, or seated shoulder rolls instead of standing arm circles.
    • Extend the rest pauses between movements to two or three slow breaths.
    • If fatigue is the main issue, simply lie on your back with knees bent and practice the diaphragmatic breathing from the previous section; that alone can shift the nervous system toward relaxation.

    On days when everything feels inflamed, it is wise to skip the routine entirely and focus on gentle heat, hydration, and rest. Many people find that honoring the "do less" option actually prevents a minor flare from becoming a multi-day setback. If stiffness persists beyond a couple of hours, worsens with gentle movement, or comes with swelling, redness, or fever, check in with a healthcare professional before continuing. The goal is consistency over the long haul, not perfection on any single morning.

    Putting It Together

    Start with two minutes of quiet sitting on the edge of your bed or a sturdy chair. Notice how your breath feels and where stiffness shows up without trying to change anything. From there, move through the sequence you have chosen — neck rolls, shoulder circles, wrist and ankle mobility, cat-cow, hip circles, and a gentle standing forward fold — spending roughly one minute on each area. Keep the pace slow enough that you can stay aware of sensation rather than rushing to finish.

    • Day 1 to 3: Do the full 10-minute routine every morning. If a movement feels sharp, skip it that day and note it.
    • Day 4 to 5: Repeat the routine, but add an extra 30 seconds to any area that felt especially tight the day before.
    • Day 6: Do a shorter five-minute version, focusing only on the joints that need the most attention.
    • Day 7: Rest or do a very light version. Use the time to review your simple log and decide what to keep or adjust for week two.

    Many people find that consistency matters more than intensity at this stage. If fatigue or a flare-up appears, scale back without guilt. Checking in with a healthcare provider before starting can help you feel confident the movements suit your current needs.

    More from the blog

    From FitLife Solutions

    Browse all our practical health and fitness guides at fitlifesolutions.site.

    New practical health guides and articles on WhatsApp: follow our channel.

    Earn by sharing our books with your audience: join our affiliate channel on Telegram for one ready-to-post book a day.

    This article is for general information only and is not a substitute for professional medical advice. Talk to your doctor or another qualified health professional before changing your diet, exercise or health routine, especially if you have a medical condition or take medication.
  • How to Choose the Right Running Shoes for Your Foot Type and Gait

    How to Choose the Right Running Shoes for Your Foot Type and Gait

    Choosing running shoes can feel overwhelming with so many options and technical terms, but the right pair starts with understanding your own body. This guide is for runners of any experience level who want to make informed decisions instead of guessing based on brand names or colors. Whether you are training for a first 5K, logging weekly long runs, or returning after time off, learning how your feet move helps you narrow the field to models that actually suit you.

    After reading this article, you will be able to:

    • Identify your arch type using simple at-home checks
    • Recognize whether your gait leans toward overpronation, neutral motion, or supination
    • Match shoe categories such as stability, neutral, or motion control to your mechanics
    • Evaluate cushioning, heel-to-toe drop, and upper fit for your preferred distances
    • Spot wear patterns that signal it is time for a new pair

    Use this information as a starting point. If you have persistent pain or a history of injuries, consider checking with a medical professional before making major changes to your footwear.

    Understanding Your Foot Arch Type and Its Impact on Shoe Selection

    Your foot arch acts as a natural shock absorber and lever, influencing how force travels through your legs with every step. Understanding whether you have a low, neutral, or high arch helps narrow the field of shoes that will work with your mechanics rather than against them.

    A simple way to estimate your arch type at home is the wet test. Wet the sole of your foot, step onto a piece of cardboard or a paper bag, and examine the imprint. If you see almost the entire sole with little curve along the inner edge, you likely have a low arch or flat foot. A distinct curve along the inside with a band connecting heel and forefoot about half the width of your foot suggests a neutral arch. If only a thin strip or just the heel and ball of the foot appear, your arch is high.

    Low arches tend to be flexible and often collapse inward when you land, a motion linked to overpronation. Shoes labeled as stability or motion control usually add firmer foam or a medial post on the inner side to slow that roll and guide the foot toward a straighter path. Neutral arches typically handle impact well on their own, so a neutral-cushioned shoe with even foam density often works best. High arches are usually more rigid and absorb less shock naturally; many people find that a well-cushioned neutral shoe with a softer midsole helps make up for that reduced natural give.

    Arch height can change over time due to age, injury, pregnancy, or training volume. If you have persistent pain in the feet, knees, or hips, consider checking with a podiatrist or physical therapist for a hands-on assessment before investing in a new pair.

    Identifying Your Gait Pattern: Overpronation, Neutral, and Supination

    Your gait pattern describes how your foot moves from the moment it strikes the ground until it pushes off again. While arch type gives you a static snapshot, gait reveals the dynamic story. The three main patterns — overpronation, neutral, and supination — each place different demands on a shoe.

    Overpronation happens when the foot rolls inward excessively after landing. The arch collapses more than ideal, and the ankle tips toward the midline. You might notice the inner edge of your old shoes wearing down faster than the rest. Many people with flexible, low arches fall into this group, but not everyone does. A shoe with a firmer medial post or guided rails can help limit that inward motion and keep the lower leg aligned.

    Neutral gait shows a moderate, controlled inward roll — just enough to absorb shock naturally. The foot lands on the outside of the heel, rolls through the midfoot, and pushes off evenly from the forefoot. Wear on an old pair tends to be fairly uniform across the heel and forefoot. Neutral runners usually do well in shoes without aggressive stability features, letting the foot move as it wants to.

    Supination (sometimes called underpronation) is the opposite: the foot stays rigid and rolls outward, placing load on the lateral edge. High, rigid arches are common here. You’ll often see heavy wear on the outer heel and forefoot. Because the foot doesn’t pronate enough to dissipate force, cushioning becomes the priority — look for a softer, more compliant midsole.

    Quick self-checks: – Wet foot test on cardboard: a full imprint suggests overpronation; a thin crescent suggests supination; something in between points toward neutral. – Video yourself from behind on a treadmill or have a friend watch you run at an easy pace. – Check the wear pattern on a well-used pair of running shoes.

    These observations are clues, not diagnoses. If you have recurring aches or a history of injury, a physical therapist or sports medicine professional can confirm what your feet are doing and why.

    Matching Shoe Categories to Your Biomechanical Needs

    Once you understand your arch type and gait pattern, the next step is translating that information into the right shoe category. Manufacturers generally group running shoes into three main buckets: neutral, stability, and motion control. Neutral shoes are built for runners with normal to high arches who supinate or maintain a neutral stride. They offer cushioning without added medial support, allowing the foot to move naturally. Many people find these models comfortable for long runs because they do not restrict the foot’s inherent motion.

    Stability shoes target mild to moderate overpronation. They typically feature a firmer density foam or a guide rail on the medial side to slow the inward roll. This design can help align the lower leg and reduce strain on the knee and shin. If your wet test shows a low arch and your wear pattern reveals excessive inner-edge wear, a stability model is often a sensible starting point.

    Motion control shoes provide the highest level of support for severe overpronation and very flat arches. They incorporate extended medial posts, stiffer heels, and straighter lasts to limit excessive motion. These shoes tend to be heavier and less flexible, so they are usually reserved for runners who have not found relief in stability options.

    • Neutral: best for high arches, supination, or neutral gait
    • Stability: best for low arches with mild to moderate overpronation
    • Motion control: best for very flat arches with severe overpronation

    Specialty categories like trail, racing, and maximalist cushioning exist within these frameworks. Trail shoes add grip and protection; racing flats prioritize weight savings; maximalist models stack thick midsoles for impact absorption. Your primary biomechanical need should guide the base category, then layer in terrain and distance preferences. If you are unsure which group fits you, a visit to a running specialty store for a gait analysis or a conversation with a physical therapist can clarify the choice.

    Evaluating Cushioning Levels and Midsole Technologies for Your Running Style

    Cushioning is not simply about softness; it is about how the midsole manages impact forces and returns energy during your stride. Most modern midsoles use variations of EVA (ethylene-vinyl acetate) or polyurethane blends, often infused with nitrogen or CO2 to create lighter, more responsive foams. A higher stack height generally means more material to compress, which many people find comfortable for long, easy miles where impact protection is the priority. Conversely, a lower stack height with a firmer density often provides better ground feel and stability for faster tempo work or runners who prefer a more connected sensation.

    The geometry of the midsole matters as much as the foam chemistry. Rockered profiles — where the sole curves upward at the toe and sometimes the heel — are designed to smooth the transition from landing to toe-off. This shape may reduce the workload on the calf and Achilles complex, which can be helpful for runners managing stiffness in those areas. However, some runners feel unstable on aggressive rockers, particularly on technical trails or during sharp turns.

    Midsole technologies you will encounter include: – Single-density foam tuned for a balanced ride – Dual-density constructions with a firmer medial post to resist excessive inward roll – Plates made of nylon, PEBA, or carbon fiber embedded in the foam to add stiffness and propulsion – Segmented crash pads or decoupled heel designs that allow independent movement

    If you are recovering from a stress injury or dealing with joint sensitivity, a maximally cushioned neutral shoe may offer the protection you need. If you prioritize speedwork, a lighter shoe with a responsive plate and moderate stack height might suit you better. There is no universal "best" foam; the right choice depends on your pace range, distance goals, and how your body tolerates load. When in doubt, visit a specialty running shop where you can test two or three distinct models on a treadmill. If you have a history of stress fractures or chronic joint pain, check with a sports medicine professional before committing to a dramatically different cushioning profile.

    Assessing Heel-to-Toe Drop and Its Influence on Running Mechanics

    Heel-to-toe drop, sometimes called offset, is the difference in height between the heel and forefoot of a shoe measured in millimeters. Traditional running shoes often feature a drop of 10 to 12 millimeters, while lower-profile models range from zero to 8 millimeters. This measurement influences how your foot strikes the ground and how forces travel up your leg. A higher drop tends to shift impact toward the heel and can reduce strain on the Achilles tendon and calf muscles. Many people find this helpful if they have a history of Achilles tightness or calf strains. A lower drop encourages a more midfoot or forefoot landing, which may increase load on the calf complex and Achilles but can reduce braking forces at the knee.

    Changing drop abruptly can stress tissues that aren’t accustomed to the new loading pattern. If you are considering a significant shift, transition gradually over several weeks by alternating the new shoes with your current pair on shorter runs. Pay attention to any new soreness in the calves, Achilles, plantar fascia, or shins. Your preferred drop may also vary by workout type; some runners prefer a higher drop for long, easy miles and a lower drop for faster sessions or racing.

    • Start with a drop similar to what you have run in comfortably before.
    • Adjust by no more than 4 millimeters at a time.
    • Use walk breaks or shorter runs during the first few weeks.
    • Monitor for persistent discomfort that does not resolve with rest.

    If you have a history of lower-leg injuries or are unsure which drop suits your mechanics, a physical therapist or sports medicine professional can help assess your gait and guide the transition safely.

    Testing Fit, Sizing, and Upper Construction for Long-Distance Comfort

    Even the most technically appropriate shoe will fall short if the physical fit does not honor the shape and volume of your foot. Start by trying shoes later in the day when your feet are naturally slightly swollen from daily activity, mimicking the expansion that occurs during a long run. Wear the socks you plan to run in, along with any orthotics or insoles you use regularly. Stand up and check for roughly a thumb’s width of space between your longest toe and the shoe’s end; this gap accommodates forward slide on descents and prevents toenail trauma. The midfoot should feel snug but not tight, with no pressure points along the sides or top. Your heel should lock in place with minimal slippage when you walk or jog in place.

    Upper construction plays a quiet but critical role in comfort over many miles. Engineered mesh varies widely in stretch, breathability, and structural support. Some uppers use targeted overlays or fused films to hug the arch and midfoot without creating hot spots, while others rely on a more relaxed, accommodating knit. Pay attention to the tongue design; a gusseted or semi-gusseted tongue stays centered and keeps debris out, while a thin, movable tongue may bunch and cause irritation. The heel counter should cup your Achilles area firmly without digging in.

    • Check for seams or internal stitching that might rub during high-mileage weeks.
    • Ensure the lacing system allows you to fine-tune tension across different zones of the foot.
    • Walk on a hard surface and do a few easy strides; note any pinching, slipping, or numbness.

    Many people find that going up a half size from their street shoe size works well, but sizing varies between brands and even models. If you have a history of foot issues or persistent discomfort, checking with a podiatrist or physical therapist can help clarify whether a specific last shape or width option suits your anatomy better.

    When to Replace Running Shoes Based on Wear Patterns and Mileage

    Most runners track mileage as a rough guide, but the calendar and the odometer only tell part of the story. A common benchmark suggests replacing shoes every 300 to 500 miles, yet factors like body weight, running surface, temperature, and your individual gait can shorten or extend that window significantly. Lighter runners on soft trails may get more life out of a pair than heavier runners pounding hot asphalt, so learning to read the physical clues on the shoe itself is often more reliable than hitting a specific number.

    Start by examining the midsole. Press your thumb into the foam under the heel and forefoot; it should offer some resistance and spring back. If it feels permanently compressed, dead, or you can see deep horizontal creases that don't disappear when unweighted, the cushioning has likely lost its ability to protect your joints. Flip the shoe over and study the outsole wear. Even abrasion across the forefoot and lateral heel is normal, but smooth, bald spots — especially if they angle sharply toward the inside (medial) or outside (lateral) edge — signal that the shoe is no longer guiding your foot neutrally.

    • Place the shoes on a flat table and view them from behind; a visible lean to one side means the support structure has collapsed.
    • Check the heel counter by squeezing the back; it should feel firm, not flexible or crushed.
    • Inspect the upper for tears, stretched mesh, or a heel liner that has worn through, which can cause blisters and instability.

    Rotating between two pairs lets the foam decompress between runs and gives you a direct comparison — when the older pair feels noticeably harsher or less stable than the fresher one, it’s time to retire it. Keep a simple log or use an app to note the start date, but let the physical evidence make the final call. If you’re unsure whether wear patterns point to a biomechanical issue, a specialty running store or a physical therapist can help interpret them.

    Putting It Together

    You now have the pieces: your arch type, your gait tendency, the shoe category that aligns with both, a cushioning level that matches your typical distance, a drop that feels natural, and a fit checklist you can use in the store. The next step is a low-pressure first week that lets your body tell you what works.

    Start with two or three easy runs of 20 to 30 minutes on familiar, forgiving surfaces. Wear the new shoes only for those runs; keep your old pair for walking or cross-training so you have a baseline for comparison. Pay attention to any hot spots, unusual fatigue, or changes in how your knees and hips feel afterward.

    • Day 1: short shakeout run, note immediate comfort
    • Day 3: repeat same distance, check for pressure points
    • Day 5: slightly longer if the first two felt fine
    • Days 2, 4, 6, 7: rest or non-running activity

    If something feels off — persistent aching, numbness, or a new pain — swap back to the old pair and reassess fit or category. Many people find a brief break-in period normal, but sharp discomfort is a signal to stop. When in doubt, a quick conversation with a physical therapist or sports-medicine professional can save weeks of frustration.

    More from the blog

    From FitLife Solutions

    Browse all our practical health and fitness guides at fitlifesolutions.site.

    New practical health guides and articles on WhatsApp: follow our channel.

    Earn by sharing our books with your audience: join our affiliate channel on Telegram for one ready-to-post book a day.

    This article is for general information only and is not a substitute for professional medical advice. Talk to your doctor or another qualified health professional before changing your diet, exercise or health routine, especially if you have a medical condition or take medication.

  • How to Stretch Your Hamstrings Safely After Sitting All Day

    How to Stretch Your Hamstrings Safely After Sitting All Day

    If you spend long hours sitting at a desk, in a car, or on the couch, you may notice your legs feeling heavy or stiff when you stand up. This tightness often comes from the hamstrings—the muscles along the back of your thighs—staying in a shortened position for extended periods. Over time, this can contribute to discomfort in the lower back, hips, or knees, and make everyday movements like bending or walking feel less easy.

    This guide is for anyone who sits for much of the day and wants to gently ease hamstring tension using simple, safe stretches that can be done at home or at work. You don’t need special equipment or a lot of time—just a few minutes and attention to how your body feels.

    By the end, you’ll be able to recognize early signs of tightness, prepare your muscles with gentle movement, and perform stretches that support better comfort and mobility. You’ll learn how to adjust each stretch to your current flexibility, use everyday items like a towel or belt for support, and pair your stretching with steady breathing to help your body relax into the movement. These practices can be woven into your daily routine to help counteract the effects of prolonged sitting—always moving within a range that feels safe and respectful of your body’s limits. If you have any existing pain, injury, or medical condition, it’s wise to check with a healthcare professional before beginning a new stretching routine.

    Understanding Why Prolonged Sitting Tightens Hamstrings

    Prolonged sitting can contribute to tightness in the hamstrings for several practical reasons. When you sit for extended periods, your hips and knees remain in a flexed position, which keeps the hamstring muscles in a shortened state. Over time, this sustained position may reduce the muscles’ natural elasticity and lead to a sensation of tightness, especially when you try to stand or move after sitting.

    Additionally, sitting often encourages a slouched or rounded posture, which can tilt the pelvis backward. This pelvic tilt places the hamstrings on a constant, low-level stretch—not the beneficial kind, but one that can trigger a protective tightening response as the body tries to stabilize the spine and hips.

    Many people find that this combination of sustained shortening and postural strain contributes to discomfort in the back of the thighs, lower back, or even behind the knees. It’s not just about inactivity; it’s about how the body adapts to the positions we hold most frequently.

    If you notice persistent tightness, numbness, or pain that doesn’t ease with gentle movement, it’s wise to check with a healthcare professional to rule out other underlying issues. Understanding these mechanics helps you approach stretching not as a fix, but as a way to support your body’s natural balance after long hours in a chair.

    Pre-Stretch Assessment: Checking for Safe Range of Motion

    Before beginning any stretch, it’s helpful to check how your hamstrings feel and move without strain. This quick assessment isn’t about achieving a certain flexibility level but about noticing your current range of motion so you can stretch safely and avoid overreaching. Start by standing tall with your feet hip-width apart. Gently hinge forward at the hips, keeping a slight bend in your knees, and let your arms hang toward the floor. Notice where you feel sensation—ideally, a mild stretch along the back of your thighs, not sharp pain in the lower back or behind the knees. If you can’t reach far without rounding your spine or feeling discomfort, that’s useful information; it means your hamstrings may be tight from sitting, and you’ll want to move gently into stretches.

    You can also try a seated version: sit on the edge of a chair, extend one leg straight with the heel on the floor and toes pointing up, then slowly lean forward from the hips while keeping your back straight. Again, pay attention to where you feel tension. If you feel pulling behind the knee or in the calf, ease off slightly—this suggests the stretch might be too intense for now. The goal isn’t to touch your toes but to find a point where you feel a comfortable, steady stretch in the muscle belly of the hamstring. If you feel numbness, tingling, or pain that doesn’t ease with a small adjustment, stop and consider checking with a doctor or physical therapist to rule out other issues. This mindful check-in helps you stretch with awareness, making each session safer and more effective over time.

    Dynamic Warm-Up Movements to Prepare the Hamstrings

    Dynamic warm-up movements help prepare your hamstrings for stretching by gently increasing blood flow and easing stiffness without overloading the muscles. These simple motions can be done right at your desk or in a small space at home, making them easy to fit into a break during a long day of sitting.

    Start with seated leg extensions: sit tall in your chair, slowly straighten one leg out in front of you, hold for a moment, then lower it back down with control. Repeat 8 to 10 times on each side, focusing on smooth movement rather than speed. This wakes up the front of the thigh while lightly engaging the back of the leg.

    Next, try standing hip hinges: stand with feet hip-width apart, place your hands on your thighs, and gently slide them down toward your knees as you hinge at the hips, keeping your back straight. Go only as far as feels comfortable, then return to standing. Do 8 to 10 repetitions, moving with your breath if it helps.

    Another option is marching in place with a slight forward lean: lift your knees comfortably, swing your arms naturally, and lean forward just a bit from the ankles—not the waist—to engage the hamstrings lightly. Continue for 30 to 60 seconds.

    These movements aren’t meant to stretch deeply but to create a sense of readiness. If anything feels sharp or uncomfortable, ease back or skip that motion. Many people find that doing a minute or two of gentle movement like this makes static stretching feel more accessible and less strained afterward. As always, if you have existing pain, injury, or concerns about your mobility, it’s wise to check with a healthcare professional before beginning any new routine.

    Static Stretching Techniques for Gradual Lengthening

    Static stretching can help gently lengthen the hamstrings over time, especially after they’ve warmed up with light movement. These stretches are best done slowly, holding each position without bouncing, to allow the muscles to relax and ease tension gradually. Aim to feel a mild stretch in the back of the thigh, not sharp pain or discomfort. If anything feels intense or causes strain, ease out of the position and adjust your alignment.

    One simple option is the seated hamstring stretch. Sit on the edge of a chair with one foot flat on the floor and the other leg extended straight, heel on the ground and toes pointing up. Keep your back straight and gently hinge forward from the hips, reaching toward your toes. You should feel the stretch along the back of the extended leg. Hold for 20 to 30 seconds, then switch sides.

    Another effective stretch is the standing hamstring stretch. Stand facing a low surface like a step or sturdy chair. Place one heel on the surface, keeping the leg straight and toes relaxed. Slightly bend the standing leg and lean forward from the hips, keeping your spine long. Avoid rounding your back. Hold the stretch, then switch legs.

    For those who prefer lying down, try the supine hamstring stretch. Lie on your back with one leg flat on the floor. Loop a towel or strap around the ball of the opposite foot and gently lift that leg toward the ceiling, keeping it as straight as comfortable. Keep your hips grounded and avoid pulling too hard. Hold, then switch sides.

    Breathe steadily throughout each stretch—inhaling to prepare, exhaling to ease deeper into the position. Never force the movement. If you have any existing hip, back, or leg concerns, it’s wise to check with a healthcare professional before beginning a new stretching routine. Consistency, not intensity, supports gradual improvement over time.

    Incorporating Breath Control to Enhance Stretch Efficacy

    Incorporating breath control into your hamstring stretches can help deepen the stretch safely and improve your overall experience. When you breathe mindfully, you signal your nervous system to relax, which may reduce muscle tension and allow for a more effective lengthening of the hamstrings. Many people find that pairing slow, steady breaths with their stretches makes the process feel more calming and less forced.

    Try inhaling deeply through your nose as you prepare to move into a stretch, then exhale slowly through your mouth as you gently ease into the position. Aim to make your exhale longer than your inhale—for example, inhale for four counts, exhale for six or eight. This extended exhale can encourage the body to release tension. Hold the stretch while continuing to breathe smoothly, avoiding breath-holding or shallow chest breathing.

    If you feel sharp pain or discomfort, ease back slightly and return to a comfortable breath pattern. Never push into pain, even if you’re breathing deeply. If you have any respiratory conditions, blood pressure concerns, or are unsure whether breath-focused stretching is right for you, it’s wise to check with a doctor or healthcare provider before making changes to your routine.

    You might also try syncing small movements with your breath: inhale to lengthen your spine, exhale to gently deepen the stretch. Over time, this rhythm can become a natural part of your stretching practice, helping you stay present and attentive to your body’s signals. Remember, the goal is not to force flexibility but to create a safe, supportive environment where your muscles can gradually release tension with the help of your breath. Many people find this approach makes stretching feel more sustainable and enjoyable throughout the day.

    Using Props Like Towels or Straps for Support and Alignment

    Using props like towels or straps can make hamstring stretches more accessible and effective, especially if you're working with limited flexibility or want to maintain proper alignment without strain. A simple towel, belt, or yoga strap can help you gently guide your leg into a stretch while keeping your spine neutral and your hips level. This support reduces the temptation to round your back or force the movement, which can shift the stretch away from the hamstrings and into the lower back.

    To use a towel or strap, lie on your back with one leg bent and foot flat on the floor. Loop the strap around the ball of your opposite foot, holding both ends in your hands. Slowly straighten the leg toward the ceiling, using the strap to control the depth of the stretch. Keep your shoulders relaxed and your lower back pressed gently into the floor. You should feel a mild pull along the back of the thigh, not sharp pain or tingling. If your lower back lifts off the floor, bend the knee slightly or lower the leg until you can maintain contact.

    You can also use a strap while seated. Sit tall on the edge of a chair, extend one leg straight with the heel on the floor, and loop the strap around the foot. Gently pull the strap toward you while keeping your back straight and chest open. This helps you avoid slouching and keeps the focus on the hamstring.

    Props aren’t about forcing flexibility—they’re about creating the conditions for a safe, sustainable stretch. Many people find that using a towel or strap helps them breathe more easily into the stretch and notice subtle improvements over time. If you have any existing back, hip, or leg concerns, consider checking with a doctor or physical therapist before adding new tools to your routine.

    Frequency and Timing Guidelines for Daily Hamstring Care

    For most people, doing gentle hamstring stretches a few times each day can help ease the tightness that builds from sitting. You don’t need long sessions—just a few minutes spread throughout the day often works well. Many find it helpful to stretch after periods of sitting, such as after a meeting, before lunch, or at the end of the workday. Doing a short routine in the morning can also help start the day with more ease in the legs.

    Aim for consistency over intensity. Stretching daily, even briefly, tends to be more supportive than doing a longer stretch only once a week. If your schedule allows, try to include hamstring care two to three times a day, adjusting based on how your body feels. On days when you move more or exercise, you might find one thorough stretch after activity is enough. On heavier sitting days, more frequent, lighter stretches may feel better.

    Listen to your body’s signals. If a stretch feels sharp or painful, ease off or stop. Mild tension is normal, but pain is a sign to adjust. Some people notice they need less frequent stretching as their flexibility improves over time, while others benefit from keeping it as a regular habit. If you have any existing hip, back, or leg concerns, it’s wise to check with a doctor or physical therapist before starting or changing a routine.

    Keep it simple: pair your stretches with moments you already have, like waiting for your coffee to brew or during a phone call. This makes it easier to stick with without adding extra time to your day. Over time, these small, regular efforts can add up to greater comfort and ease in your daily movements.

    Putting It Together

    Putting it together is about building a simple, sustainable habit that fits into your day. Start by choosing two or three times each day when you can pause for a few minutes—maybe after lunch, during a work break, or in the evening. Use your dynamic warm-up for one to two minutes to get the blood flowing, then move into one or two static stretches you found most comfortable during your assessment. Hold each stretch for 20 to 30 seconds, breathing slowly and deeply. If you’re using a towel or strap, keep it loose enough to avoid strain but firm enough to support your alignment. On days when you feel particularly tight, you might add an extra stretch or spend a little longer in the warm-up. On lighter days, just a few mindful breaths in a seated forward fold can help maintain awareness. The goal isn’t perfection—it’s consistency. Notice how your body feels over time, and adjust based on what supports you best. If anything causes sharp discomfort, ease back and consider checking with a healthcare professional. Small, regular efforts often make the most difference.

    More from the blog

    From FitLife Solutions

    Browse all our practical health and fitness guides at fitlifesolutions.site.

    New practical health guides and articles on WhatsApp: follow our channel.

    Earn by sharing our books with your audience: join our affiliate channel on Telegram for one ready-to-post book a day.

    This article is for general information only and is not a substitute for professional medical advice. Talk to your doctor or another qualified health professional before changing your diet, exercise or health routine, especially if you have a medical condition or take medication.
  • How to Structure a Weekly Walking Plan That Builds Endurance Safely

    How to Structure a Weekly Walking Plan That Builds Endurance Safely

    Whether you are returning to movement after a break, managing a busy schedule, or simply want a steadier way to build stamina, this guide is written for adults who prefer a low-impact path to better cardiovascular health. You do not need special equipment, a gym membership, or a background in fitness — just a willingness to walk with intention and a plan that respects your body’s signals.

    By the end of this article, you will be able to:

    • Evaluate your current walking capacity without guesswork
    • Set weekly frequency and duration targets that fit your life
    • Structure a balanced mix of easy, moderate, and longer sessions
    • Schedule rest and active recovery so progress feels sustainable
    • Apply a gradual progression method that reduces injury risk
    • Monitor effort using simple tools like perceived exertion
    • Adjust the plan when fatigue, soreness, or life demands shift

    If you have any medical conditions or concerns, consider checking with a doctor before beginning a new exercise routine.

    Assess Your Current Fitness Level Before Starting

    Before lacing up your shoes for a structured plan, take an honest inventory of where you are right now. Many people find it helpful to start with a simple baseline: go for a walk at a comfortable pace and note how long you can move continuously before feeling the need to stop or slow down significantly. There is no minimum time that counts as success; the goal is simply to know your starting point so you can build from there without overreaching.

    Pay attention to how your body responds during and after that test walk. Note any joint discomfort, unusual shortness of breath, dizziness, or lingering fatigue the next day. These signals help you distinguish between the normal sensations of effort and signs that you may need to adjust intensity or seek guidance. If you have a history of heart conditions, high blood pressure, joint issues, or have been sedentary for an extended period, checking with a doctor before beginning a new exercise routine is a wise step.

    Consider practical factors that will shape your weekly schedule. Look at your typical work hours, caregiving duties, and sleep patterns to identify realistic windows for walking. Think about your environment: do you have safe sidewalks, trails, or a treadmill available? Weather, lighting, and terrain all influence consistency.

    A few quick self-checks can clarify your readiness: – Current average daily step count or typical weekly walking time – Ability to hold a conversation while walking at a brisk pace – Recovery time needed after a 20 to 30 minute walk – Any recurring aches that flare with increased activity

    Writing these observations down creates a reference point you can return to weeks later. It also makes it easier to spot patterns and adjust the plan as your fitness evolves.

    Set Realistic Weekly Mileage and Frequency Goals

    A good starting point is to decide how many days you can realistically commit to walking each week. Three to four sessions often works well for beginners because it leaves room for recovery and life’s inevitable interruptions. If you are already comfortable walking several times a week, you might aim for five days, but adding a session should feel manageable, not like a squeeze.

    Next, think in terms of total weekly minutes rather than miles. Time is easier to track and less affected by terrain or pace. A beginner might target 75 to 100 total minutes spread across the week — for example, three 25-minute walks or four 20-minute ones. Someone with a stronger base could start around 120 to 150 minutes. The exact number matters less than consistency; showing up regularly builds the habit that endurance rests on.

    Keep individual walks within a range that feels doable on a low-energy day. A single session of 20 to 45 minutes is a practical window for most people. If a 45-minute walk feels daunting, break it into two shorter bouts; the cardiovascular benefit is similar and the mental barrier drops.

    • Choose a frequency you can honor for at least four weeks
    • Set a weekly minute total that feels slightly easy at first
    • Cap the longest walk at a duration you could repeat two days later

    Many people find that writing the plan on a calendar — treating walks like appointments — helps protect the time. If you have any health conditions or have been inactive for a long period, check with a doctor before locking in your weekly targets.

    Design a Balanced Mix of Easy, Moderate, and Long Walks

    A balanced weekly walking plan includes three distinct types of sessions, each serving a different purpose. Easy walks form the foundation. These are comfortable, conversational-pace outings that build aerobic capacity without adding much fatigue. Many people find that scheduling two to three easy walks per week helps establish consistency while keeping the body fresh for harder efforts.

    Moderate walks introduce a bit more challenge. You should be breathing noticeably harder but still able to speak in short sentences. These sessions improve your ability to sustain a faster pace over time. One or two moderate walks per week — such as a steady 30- to 40-minute effort or a route with gentle hills — can make a meaningful difference in endurance.

    Long walks are the weekly peak. They extend duration rather than intensity, teaching your body to handle time on feet. Start with a length that feels manageable, perhaps 45 to 60 minutes, and treat it as a non-negotiable appointment. The goal isn't speed; it's duration at an easy, sustainable rhythm.

    – Easy walks: conversational pace, low fatigue, 2–3 per week – Moderate walks: noticeably harder breathing, short sentences possible, 1–2 per week – Long walk: extended time at easy pace, 1 per week

    Spacing these sessions across the week — for example, easy on Monday, moderate on Wednesday, long on Saturday — allows recovery between harder efforts. Listen to how your body responds; if a moderate walk leaves you unusually sore, replace it with an easy walk that week. Checking with a doctor before increasing intensity is wise, especially if you have any health concerns. Over time, this mix builds a resilient aerobic base while reducing the risk of overuse issues.

    Incorporate Rest Days and Active Recovery Strategically

    Rest days are not gaps in your training — they are where adaptation happens. When you walk, you create small amounts of stress in muscles, tendons, and joints. Recovery allows those tissues to repair and grow stronger. Skipping rest often leads to lingering fatigue, disrupted sleep, or nagging aches that derail consistency. Aim for at least one full rest day each week, ideally after your longest or hardest walk. If you feel unusually sore, irritable, or notice your pace slowing without reason, that’s a signal to add an extra day off.

    Active recovery keeps you moving without adding strain. A 15- to 20-minute gentle stroll, light stretching, or easy cycling can promote blood flow and reduce stiffness. The key is intensity: you should be able to hold a full conversation without pausing for breath. Many people find these sessions help them mentally reset, especially on busy weeks when a full rest day feels impossible.

    • Schedule one complete rest day per week, no structured activity
    • Add one active recovery day with very light movement if desired
    • Listen for signs like heavy legs, elevated resting heart rate, or low motivation
    • Use recovery days to focus on hydration, sleep, and meal timing

    If you have a history of injury, chronic conditions, or are new to regular exercise, check with a doctor before finalizing your recovery rhythm. The goal isn’t to do less — it’s to make every walking day count by giving your body the space to respond.

    Progress Weekly Volume Using the 10 Percent Rule

    A steady increase in weekly walking time helps your body adapt without tipping into fatigue or injury. The 10 percent rule is a widely used guideline: aim to raise your total weekly minutes by no more than roughly 10 percent from one week to the next. If you walked 150 minutes this week, target about 165 minutes next week. This modest jump gives muscles, tendons, and joints time to strengthen while keeping the routine manageable.

    Apply the increase to your longest walk first, since that session drives endurance gains. Keep your easy and moderate walks at their current lengths for a week or two before extending them. Many people find that adding five to ten minutes to the long walk feels natural and sustainable. If a week feels unusually taxing — poor sleep, high stress, lingering soreness — hold the volume steady or even drop back slightly. Consistency over months matters more than hitting a specific number every seven days.

    Track your weekly total in a simple log or app. Seeing the gradual climb builds confidence and makes it easier to spot patterns. A sample progression might look like:

    • Week 1: 150 minutes total
    • Week 2: 165 minutes total
    • Week 3: 180 minutes total
    • Week 4: 160 minutes total (recovery week)

    Every third or fourth week, reduce volume by 15 to 25 percent to let your body absorb the training. This planned step-back often leads to stronger walks afterward. If you have any cardiovascular conditions or are new to structured exercise, check with a doctor before increasing weekly volume.

    Track Effort With Perceived Exertion and Heart Rate Zones

    Tracking how hard your body is working turns a vague routine into a plan you can trust. Two simple tools — perceived exertion and heart rate zones — give you that feedback without requiring a lab test or expensive gear.

    Start with the talk test, a practical version of the Rate of Perceived Exertion (RPE) scale. On easy walks you should speak in full sentences comfortably. Moderate effort means you can talk but not sing. Hard intervals leave you managing only a few words at a time. Most of your weekly minutes belong in the easy to moderate range; this builds aerobic capacity while keeping fatigue manageable. Many people find that rating effort on a 1 to 10 scale — where 1 is sitting on the couch and 10 is an all-out sprint — helps them stay honest. Aim for mostly 3 to 4 out of 10 on easy days, 5 to 6 on moderate days, and brief touches of 7 to 8 during planned intervals.

    If you wear a watch or chest strap, heart rate zones add precision. A common approach uses percentages of your maximum heart rate, but since true max varies widely, consider a field test or a recent race effort to estimate it. Zone 2 — roughly 60 to 70 percent of max — aligns with conversational pace and should dominate your volume. Zone 3 (70 to 80 percent) fits steady moderate walks. Zones 4 and 5 are for short, structured intervals only.

    • Easy/Recovery: RPE 2–3, Zone 1–2, full conversation possible
    • Moderate/Steady: RPE 4–6, Zone 2–3, talking in short sentences
    • Hard/Interval: RPE 7–8, Zone 4–5, few words at a time

    Check your device against how you feel; numbers drift and wrists move. If you take medication that affects heart rate — such as beta blockers — perceived exertion becomes your primary guide. As always, check with a doctor before starting a new exercise program if you have a heart condition, uncontrolled blood pressure, or other medical concerns.

    Adjust the Plan Based on Fatigue, Soreness, and Life Demands

    Life rarely follows a perfect schedule, and your walking plan should bend without breaking. Some weeks you feel strong and sleep well; other weeks work runs late, sleep suffers, or a minor cold lingers. The goal is to keep the habit alive while respecting what your body is telling you. If you wake up with heavy legs that don't loosen after the first five minutes, consider turning a planned moderate walk into an easy stroll or swapping it for a rest day. Sharp or localized pain — especially in a joint — is a signal to stop and assess, not push through. General muscle soreness that fades with movement is usually fine, but soreness that sharpens or changes your gait deserves attention.

    Many people find it helpful to use a simple daily check-in: rate your energy, sleep quality, and any aches on a scale of one to five. If two or more scores dip low, treat the day as active recovery — gentle mobility work, a short easy walk, or complete rest. When life piles on — travel, deadlines, caregiving — compress the plan rather than abandon it. Keep one long walk and one moderate session if you can; drop the extras. Consistency over weeks matters more than perfection in any single week.

    • Shift intensity down before you skip a day entirely
    • Use "how you feel at the 10-minute mark" as a go/no-go guide
    • Protect sleep and hydration; they affect recovery more than mileage tweaks
    • If fatigue persists beyond a few days despite scaling back, check in with a doctor to rule out underlying issues

    Putting It Together

    Here is what a first week might look like for someone starting from a casual baseline. Monday begins with a 20-minute easy walk at a conversational pace, followed by a rest day Tuesday. Wednesday adds a touch of structure: 10 minutes easy, 5 minutes at a slightly brisker effort where talking takes a little more breath, then 5 minutes easy to finish. Thursday is another rest day or gentle stretching session. Friday repeats a 20-minute easy walk, focusing on relaxed posture and steady breathing. Saturday offers the week’s longest session — 30 minutes at an easy, sustainable rhythm, ideally on terrain you enjoy. Sunday closes the loop with full rest or a short, unhurried stroll if it feels good.

    • Monday: 20 min easy
    • Tuesday: rest or light mobility
    • Wednesday: 10 min easy / 5 min moderate / 5 min easy
    • Thursday: rest or light mobility
    • Friday: 20 min easy
    • Saturday: 30 min easy
    • Sunday: rest or optional short stroll

    Many people find this rhythm manageable and low-pressure. Adjust any day based on how your body responds, and consider checking with a doctor before beginning if you have health concerns or have been inactive for a while.

    More from the blog

    From FitLife Solutions

    Browse all our practical health and fitness guides at fitlifesolutions.site.

    New practical health guides and articles on WhatsApp: follow our channel.

    Earn by sharing our books with your audience: join our affiliate channel on Telegram for one ready-to-post book a day.

    This article is for general information only and is not a substitute for professional medical advice. Talk to your doctor or another qualified health professional before changing your diet, exercise or health routine, especially if you have a medical condition or take medication.

  • How to Build a Balanced Weekly Workout Schedule Using Only Bodyweight Exercises

    How to Build a Balanced Weekly Workout Schedule Using Only Bodyweight Exercises

    This guide is for anyone who wants a complete weekly training structure using only their bodyweight — whether you train at home, travel often, or simply prefer equipment-free movement. It suits beginners building a first routine, intermediate exercisers looking to balance strength, mobility, and cardio, and experienced movers who want a repeatable template they can adjust over time.

    By the end, you will be able to: – Assess your current fitness level and set realistic weekly goals – Organize seven days around fundamental movement patterns so nothing gets neglected – Build push, pull, and leg progressions that scale with your ability – Layer in core stability, rotational work, and skill practice without extra sessions – Schedule mobility and active recovery so they support — not compete with — your main work – Adjust volume and intensity using feel-based tools like RPE and tempo – Track progress across four-week blocks and know when to change the plan

    If you have any medical conditions, injuries, or haven't exercised in a while, check with a healthcare professional before starting a new program.

    Assessing Your Current Fitness Level and Goals

    Before you map out a single push-up or squat, take an honest snapshot of where you are right now. Grab a notebook or open a notes app and jot down three things: how many days per week you can realistically train, what time of day feels most sustainable, and any injuries, aches, or mobility restrictions that need respect. Many people find that a quick self-screen — holding a plank for time, testing a full-range bodyweight squat, and noting how a slow push-up feels — reveals more than a generic fitness test. If anything hurts beyond mild muscle fatigue, or if you have a history of joint issues, checking with a doctor or physiotherapist before starting is a smart move.

    Next, clarify what you want the program to give you. Goals tend to fall into a few buckets, and naming yours keeps the weekly template focused:

    • General strength and muscle tone for daily life
    • Improved mobility and movement quality
    • Better cardiovascular capacity without running or equipment
    • Skill development such as handstands, pistol squats, or L-sits
    • A mix of the above with an emphasis on consistency

    Rank these in order of priority. If mobility sits at the top, your schedule will front-load dynamic warm-ups and dedicated flow sessions. If strength leads, you’ll structure harder push-pull-legs blocks earlier in the week when freshness is highest. Be specific about the minimum viable commitment — for example, “four 40-minute sessions” beats “get fit.” That number becomes the skeleton you’ll flesh out in the next sections, and it protects you from overreaching when motivation dips.

    Structuring Training Days for Movement Pattern Balance

    A balanced weekly plan starts by making sure every major movement pattern appears at least once, so no single joint or muscle group carries an unfair share of the load. Think of the body as a set of hinges and levers: you want pushing, pulling, squatting, hinging, lunging, carrying, and rotating actions spread across the seven days. If you front-load all the pushing work on Monday and Thursday, the shoulders and elbows may get cranky while the posterior chain sits idle. Instead, pair a vertical push such as pike push-ups with a horizontal pull like doorway rows on the same session, then flip the pairing — horizontal push and vertical pull — two days later. This alternating rhythm gives connective tissue time to adapt while keeping the nervous system fresh.

    Many people find it helpful to assign each training day a primary pattern focus rather than a body-part label. For example: – Day 1: squat pattern and horizontal push – Day 2: hinge pattern and vertical pull – Day 3: lunge pattern and horizontal pull – Day 4: push pattern emphasis with rotational core – Day 5: pull pattern emphasis with anti-rotation core – Day 6: mixed pattern circuit or skill practice – Day 7: mobility flow and active recovery

    Notice how each lower-body pattern — squat, hinge, lunge — gets its own anchor day, while upper-body pushes and pulls alternate planes. If a joint feels sore, you can swap a bilateral squat for a split squat or a full push-up for an elevated version without breaking the overall structure. Before starting any new routine, consider checking with a doctor or qualified professional, especially if you have past injuries or medical conditions. The goal is a schedule that feels sustainable, not a perfect theoretical split.

    Designing Push-Pull-Legs Cycles With Bodyweight Progressions

    A push-pull-legs framework translates cleanly to bodyweight training when you organize exercises by joint action rather than equipment. Start each cycle with a horizontal push such as standard or elevated push-ups, then progress toward vertical pressing through pike push-ups and eventually wall-supported handstand holds. For pulling, begin with inverted rows under a sturdy table or doorframe, move to chin-up variations if a bar is available, and layer in single-arm rows using a towel looped around a column to challenge anti-rotation. Leg days alternate between knee-dominant and hip-dominant patterns: air squats and split squats build a base, while shrimp squats, skater squats, and single-leg glute bridges add unilateral intensity without external load.

    Progressions rely on leverage, range of motion, and tempo rather than added weight. Elevate the hands to regress a push-up; elevate the feet to advance it. Slow eccentrics of three to five seconds increase time under tension, and pauses at the bottom remove momentum. When a movement feels smooth for three sets of twelve controlled reps, shift to the next variation instead of simply adding volume.

    • Push: incline push-up → standard push-up → diamond push-up → pseudo-planche lean → pike push-up → wall handstand hold
    • Pull: doorframe row → table row → chin-up negative → full chin-up → archer row → single-arm towel row
    • Legs: air squat → split squat → Bulgarian split squat → shrimp squat → skater squat → single-leg glute bridge → pistol squat progression

    Cycle these patterns across non-consecutive days — for example, push on day one, pull on day three, legs on day five — and repeat the sequence weekly. Many people find this rhythm supports joint health while steadily expanding movement capacity. As always, check with a doctor before beginning a new exercise program if you have any medical concerns.

    Integrating Core Stability and Rotational Work Throughout the Week

    Core work often gets pushed to the end of a session and then skipped when time runs short. A more reliable approach is to weave stability and rotational drills into the warm-up, between strength sets, and during dedicated mobility blocks so they accumulate naturally across the week. Start each training day with two to three minutes of breathing-linked dead bugs, bird-dogs, or segmental cat-cow variations; these wake up the deep stabilizers and set a neutral spine reference for the heavier work that follows.

    Between push or pull sets, slip in a short anti-rotation hold such as a shoulder-tap plank or a Pallof press using a towel anchored in a door frame. These low-fatigue drills reinforce trunk stiffness without stealing recovery from the primary movement. On lower-body days, add a single-leg hip hinge or a standing contralateral reach to challenge rotary control while the hips are already warm.

    Dedicate one mobility-focused session — often midweek — to longer rotational sequences: quadruped thoracic rotations, half-kneeling windmills, and slow Russian twists with a controlled pause at each side. Keep the tempo deliberate; the goal is quality of segmental motion, not speed or rep count.

    • Warm-up: 2–3 min dead bug, bird-dog, or cat-cow flow
    • Between sets: 15–20 sec anti-rotation hold (shoulder-tap plank, towel Pallof)
    • Lower-body days: 6–8 reps/side single-leg hinge or standing contralateral reach
    • Mobility day: 2 rounds of thoracic rotations, half-kneeling windmills, slow Russian twists

    If any drill causes sharp discomfort in the low back or shoulders, regress the range or swap for a simpler variation. As always, check with a healthcare professional before starting a new program if you have a history of spinal issues or recent injury.

    Scheduling Mobility, Active Recovery, and Skill Practice

    Mobility work and active recovery are not filler. They are the connective tissue that lets strength and cardio sessions compound without grinding joints or dulling coordination. Aim to weave short, daily mobility flows — five to ten minutes — around your main training blocks. Morning circuits that cycle through cat-cow, world’s greatest stretch, 90/90 hip shifts, and scapular push-ups prepare the nervous system for the day. Evening sessions can slow down with longer holds: couch stretch, child’s pose with side reach, and supine thoracic rotations. Consistency beats intensity here; a daily habit maintains range better than a single weekly marathon.

    Active recovery days sit deliberately between harder efforts. Keep heart rate low enough to hold a conversation — brisk walking, easy cycling, or a light swim all work. Use these sessions to practice movement quality: barefoot balance drills, slow single-leg hinges, or controlled crawling patterns. The goal is blood flow and neural rehearsal, not fatigue. If soreness is sharp or joint-specific, swap movement for rest and consider checking with a clinician.

    Skill practice turns maintenance into progression. Pick one or two skills per four-week block — handstand line, pistol squat negative, L-sit tuck, or pull-up eccentric — and practice them fresh, after warm-up but before main sets. Five to eight quality attempts, two to three times a week, build coordination without overloading recovery. Track feel, not just reps; smoothness and control are the real markers.

    • Daily mobility flow: 5–10 minutes, morning or evening
    • Active recovery: 20–40 minutes low-intensity movement between hard days
    • Skill practice: 2–3 times weekly, low volume, high focus
    • Adjust based on soreness, sleep, and stress — not a fixed calendar

    Adjusting Volume and Intensity Using RPE and Tempo Manipulation

    Volume and intensity are the two levers that keep a bodyweight program moving forward without external load. A practical way to manage both is rating of perceived exertion, or RPE, on a one to ten scale where ten means you could not complete another rep with good form. Many people find that ending most working sets around RPE seven to eight leaves enough recovery capacity to train consistently across the week while still providing a stimulus for strength and hypertrophy. If a session feels like a nine or ten too often, consider reducing reps, adding a pause, or extending rest periods before the next set.

    Tempo manipulation is the equipment-free equivalent of adding weight. Slowing the eccentric phase to three or four seconds increases time under tension and highlights control deficits. Adding a one to two second pause at the bottom of a push up or squat removes momentum and forces the working muscles to initiate the concentric phase. Conversely, speeding up the concentric phase with intent trains power once the pattern is solid. A simple framework: week one use a 2-0-2 tempo, week two shift to 3-1-2, week three try 3-2-1, and week four test a controlled 2-0-X where X means move as fast as possible with good form.

    Weekly volume can be adjusted by adding or removing a set from each movement pattern rather than overhauling the whole schedule. If recovery markers such as sleep quality, joint comfort, and motivation are trending well, add one set to push, pull, and leg movements. If they are trending poorly, drop a set and keep the tempo strict. Always listen to your body and check with a doctor if unusual pain or fatigue persists.

    Tracking Progress and Modifying the Plan Over Four-Week Blocks

    After a few weeks of consistent training, the novelty wears off and the real work of progression begins. A simple notebook or spreadsheet works well for tracking. Record the date, the workout type, the specific exercise variations used, sets, reps, rest periods, and the RPE for each set. Note how your joints feel during and after the session, and jot down any mobility limitations that showed up. This level of detail helps you spot patterns — like a push variation that consistently feels harder than its pull counterpart, or a hip mobility drill that improves your squat depth over time.

    At the end of each four-week block, review your logs. Look for exercises where you have hit the top of your prescribed rep range at an RPE of 7 or lower for two consecutive sessions. That is your signal to progress the variation — moving from standard push-ups to archer push-ups, or from assisted pistol squats to a deeper range of motion. If you are stuck at the same reps and RPE for three weeks, consider adding a set, slowing the tempo, or inserting a brief isometric hold at the sticking point.

    • Compare week one and week four mobility test results (for example, overhead reach, Thomas test, or seated rotation).
    • Note any recurring soreness that lasts longer than 48 hours; it may indicate a need for more recovery or a movement adjustment.
    • Adjust the weekly schedule if life demands shifted — swap a high-intensity day for active recovery without guilt.

    Many people find that progress is rarely linear. Some blocks bring strength gains, others bring better movement quality or consistency. If you have a history of joint issues or medical conditions, check with a healthcare professional before increasing intensity or volume significantly. The goal is a plan that evolves with you, not a rigid script you force yourself to follow.

    Putting It Together

    Here is a sample first week that follows the structure outlined in the previous sections. Treat it as a starting template you can shift to match your schedule and energy levels. Many people find it helpful to write the plan down Sunday night so the week begins with clarity rather than negotiation.

    • Monday: Push focus (push-up variations, pike push-ups, dips on a sturdy chair) followed by 5 minutes of wrist and thoracic mobility work.
    • Tuesday: Pull focus (doorframe rows, towel rows, scapular pull-ups if a bar is available) plus a short core circuit of dead bugs, side planks, and bird-dogs.
    • Wednesday: Active recovery — 20 to 30 minutes of brisk walking, easy cycling, or a gentle yoga flow targeting hips and shoulders.
    • Thursday: Legs focus (bodyweight squats, reverse lunges, glute bridges, calf raises) with tempo controlled eccentrics on the last set of each move.
    • Friday: Push-pull combo (light push-up and row variations in a superset) followed by rotational core work such as Russian twists or standing bandless chops.
    • Saturday: Skill and mobility session — practice a movement you want to improve (handstand wall holds, pistol squat progressions, or L-sit tucks) and finish with a full-body stretch routine.
    • Sunday: Complete rest or an easy walk if you feel stiff.

    Listen to your RPE ratings each session; if fatigue climbs above a 7 out of 10 consistently, reduce volume or add an extra mobility day. Check with a doctor before starting if you have any medical concerns or past injuries. Adjust the plan weekly based on how you recover, not on a rigid calendar.

    More from the blog

    From FitLife Solutions

    Browse all our practical health and fitness guides at fitlifesolutions.site.

    New practical health guides and articles on WhatsApp: follow our channel.

    Earn by sharing our books with your audience: join our affiliate channel on Telegram for one ready-to-post book a day.

    This article is for general information only and is not a substitute for professional medical advice. Talk to your doctor or another qualified health professional before changing your diet, exercise or health routine, especially if you have a medical condition or take medication.