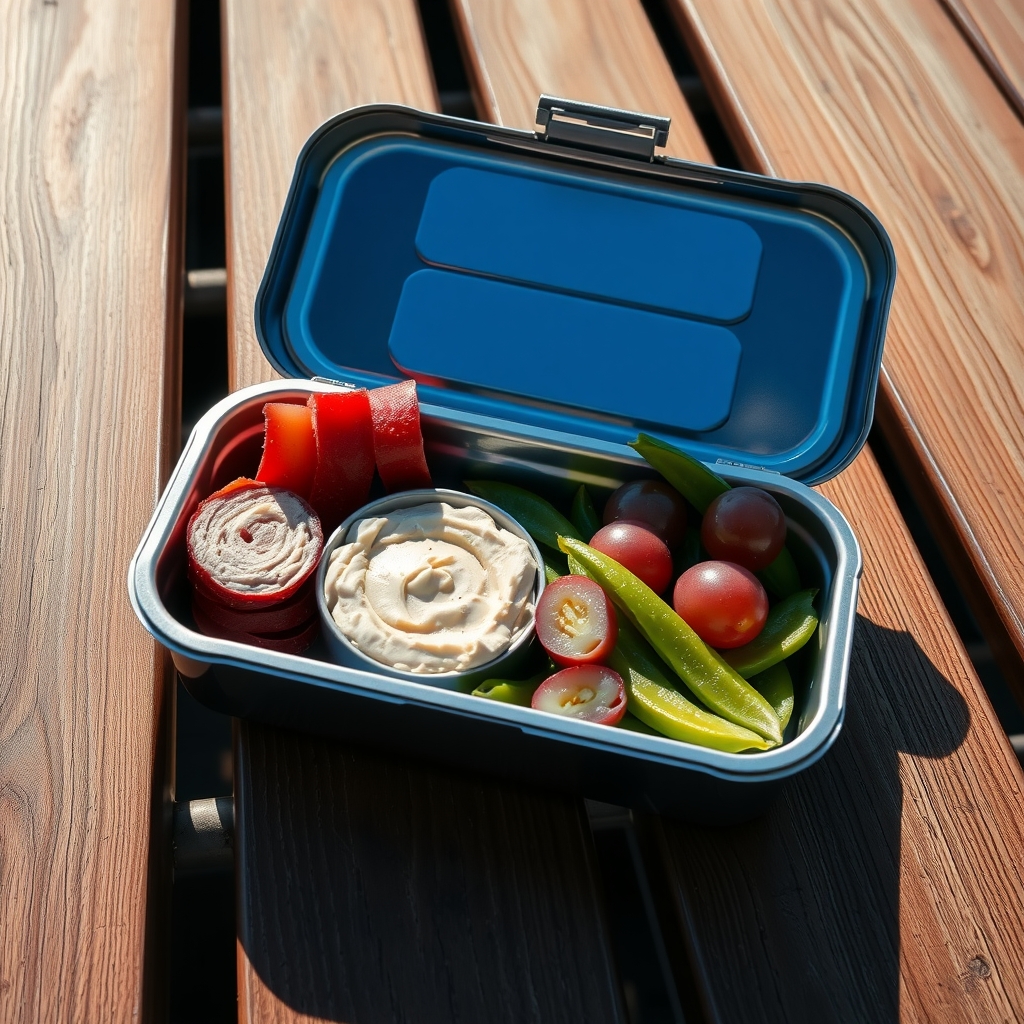
Packing a nut-free lunch that stays fresh until noon is a daily challenge for parents, caregivers, and anyone managing a school allergy policy. This guide is for you if you need reliable, food-safe methods that work with a morning rush and a lunchbox that sits at room temperature for hours. You will learn how to choose proteins, produce, and grains that hold their texture and safety without refrigeration, and how to layer sandwiches and wraps so they don't turn soggy. We cover practical ways to keep dairy or alternatives cold with strategic ice pack placement, plus crunchy snack ideas that stay crisp in reusable containers. You will also get a simple night-before prep routine that makes morning assembly quick and stress-free. By the end, you will be able to:
- Build balanced, allergen-aware meals using whole foods instead of packaged snacks
- Apply food-safety principles so everything tastes good and stays safe until lunch
- Pack efficiently with the right containers and cooling gear for your child's bag
Choosing Nut-Free Proteins That Hold Up Without Refrigeration
Hard-boiled eggs are a lunchbox staple for good reason. When cooked until the yolk is fully set and kept in their shells until eating, they stay safe at cool room temperature for several hours. Peel them the night before, sprinkle lightly with salt, and tuck them into a small container with a silicone cupcake liner to prevent rolling. Many people find that a quick dip in ice water after boiling makes peeling easier and helps the eggs cool faster for packing.
Roasted chickpeas offer a satisfying crunch and a solid hit of protein without any refrigeration needed. Toss canned chickpeas (rinsed and thoroughly patted dry) with olive oil and spices, then roast at 400°F until crisp. They hold their texture all morning in a vented container or a paper bag tucked inside the lunch box. For a softer option, a scoop of hummus in a leak-proof jar pairs well with crackers or veggie sticks — just keep the jar against an ice pack if the day will be warm.
Sunflower seed butter and soy nut butter are reliable nut-free spreads that don't require cooling. Spread them thinly on whole-grain bread or a tortilla with a layer of banana slices or a drizzle of honey to keep the bread from drying out. Single-serve packets are handy for portion control and less mess.
- Hard-boiled eggs (in shell until lunch)
- Roasted chickpeas (fully crisp, cooled before packing)
- Sunflower seed butter or soy nut butter packets
- Shelf-stable turkey or chicken jerky (check labels for nut-free facilities)
- Edamame (steamed, cooled, and lightly salted)
Always pack these alongside a cold source if the classroom runs warm, and check with your child's school about any additional allergen policies beyond peanuts and tree nuts.
Selecting Whole Fruits and Vegetables That Resist Bruising
Whole fruits and vegetables that hold their shape through a morning in a backpack make packing easier and reduce waste. Choose varieties with firmer flesh and thicker skins, and handle them gently when washing and cutting. A quick rinse under cool water and a thorough pat-dry with a clean towel helps prevent excess moisture from softening the produce or creating condensation inside the container.
Good candidates include apples, Asian pears, grapes, clementines, baby carrots, snap peas, cucumber spears, bell pepper strips, cherry tomatoes, and jicama sticks. These tend to resist bruising and maintain a pleasant texture for several hours at cool room temperature. If you prefer sliced apples or pears, toss the pieces in a little lemon juice or a commercial fruit preserver to slow browning; many people find this keeps them looking fresh until lunch.
- Apples and Asian pears: slice or leave whole; pair with a small container of sunflower seed butter for dipping.
- Grapes and berries: keep stems on grapes; pack berries in a rigid container so they don’t get crushed.
- Clementines and mandarins: easy to peel and naturally portioned.
- Baby carrots and snap peas: rinse and dry well; they stay crisp without extra prep.
- Cucumber, bell pepper, jicama: cut into sticks or coins; store in a separate compartment to avoid leaking onto other items.
Pack produce in reusable silicone cups, small bento-style compartments, or sturdy containers with tight-fitting lids. Placing a dry paper towel at the bottom absorbs any stray moisture. If your child’s school allows a mid-morning snack, portion a handful of veggie sticks into a separate bag so the main lunch stays intact. As always, check with a doctor or allergist if you have specific concerns about food sensitivities or choking hazards for younger children.
Building Sandwiches and Wraps With Moisture-Resistant Layers
Start with a sturdy base. Whole-grain bread, tortillas, pita pockets, or flatbreads hold their shape better than soft white slices and are less likely to turn soggy before lunch. Lightly toasting bread adds a subtle barrier against moisture without making it hard to chew.
Create a moisture-resistant layer between the bread and any wet ingredients. A thin spread of hummus, sunflower seed butter, cream cheese, or dairy-free alternative seals the surface and adds flavor. For wraps, spread the layer all the way to the edges so the tortilla stays flexible but protected.
Layer ingredients in the right order. Place the protein — sliced turkey, roasted chicken, hard-boiled egg, or seasoned beans — directly on the spread. Add cheese or a dairy-free slice next. Then come crisp vegetables that release little water:
- Thinly sliced cucumber (seeds removed)
- Shredded carrots
- Bell pepper strips
- Baby spinach or lettuce leaves patted completely dry
Avoid tomato slices, pickles, or wet spreads like mustard inside the sandwich; pack them in a tiny separate container so your child can add them at the table.
Roll wraps tightly and slice them in half, or cut sandwiches into quarters. Wrap each piece in parchment paper or a reusable sandwich bag before placing it in the lunchbox. The paper absorbs any minor condensation and keeps the bread from sticking to the container. Many people find this method keeps sandwiches tasting fresh and intact until the lunch bell rings.
Packing Dairy and Dairy Alternatives Safely With Ice Packs
Dairy and dairy alternatives add protein, calcium, and creaminess to a lunchbox, but they are also the items most sensitive to temperature. A small insulated lunch bag with one or two slim ice packs is usually enough to keep yogurt cups, cheese sticks, or plant-based alternatives at a safe temperature until noon. Place the ice packs flat against the bottom and along one side wall of the bag, then nestle the dairy containers directly against them so cold air circulates around each piece.
Choose individual portions rather than a large tub that gets opened and closed. Single-serve Greek yogurt, cottage cheese cups, and string cheese hold their texture better than bulk versions that sit half-eaten. For dairy-free eaters, look for fortified soy, oat, or pea-protein yogurts and cheeses that list calcium and vitamin D on the label; many people find these nutritionally comparable to dairy when chosen carefully. Shelf-stable UHT milk boxes or plant-milk cartons can skip the ice pack entirely, which frees up space for other perishables.
- Freeze a yogurt tube or a small water bottle the night before; it doubles as an extra cold source and thaws to a slushy treat by lunch.
- Wrap cheese sticks in a cloth napkin before placing them next to the ice pack to prevent surface condensation from making the wrapper soggy.
- Pack a tiny silicone cup of honey or maple syrup separately so kids can stir it in at the table instead of creating a runny mess inside the container.
If your child has a diagnosed milk allergy or lactose intolerance, check with a doctor or dietitian to confirm that the alternatives you choose meet their specific nutrient needs. A well-chilled, portion-controlled dairy or dairy-free component rounds out the meal without relying on packaged snacks.
Including Crunchy Snacks That Stay Crisp in Reusable Containers
Crunchy snacks add texture and satisfaction to a lunchbox, but keeping them crisp until noon takes a little planning. The key is controlling moisture and air exposure. Start by choosing snacks that naturally hold their shape — think roasted chickpeas, baked lentil crisps, whole-grain crackers with a tight crumb, or freeze-dried vegetable pieces. These tend to resist softening better than puffed or fried options. Many people find that homemade batches, cooled completely before packing, stay crisper than store-bought versions that may have absorbed humidity during transit.
Pack each crunchy item in its own small reusable container with a tight-fitting lid. Silicone lids or snap-lock boxes work well because they create a reliable seal without taking up much space. Avoid mixing moist foods like fruit or yogurt in the same compartment — even a little condensation can travel. If you like to include a dip, pack it separately in a leakproof mini jar and add it at lunchtime.
A few practical habits help maintain crunch: – Toast nuts or seeds lightly before packing to drive off surface moisture (if your school allows them; otherwise use seeds like pumpkin or sunflower) – Line the bottom of the container with a paper towel to absorb any stray humidity – Pack the container upright in the lunch bag so it doesn’t get crushed
If you’re including something like popcorn or rice cakes, add them the morning of — they’re especially sensitive to overnight humidity. A quick shake of the container before sealing can also help redistribute any settled moisture. With these small steps, crunchy snacks arrive intact and ready to eat.
Using Insulated Lunch Gear and Strategic Ice Pack Placement
A well-insulated lunch bag acts like a portable cooler, slowing the rise in temperature that can turn safe food risky by noon. Look for a bag with thick foam walls, a tight-sealing zipper, and a reflective inner lining that bounces heat away. Many people find that a boxy shape holds containers upright and leaves room for ice packs on multiple sides, which keeps the cold air circulating instead of pooling at the bottom.
Place one flat ice pack against the bottom of the bag, then set the heaviest, most perishable items — yogurt cups, hummus containers, cheese sticks — directly on top of it. Add a second ice pack along one side wall or tucked between two containers so the chill wraps around the food. If you use a bendable gel pack, wrap it in a thin kitchen towel first; this prevents frost from making the outside of containers slick and keeps condensation from soaking into a sandwich wrap.
- Choose a bag that fits your containers snugly; extra air space warms up faster.
- Freeze a reusable water bottle overnight — it doubles as an ice pack and a cold drink by lunch.
- Slip a small fridge thermometer into the bag occasionally; the temperature should stay at 40 °F or below until the lunch period.
- Pack the bag in the morning, not the night before, so the insulation starts cold.
A little planning with placement means the turkey roll-ups stay firm, the apple slices stay crisp, and everything tastes fresh when the lunch bell rings.
Prepping Components the Night Before for Morning Efficiency
Setting aside fifteen minutes after dinner can transform a frantic morning into a smooth departure. Start by washing and drying any produce that will travel whole — grapes, berries, cherry tomatoes, snap peas — then store them in lined containers so they’re ready to drop into the lunchbox. Slice cucumbers, bell peppers, or jicama and place them between paper towels in a sealed box; the towels absorb excess moisture that leads to sogginess. If you’re including a dip such as hummus or sunflower-seed butter, portion it into a small leak-proof cup and refrigerate it next to the veggies.
Proteins that don’t need reheating — hard-boiled eggs, cubed baked tofu, roasted chickpeas, or pre-cooked chicken strips — can be divided into silicone cups or small containers tonight. For sandwiches and wraps, lay out the bread or tortillas and add your moisture barrier: a thin spread of cream cheese, dairy-free mayo, or mashed avocado goes on first, followed by lettuce or spinach, then protein, then another barrier layer. Wrap each one tightly in parchment or wax paper and store flat in a large container; this keeps fillings from shifting and bread from drying out.
- Assemble trail-mix-style blends (pumpkin seeds, dried mango, coconut flakes, pretzel sticks) in individual snack bags
- Fill reusable drink bottles with water or a shelf-stable milk box and chill overnight
- Place ice packs in the freezer so they’re solid by morning
- Line the insulated bag with a clean kitchen towel to catch condensation
In the morning you’ll only need to transfer the pre-portioned components, tuck in the frozen packs, and zip the bag — no chopping, no measuring, no last-minute decisions.
Putting It Together
Start the week by picking two proteins, two fruits, two vegetables, and one crunchy snack that your child already likes. Shop once on Sunday, wash and dry produce, and portion proteins into small containers. Make a double batch of sandwich fillings — hummus with shredded carrot, or sunflower butter with thin apple slices — and store them separately from bread or wraps so nothing gets soggy.
Each night, assemble the non-perishable parts: wrap, crackers, snack container, and a napkin. In the morning, add the cold items straight from the fridge — cheese stick, yogurt tube, prepped veggie sticks — and tuck an ice pack above and below them in the insulated bag. Keep a sticky note on the lunchbox with a quick checklist: protein, fruit, veg, crunch, cold pack. Many people find this visual cue cuts down on forgotten items.
- Sunday: shop, wash, portion, make fillings
- Monday–Friday: night-before dry pack, morning cold pack, ice packs in place
- Adjust portions after day three based on what comes home uneaten
If your child has specific dietary needs or allergies beyond nuts, check with a doctor or dietitian to confirm the plan covers their nutrition requirements.
More from the blog
- How to Perform a Bodyweight Squat, Push-Up, and Plank With Proper Form
- How to Build a Balanced Snack Plate Using Protein, Fiber, and Healthy Fats
- How to Measure Exercise Intensity Using the Talk Test and RPE Scale
From FitLife Solutions
Browse all our practical health and fitness guides at fitlifesolutions.site.
New practical health guides and articles on WhatsApp: follow our channel.
Earn by sharing our books with your audience: join our affiliate channel on Telegram for one ready-to-post book a day.
This article is for general information only and is not a substitute for professional medical advice. Talk to your doctor or another qualified health professional before changing your diet, exercise or health routine, especially if you have a medical condition or take medication.