Category: Healthy Eating

  • When Meal Prep Doesn’t Work and What to Do Instead

    When Meal Prep Doesn’t Work and What to Do Instead

    You spend Sunday chopping, portioning, and stacking containers, only to find yourself ordering takeout by Wednesday because the sight of that fifth chicken-and-rice box kills your appetite. If rigid meal prep has left you with wasted groceries, decision fatigue, and a fridge full of guilt, this article is for you. It is written for busy adults who need nourishment without a part-time job in food logistics.

    We will look at why the standard cook-once-eat-all-week model often backfires, from hidden time costs to the psychology of palate fatigue. You will learn how to spot the friction points in your current routine and replace them with a flexible component-prep framework that adapts to shifting schedules and actual cravings.

    After reading, you will be able to:

    • Identify which prep habits are costing you time and mental energy
    • Build a modular system of proteins, starches, and vegetables that mix into different meals
    • Adjust your strategy when work runs late, appetite changes, or leftovers lose appeal
    • Keep food waste down without eating the same thing on repeat

    The Hidden Costs: Time, Waste, and Decision Fatigue

    The Sunday ritual looks productive on paper: three hours, twenty containers, a color-coded spreadsheet. What the highlight reel skips is the hidden ledger. You spend forty minutes washing and chopping vegetables that wilt by Thursday. You buy bulk proteins because the per-pound price is lower, then toss half a package of freezer-burned chicken in March. The mental load is heavier than the grocery bags. By Wednesday you are negotiating with a container of mushy quinoa, deciding whether to force it down or order takeout and feel guilty. That negotiation is decision fatigue wearing a different outfit — you already made fifty choices at work; dinner shouldn't require a committee meeting.

    The waste shows up in three forms. Food waste: the bag of spinach that turns to sludge, the sauce that separates, the rice that hardens into a brick. Time waste: the hour you spend portioning snacks you never eat because the texture is off. Energy waste: the resentment that builds when your carefully planned Tuesday lunch feels like a punishment instead of fuel. Many people find they spend more cognitive bandwidth managing the system than they save by having meals ready.

    • Track what you actually throw out for two weeks; the pattern usually points to one or two ingredients you keep buying "just in case."
    • Limit active prep to ninety minutes max; beyond that, accuracy drops and shortcuts creep in.
    • Build in one "flex night" per week where the plan is deliberately empty — leftovers, eggs on toast, or a sandwich — so the system has a pressure valve.

    Why the Standard Approach Fails Real-Life Schedules

    The standard meal prep model assumes your week follows a predictable script. You shop Sunday, cook for three hours, portion into identical containers, and eat on schedule. Real life rarely cooperates. A Tuesday meeting runs late, a child gets sick, or you simply finish work too exhausted to reheat the chicken and rice you packed. When the plan breaks, the food often sits until it spoils, and you end up ordering takeout anyway — wasting both the prep effort and the money spent on groceries.

    Rigid batching also ignores how energy fluctuates. You might have bandwidth for a complex recipe on Sunday but need zero-cook meals by Thursday. Standard prep locks you into the same labor level all week. It also assumes your appetite stays constant. Eating the same portion of the same macro split five days straight ignores hunger cues that shift with sleep, stress, and activity. Many people find they overeat on low-activity days just to "finish the container" or under-eat on high-activity days because the portion was set on Sunday.

    Common friction points: – Fixed portions that don't match daily hunger – No buffer for schedule changes or social meals – All cooking front-loaded when energy is highest – No system for using up partial ingredients mid-week – Mental guilt when you deviate from the plan

    A flexible system builds in slack. It separates components so you can assemble different meals in minutes, swap portions based on actual hunger, and pivot when plans change without throwing out food or abandoning the effort entirely.

    The Psychology of Food Boredom and Palate Fatigue

    Eating the same reheated chicken, rice, and broccoli for five straight days sounds efficient on paper, but your brain and taste buds often rebel by Wednesday. This phenomenon, often called palate fatigue, is a survival mechanism, not a character flaw. When flavors and textures repeat without variation, dopamine response drops, meals stop feeling satisfying, and the urge to order takeout spikes — not because you lack discipline, but because your sensory system is begging for novelty.

    Many people find that boredom shows up first as mindless snacking after the "healthy" meal, then as resentment toward the containers staring back from the fridge. The fix isn't forcing yourself to finish the batch. It’s building in deliberate variation at the component level so the base ingredients stay the same but the eating experience shifts.

    • Cook a neutral protein (shredded chicken, lentils, ground turkey) and rotate sauces: chimichurri Monday, teriyaki Tuesday, harissa Wednesday, lemon-herb yogurt Thursday.
    • Prep two vegetable bases instead of one — roasted root vegetables and a raw slaw — then mix and match.
    • Keep texture contrast handy: toasted nuts, quick-pickled onions, crispy chickpeas, or a handful of fresh herbs added at serving time.
    • Designate one "wild card" dinner slot midweek for leftovers remixed into a wrap, frittata, or grain bowl with a fried egg.

    If you notice dread creeping in when you open a container, treat it as data. Swap the sauce, change the temperature (cold salad vs. hot bowl), or repurpose the protein into a soup. Flexibility protects the habit better than rigidity ever could.

    When Batch Cooking Sabotages Weight Loss Goals

    Batch cooking often promises portion control, but the reality can work against weight goals in subtle ways. When you cook five identical lunches on Sunday, you lock in calorie density and macro ratios before you know how hungry you will actually be on Wednesday. A 600-calorie container feels fine after a morning workout but excessive after a sedentary day of meetings, yet you eat it anyway because it’s already packed. That rigidity overrides fullness cues and trains you to finish the portion rather than stop when satisfied.

    Large-batch recipes also tend to rely on calorie-dense binders — oil, cheese, heavy sauces — to keep food palatable after days in the fridge. A stir-fry that tastes bright on day one often needs extra sodium or fat by day four to mask texture changes. Those additions add up quietly across the week.

    • Weigh or measure the protein and starch once, then keep vegetables separate so you can increase volume without adding calories when hunger is higher.
    • Pack sauces and dressings in small containers; add them at the table to control the final amount.
    • Build one “flex meal” slot into the week — a salad bar, omelet, or grain bowl — where you assemble fresh ingredients to match that day’s appetite.
    • If a pre-portioned meal feels too large, immediately move half to a second container before you start eating; the visual cue of a full plate stays intact while intake drops.

    These small adjustments keep the convenience of advance cooking while restoring the feedback loop that supports sustainable weight management.

    If you want this in more depth, our book Healthy Lunchbox Recipes: Practical Meal Prep for Busy Adults covers it step by step.

    What Reddit Communities Get Right About Flexible Systems

    Reddit threads about meal prep often reveal what polished guides leave out: the gap between a perfect Sunday cook-up and a chaotic Tuesday. Communities like r/MealPrepSunday and r/EatCheapAndHealthy consistently highlight that rigid menus collapse when work runs late, kids get sick, or appetite simply shifts. What users there get right is treating prep as a set of modular habits rather than a fixed menu.

    Many people find success with a "cook once, eat differently" mindset. Instead of portioning five identical containers, they batch neutral bases — rice, roasted vegetables, shredded chicken, beans — and keep sauces, dressings, and fresh toppings separate. A single tray of roasted broccoli and sweet potato becomes a grain bowl Monday, a frittata filling Tuesday, and a taco topping Wednesday. This reduces palate fatigue without adding cook time.

    • Prep proteins plain, season at reheating
    • Store wet and dry components in separate containers
    • Keep a "flavor kit" of three sauces that rotate weekly
    • Freeze single portions of cooked grains for quick thawing

    Another practical takeaway: plan for the "zero-energy" night. Redditors often suggest keeping two emergency meals that require zero chopping — frozen dumplings plus bagged slaw, or canned beans over microwave rice with a spoonful of pesto. It prevents the takeout spiral without demanding willpower.

    The most sustainable systems shared in these threads are the ones that assume life will interrupt. They build in slack, not perfection.

    Building a 'Component Prep' Framework That Adapts

    Instead of cooking five identical lunches on Sunday, prep building blocks that recombine in minutes. Start with two neutral bases — think brown rice, quinoa, roasted sweet potato cubes, or a big batch of lentils. Cook them plain with salt and a bay leaf so they pair with anything. While those simmer, roast two sheet pans of vegetables: one hearty (broccoli, cauliflower, carrots) and one quick-cooking (zucchini, peppers, cherry tomatoes). Toss each with oil, salt, and a different spice blend — cumin-chili on one, lemon-herb on the other — so the flavor profile shifts without extra work.

    Proteins stay flexible. Grill or bake chicken thighs, pan-sear tofu, and hard-boil a dozen eggs. Store each in its own container, unseasoned or lightly salted. Sauces do the heavy lifting: whisk together a tahini-lemon drizzle, a quick salsa verde, and a soy-ginger glaze. These three sauces turn the same rice-chicken-broccoli combo into three distinct meals.

    – Assemble just before eating: base + veg + protein + sauce + crunch (toasted nuts, seeds, or crispy chickpeas). – Keep a "rescue shelf" of canned beans, tuna, frozen edamame, and microwaveable grain pouches for days when components run low. – Prep fresh elements — washed greens, sliced cucumber, chopped herbs — in a single container so they’re ready to fold in.

    If a work lunch gets canceled, the components hold for another day. If you’re ravenous, double the protein and sauce. The system bends without breaking.

    Matching Your Prep Strategy to Your Actual Lifestyle

    If you work rotating shifts, your "Sunday prep" might need to happen on a Tuesday. If you travel two weeks a month, a fridge full of cooked chicken becomes a liability, not an asset. Start by auditing the next fourteen days as they actually look, not as you wish they looked. Mark every meal you will eat at home versus on the go, every night you get home after eight, and every morning you leave before six. That calendar dictates the strategy, not a template from a blog.

    • High-variability weeks: default to component prep. Wash and chop sturdy vegetables, cook a neutral grain, and portion a protein that reheats well. Assemble different meals in five minutes using sauces or dressings you keep on hand.
    • Low-variability weeks: batch two full recipes you genuinely enjoy and rotate them. This saves maximum time when your schedule is predictable.
    • Travel-heavy months: prep freezer-friendly components like burrito fillings, soup bases, or marinated proteins you can pull the night before. Skip fresh salads that wilt in three days.
    • Household with mixed preferences: build a "toppings bar" — roasted vegetables, grains, beans, proteins, and three distinct sauces. Everyone assembles their own bowl, taco, or wrap without extra cooking.

    When the week derails — sick kid, last-minute deadline, power outage — have a designated "emergency meal" that requires zero prep: canned beans with microwave rice and salsa, frozen dumplings with steamed bagged broccoli, or eggs scrambled with whatever cheese is left. Keep those ingredients stocked permanently. The goal is not a perfect system; it is a system that bends without breaking.

    Putting It Together

    Start Sunday by washing and storing greens, roasting two trays of vegetables with different spices, and cooking a single large pot of grains or beans. Grill or bake one protein that reheats well, such as chicken thighs or tofu, and portion it separately. Make one sauce or dressing you genuinely like. This takes about ninety minutes and gives you building blocks, not finished meals.

    Monday through Wednesday, assemble lunch in two minutes: greens, a scoop of grains, roasted vegetables, protein, and sauce. Keep dinner simple — tacos with leftover fillings, a quick stir-fry using prepped veg, or grain bowls with a fried egg. If plans change, components hold in the fridge for four to five days or freeze in portion bags.

    • Check inventory Thursday morning; roast one more vegetable tray or boil eggs if running low.
    • Use Friday for "kitchen sink" meals: frittatas, fried rice, or loaded potatoes that absorb odds and ends.
    • Saturday stays open — eat out, order in, or cook something fresh if you want.

    Adjust quantities next week based on what you actually ate. Many people find the system settles after two cycles. If you have specific health conditions, check with a doctor or dietitian before making major changes to your eating pattern.

    More from the blog

    From FitLife Solutions

    Our book Healthy Lunchbox Recipes: Practical Meal Prep for Busy Adults goes further, as a digital eBook (PDF and EPUB) you can read on any device.

    Browse all our practical health and fitness guides at fitlifesolutions.site.

    New practical health guides and articles on WhatsApp: follow our channel.

    Earn by sharing our books with your audience: join our affiliate channel on Telegram for one ready-to-post book a day.

    This article is for general information only and is not a substitute for professional medical advice. Talk to your doctor or another qualified health professional before changing your diet, exercise or health routine, especially if you have a medical condition or take medication.
  • How to Stop Nighttime Snacking When You’re Not Hungry

    How to Stop Nighttime Snacking When You’re Not Hungry

    You finish dinner, clean the kitchen, and settle in for the evening. An hour later you are back in front of the fridge or pantry, not because your stomach is growling but because the habit feels automatic. This section is for anyone who recognizes that pattern — whether it shows up while scrolling on the couch, during a late work session, or in the quiet moments before bed — and wants practical ways to interrupt it without relying on willpower alone.

    After reading, you will be able to:

    • Spot the specific cues that launch your nighttime eating episodes
    • Redesign your evening routine so the snacking loop has nowhere to hide
    • Front-load nutrition earlier in the day so physical hunger isn’t masquerading as a craving
    • Set up your kitchen and environment to make the unwanted choice harder and the better choice easier
    • Use a simple pause technique when an urge hits so you can choose your response instead of reacting
    • Address the emotions that often hide behind the reach for food
    • Align sleep timing and light exposure to quiet the biological signals that mimic hunger

    If an underlying medical condition or medication side effect could be driving appetite changes, check with your doctor before making major shifts.

    Identify Your Nighttime Eating Triggers Beyond Physical Hunger

    Start by treating the urge to snack after dinner as data, not a failure. For the next three to five evenings, keep a simple log on your phone or a notepad. Note the time, what you were doing, what you felt physically, and what you felt emotionally in the ten minutes before the craving hit. You are looking for patterns that have nothing to do with an empty stomach.

    Common triggers hide in plain sight. Many people find they reach for food during specific transitions: closing the laptop, putting kids to bed, or starting a show. Others notice a pull toward the kitchen when they feel anxious about tomorrow’s to-do list, bored while scrolling, or lonely in a quiet house. Physical cues like dehydration or fatigue often masquerade as hunger. Write the context down without judgment.

    • What activity were you doing? (watching TV, working, scrolling, reading)
    • What emotion was present? (stress, boredom, loneliness, excitement, fatigue)
    • What physical sensation did you notice? (tight chest, heavy eyelids, dry mouth, low energy)
    • Where were you? (couch, desk, standing at the counter)
    • What time was it?

    After a few nights, review the log. Circle the two or three scenarios that show up most often. That shortlist becomes your target list for the strategies in the next sections. If you notice you only snack when you stay up past a certain hour or when you skip an afternoon snack, you have actionable information. If the log reveals you are eating large amounts rapidly, feeling out of control, or eating to numb intense distress, consider mentioning the pattern to a healthcare provider to rule out binge eating disorder or other medical factors.

    Restructure Your Evening Routine to Break the Snacking Habit Loop

    The habit loop of nighttime snacking usually follows a predictable cue: finishing dinner, settling on the couch, turning on a show, and reaching for food. To break it, you need a new routine that delivers a similar reward — relaxation or transition — without eating. Start by defining a clear "kitchen closed" ritual. After your last bite, put leftovers away, wash the dishes, wipe the counters, and turn off the kitchen light. This physical sequence signals to your brain that eating is done for the day.

    Next, insert a deliberate buffer activity between the kitchen and the couch. Many people find that five to ten minutes of gentle stretching, a warm shower, or writing a quick to-do list for tomorrow creates enough separation to weaken the automatic urge to snack. If you typically watch TV, change your seat or your posture; sit on the floor with a cushion, use a blanket, or keep your hands busy with a fidget toy, knitting, or a puzzle app. The goal is to disrupt the motor memory of hand-to-mouth motion.

    Set a specific "wind-down" alarm on your phone for 30 minutes before bed. When it goes off, dim the lights, put screens away, and do one calming thing: read a physical book, listen to a podcast, or practice box breathing. Consistency matters more than perfection. If you slip and snack one night, treat the next morning as a reset — drink a glass of water, eat a protein-rich breakfast, and recommit to the routine that evening.

    Eat Balanced, Satisfying Meals During the Day to Prevent Night Cravings

    Skipping meals or eating too little earlier in the day is one of the most common reasons cravings take over after dinner. When your body hasn’t received enough fuel — or the right mix of nutrients — it ramps up hunger signals in the evening to make up the deficit. Many people find that eating three balanced meals spaced roughly four to five hours apart keeps blood sugar steadier and reduces the urge to graze at night.

    Aim to include protein, fiber, and healthy fat at each meal. Protein (eggs, Greek yogurt, tofu, chicken, beans) and fat (avocado, nuts, olive oil) slow digestion and increase satiety. Fiber from vegetables, fruit, whole grains, and legumes adds physical fullness and steadies glucose. A lunch of grilled salmon, quinoa, roasted broccoli, and a drizzle of tahini will likely keep you satisfied longer than a plain salad with low-fat dressing.

    If you go more than five hours between meals, plan a purposeful snack — something with protein and fiber — rather than waiting until you’re ravenous. Examples: – Apple slices with two tablespoons of peanut butter – A hard-boiled egg and a handful of baby carrots – Plain cottage cheese with berries

    Hydration matters too. Thirst can masquerade as hunger, so sip water throughout the day and have a glass with each meal. If you’ve been restricting calories aggressively, consider whether your intake is actually adequate for your activity level; many people find that a modest increase at breakfast and lunch eliminates nighttime urges entirely. If you have a medical condition that affects appetite or blood sugar, check with your doctor before making significant changes to your meal pattern.

    Use Environmental Design to Make Nighttime Snacking Inconvenient

    If you have to walk to the kitchen, open a cabinet, and unwrap something to snack, you have already made a series of small decisions that support the habit. Environmental design flips that script by adding friction to the unwanted behavior and removing friction from the alternative. Start with a quick audit: move trigger foods — chips, cookies, chocolate — to a high shelf, an opaque container in the back of the pantry, or out of the house entirely. Keep a bowl of washed fruit or pre-portioned nuts at eye level in the fridge instead. Many people find that simply not seeing the package reduces the urge before it starts.

    Close the kitchen after dinner like a restaurant. Turn off the lights, push in the chairs, and put a physical barrier in place — a baby gate, a closed door, or even a "kitchen closed" sign on the counter. Brush your teeth immediately after your last bite; the mint flavor signals "done eating" to your brain and makes food taste less appealing. If you tend to graze while scrolling on the couch, charge your phone across the room and keep a book, knitting, or a puzzle where you usually sit. The goal is to make the old cue (couch + phone + hand free) lead to a new routine.

    • Store tempting foods in opaque containers on high shelves or in a garage fridge
    • Pre-portion allowed snacks into single servings so you cannot mindlessly eat the whole bag
    • Keep a glass water bottle or herbal tea thermos on your nightstand to replace the hand-to-mouth motion
    • Use a kitchen timer: set it for 20 minutes when a craving hits; often the urge passes while you wait
    • Replace the snack bowl with a fidget object — stress ball, smooth stone, pen — during TV time

    If you slip and eat anyway, note the specific cue (boredom at 9 p.m., leftovers visible on the counter) and adjust one barrier tomorrow. Small environmental tweaks compound over weeks.

    If you want this in more depth, our book Healthy Snacking: Practical Choices for Everyday Nutrition covers it step by step.

    Apply Urge Surfing and Mindful Pause Techniques When Cravings Hit

    When a craving hits after dinner, the urge often feels like a command you must obey. Urge surfing changes that dynamic by treating the craving as a temporary wave you can watch rise and fall without acting on it. Start by noticing the physical sensation: tightness in your chest, a restless feeling in your hands, or a mental tug toward the kitchen. Name it silently — "urge present" — and set a timer for five minutes. During that window, stay where you are and breathe slowly, tracking the sensation as it shifts. Many people find the peak intensity passes well before the timer ends.

    If five minutes feels too long, use a micro-pause instead. Put down your phone or remote, plant both feet on the floor, and take three deliberate breaths. Ask yourself, "What do I actually need right now?" The answer might be thirst, fatigue, or a need to transition out of work mode. Keep a glass of water or herbal tea within reach so hydration becomes the default first response.

    • Notice the sensation without judgment
    • Set a short timer or take three breaths
    • Identify the underlying need
    • Choose a non-food response: stretch, text a friend, write a quick to-do list for tomorrow

    If you do snack after pausing, skip the guilt loop. Note what happened — "I ate while scrolling" — and use that data to adjust your environment or routine tomorrow. Consistency with the pause builds the muscle; perfection is not required. If nighttime eating feels compulsive or distressing, consider speaking with a healthcare provider or therapist who specializes in eating behaviors.

    Address Emotional Drivers Like Stress, Boredom, and Loneliness Directly

    Emotional eating at night often has little to do with food. When the day quiets down, unprocessed feelings — stress from work, the flatness of boredom, or the ache of loneliness — can surface quickly. Food becomes a reliable, immediate way to soothe or distract. The first step is naming the specific emotion before you reach for something to eat. Pause and ask: "What am I feeling right now?" If you can label it — "I'm anxious about tomorrow's meeting" or "I feel disconnected" — you create a gap between the urge and the action.

    Build a small menu of non-food responses matched to each common driver. – For stress: a five-minute body scan, writing a quick priority list for tomorrow, or stepping outside for cold air. – For boredom: a puzzle app, a chapter of a book, stretching while listening to a podcast, or prepping clothes for the next day. – For loneliness: a voice note to a friend, writing a short journal entry, or playing a playlist that feels comforting.

    Keep this list visible — on the fridge or your phone lock screen — so it’s easier to grab than a snack. Practice the alternative for just two minutes. Often the wave of urgency passes once you engage a different sensory channel.

    If you still eat, skip the guilt spiral. Note what happened: "I felt lonely at 9:30 p.m. and ate cookies. Next time I’ll try the voice note first." Data beats shame. If emotional eating feels frequent, intense, or tied to past trauma, consider speaking with a therapist or your doctor; they can help you build deeper coping tools that food never could.

    Align Sleep Hygiene and Circadian Rhythms to Reduce Late-Night Hunger Signals

    Your body’s internal clock drives hunger hormones on a predictable rhythm, and when sleep timing drifts, those signals often show up as late‑night cravings rather than true energy needs. Aim to go to bed and wake up within the same 30‑minute window every day, even on weekends. This consistency keeps ghrelin and leptin — the hormones that tell you to eat and stop eating — on a steadier cycle, so the urge to snack after dinner may fade naturally.

    Light exposure is the strongest cue for that clock. Get 10 to 15 minutes of bright outdoor light within an hour of waking; it anchors your circadian phase and supports melatonin release later. In the evening, dim overhead lights and switch screens to warm‑color modes at least 60 minutes before bed. If you must use a device, blue‑light‑blocking glasses can help, but the simplest fix is to put the phone in another room.

    A wind‑down routine signals to your brain that eating time is over. Try a consistent sequence: herbal tea, gentle stretching or breathing, then reading a physical book under low light. Keep the bedroom cool (around 65‑68°F) and dark; blackout curtains or a sleep mask work well. Avoid caffeine after early afternoon and limit alcohol, since both fragment sleep and can trigger rebound hunger.

    If you still wake hungry, a small protein‑rich bite — like a few almonds or a spoonful of Greek yogurt — can settle the stomach without derailing the routine. Persistent nighttime hunger despite these habits may warrant a conversation with a healthcare provider to rule out medical factors.

    Putting It Together

    Start with one small change each evening rather than overhauling everything at once. On night one, pick a consistent kitchen closing time and stick to it for seven days; brush your teeth right after to signal the shift. Night two, add a five-minute wind-down ritual — stretching, journaling, or a warm shower — before you sit on the couch. Night three, prep a balanced dinner with protein, fiber, and fat so you finish satisfied, not stuffed. Night four, move trigger foods to a high shelf or opaque container and place a glass water bottle at eye level. Night five, practice the pause: when an urge rises, set a timer for two minutes, notice the sensation, and decide whether you still want the snack. Night six, name the feeling underneath the craving — boredom, stress, loneliness — and try one non-food response: a short walk, a text to a friend, a few breaths. Night seven, review what felt doable and what didn’t, then keep the two or three habits that clicked. Progress is uneven; some nights you’ll snack anyway. That’s data, not failure. If sleep or mood stays disrupted, check in with a healthcare provider.

    More from the blog

    From FitLife Solutions

    Our book Healthy Snacking: Practical Choices for Everyday Nutrition goes further, as a digital eBook (PDF and EPUB) you can read on any device.

    Browse all our practical health and fitness guides at fitlifesolutions.site.

    New practical health guides and articles on WhatsApp: follow our channel.

    Earn by sharing our books with your audience: join our affiliate channel on Telegram for one ready-to-post book a day.

    This article is for general information only and is not a substitute for professional medical advice. Talk to your doctor or another qualified health professional before changing your diet, exercise or health routine, especially if you have a medical condition or take medication.
  • How to Meal Prep for the Week Using Simple Pantry Staples

    How to Meal Prep for the Week Using Simple Pantry Staples

    This guide is for anyone who wants weekday meals ready without spending every evening cooking or buying expensive specialty ingredients. It walks through planning a simple menu, prepping staples, storing food safely, and reheating it through the week.

    By the end, you will be able to prep breakfast burritos, breakfast sandwiches, sweet potatoes, chicken breast, and smoothie components ahead of time, then assemble them into quick meals on busy mornings and evenings. You will also learn what to do if food tastes dry, containers leak, or your schedule changes midweek.

    • Cook once and eat several times during the week
    • Store prepped food so it stays safe and tastes good
    • Swap ingredients based on what you already have

    If you have a medical condition that affects what you can eat, check with a doctor before making big changes to your meals.

    Meal Prep Basics: Planning, Storage, and Weekly Workflow

    Start by writing down three dinners and three breakfasts you want to eat next week. Choose recipes that share ingredients so you buy less and waste less. For example, if you roast sweet potatoes on Sunday, you can use them in breakfast burritos and as a side for chicken dinners. Make a short grocery list organized by store section, then shop once.

    Set aside one block of time, usually two to three hours on a weekend day, for cooking and packing. Begin with foods that take longest, such as chicken breasts or roasted vegetables, then move to quicker items while they cook. Cool cooked food before sealing containers, and store meals in the refrigerator if you will eat them within four days. Freeze anything meant for later in the week.

    Use clear, airtight containers so you can see what is inside. Label lids with the dish name and date. Keep raw meat on the bottom shelf of the fridge to prevent drips onto other foods. Reheat leftovers until steaming hot throughout, and do not leave cooked food at room temperature for more than two hours.

    If something goes wrong, stay flexible. Overcooked chicken can be chopped into salads or soups. Mushy sweet potatoes mash well for breakfast bowls. If you run out of time, prep just one component, such as cooked grains or chopped vegetables, and assemble meals fresh during the week. Many people find that a simple, repeatable routine makes weekday eating easier and less stressful. If you have food allergies, medical conditions, or concerns about safe food storage, check with a doctor or a qualified healthcare professional.

    How to Meal Prep Breakfast Burritos for the Week

    Cook breakfast burritos on Sunday so weekday mornings only require reheating. Start with eight large flour tortillas, twelve eggs, one cup of black beans rinsed and drained, one cup of cooked rice, and one cup of shredded cheese. Add any pantry vegetables you have, such as diced peppers, onions, or frozen corn.

    Scramble the eggs in a large skillet over medium heat until just set, then remove them. Warm the beans and rice together in the same pan, seasoning with cumin, salt, and pepper if you like. Lay each tortilla flat and add a portion of eggs, bean and rice mixture, and cheese. Roll tightly, folding in the sides as you go.

    Wrap each burrito in parchment paper, then place it in a freezer bag or airtight container. Label with the date and store in the freezer for up to three months or in the refrigerator for up to four days. To reheat, remove the parchment, wrap in a damp paper towel, and microwave for one to two minutes, flipping halfway. If the tortilla tears, roll it in a fresh tortilla or eat it open faced with a fork. Many people find that adding salsa or hot sauce after reheating keeps the flavor bright. Check with a doctor if you have concerns about egg or dairy intake.

    How to Meal Prep Breakfast Sandwiches for the Week

    Start with sturdy English muffins or whole grain toast because they hold up to reheating better than soft sandwich bread. Cook eggs in a large nonstick skillet or bake them in a muffin tin so you can portion them quickly. Add a slice of cheese and a precooked protein such as turkey sausage, ham, or a veggie patty if you want extra substance.

    Assemble each sandwich on a cooling rack so the bottom does not get soggy. Wrap each one individually in parchment paper, then place the wrapped sandwiches in a freezer bag or airtight container. Label with the date and use within three months for best quality. In the morning, unwrap one sandwich, place it on a microwave-safe plate, and heat for about one to two minutes, flipping halfway. If the egg looks rubbery, reduce the time next time or lower the power setting.

    If bread gets soggy, toast it lightly before assembling or store the toasted base separately and assemble fresh in the morning. If cheese sticks to the wrapper, let the sandwich cool completely before wrapping or use a slice of parchment between the cheese and the paper. Many people find that prepping a batch on Sunday makes weekday mornings feel less rushed, but check with a doctor if you have specific dietary concerns or food allergies.

    How to Meal Prep Sweet Potatoes for the Week

    Sweet potatoes keep well in the fridge for several days, which makes them a smart base for weekday breakfasts, lunches, and side dishes. Start by choosing firm sweet potatoes without soft spots or sprouts. Wash and dry them, then pierce each one a few times with a fork so steam can escape.

    Roast them whole on a sheet pan at 400 degrees Fahrenheit until a knife slides in easily, usually 45 to 60 minutes depending on size. Let them cool completely before peeling and slicing into rounds, cubes, or wedges. Store in airtight containers in the refrigerator for up to five days. For faster reheating, cut them into uniform pieces before storing so they warm evenly in a skillet or microwave.

    If you prefer mashed sweet potatoes, peel and boil cubed potatoes until tender, drain, mash with a little butter or oil, and cool before portioning into containers. Reheat with a splash of water or milk if the texture tightens in the fridge.

    Use prepped sweet potatoes in breakfast hash with eggs, as a side for chicken or beans, or blended into oatmeal. If they taste dry after reheating, toss them with a teaspoon of oil or a squeeze of lemon juice before serving. If they develop an off smell or slimy texture, discard them. If you have any medical conditions that affect how you handle carbohydrates or food safety, check with a doctor before making major changes to your routine.

    If you want this in more depth, our book Healthy Lunchbox Recipes: Practical Meal Prep for Busy Adults covers it step by step.

    How to Meal Prep Chicken Breast for the Week

    Cooking chicken breast in bulk is one of the easiest ways to have ready-to-eat protein for lunches and dinners. Start with two to three pounds of boneless skinless chicken breasts. Pat them dry with paper towels and season simply with salt, pepper, and any dried herbs you already have, such as garlic powder, paprika, or Italian seasoning.

    Preheat your oven to 400 degrees Fahrenheit. Place the breasts on a rimmed baking sheet lined with parchment foil or a silicone mat, leaving space between pieces. Bake for 18 to 22 minutes, or until the thickest part reaches 165 degrees Fahrenheit on an instant-read thermometer. Let the chicken rest for five minutes before slicing or shredding.

    If you prefer the stovetop, heat a skillet over medium heat with a little oil. Cook the breasts for about six to seven minutes per side, then cover and cook a few more minutes until done. Slicing breasts in half horizontally before cooking helps them cook faster and more evenly.

    Store cooked chicken in airtight containers in the refrigerator for up to four days. For longer storage, portion cooled chicken into freezer bags or containers and freeze for up to three months. Thaw overnight in the refrigerator before reheating.

    If the chicken turns out dry, slice it thin and toss with a little broth, olive oil, or your favorite sauce before reheating. Use prepped chicken in grain bowls, salads, wraps, tacos, or stirred into soups. Many people find that cooking once and eating several times makes weekday meals feel less rushed. Check with a doctor if you have questions about food safety or dietary needs.

    How to Meal Prep Smoothies for the Week

    Smoothies are one of the fastest ways to prep breakfast or snacks for several days. The trick is to prep the solid ingredients ahead of time rather than blending everything on Sunday, which can cause separation and off flavors by Thursday.

    Start with freezer-safe bags or containers. For each smoothie, portion out one cup of frozen fruit such as berries, mango chunks, or sliced banana, plus a handful of spinach or kale if you like greens. Add a spoonful of nut butter, a few oats, or chia seeds if you want more staying power. Seal the bag, label it with the contents, and freeze flat. When you are ready to blend, dump one bag into the blender, add liquid to cover, and blend until smooth.

    For liquid, keep shelf-stable options like almond, oat, or dairy milk in the pantry, and pour it fresh each morning. If you prefer to prep fully blended smoothies, fill airtight bottles leaving an inch of headspace, refrigerate for up to two days, and shake well before drinking. Separation is normal and not a sign of spoilage.

    If your smoothie tastes bland, add a squeeze of lemon, a pinch of cinnamon, or a date. If it is too thick, add more liquid; too thin, add more frozen fruit or a spoonful of yogurt. Many people find that rotating two or three flavor combos keeps the week interesting without adding prep time. If you have any health conditions or take medication, check with a doctor before making major changes to your diet.

    Building a Full Weekly Menu from Simple Pantry Staples

    Start by choosing one protein, one starch, one vegetable, and one breakfast item you already have or can buy cheaply. Chicken breast, sweet potatoes, eggs, and a frozen vegetable make a reliable core. Cook the protein and starch in large batches on your prep day, then divide them into containers before adding sauces or toppings. This keeps textures from getting soggy and lets you change flavors through the week.

    A simple weekly frame might look like this:

    • Monday: breakfast burrito, chicken and sweet potato bowl with steamed broccoli
    • Tuesday: breakfast sandwich, chicken and sweet potato bowl with frozen spinach
    • Wednesday: smoothie, leftover chicken and sweet potato with canned beans
    • Thursday: breakfast burrito, chicken and sweet potato with jarred salsa
    • Friday: breakfast sandwich, chicken and sweet potato with a quick egg on top

    Use pantry staples such as canned beans, jarred salsa, dried spices, rice, oats, and peanut butter to add variety without extra cooking. Rotate two or three sauces so the same base ingredients taste different each day. If a meal turns out too dry, stir in a spoonful of salsa, broth, or yogurt before reheating. If vegetables get soft, use them in a soup or mash them into the grain.

    Keep breakfasts separate from lunches and dinners until you are ready to eat. Many people find that writing the menu on the fridge door removes decision fatigue on busy weeknights. If you have health conditions or take medication that affects your diet, check with a doctor before making major changes to what you eat regularly.

    Putting It Together

    Start with a Sunday afternoon block of about two hours. Cook your chicken breasts and roast your sweet potatoes while eggs and burrito fillings come together on the stove. Portion everything into containers while still warm, then let them cool before sealing and refrigerating. Blend smoothie packs into freezer bags so mornings only require a blender and liquid.

    Keep the first week small. Prep breakfasts and lunches only, and leave dinners flexible. If chicken turns out dry, chop it and toss it with broth or salsa before reheating. If sweet potatoes get soft, mash them and use them as a base for bowls or burritos. If a container leaks or a bag tears, move the food to a clean container right away and use it within a day or two.

    A simple first week might look like:

    • Sunday: cook proteins and roast vegetables, assemble burritos and sandwiches, freeze smoothie packs
    • Monday through Friday: grab breakfast and lunch from the fridge, blend a smoothie pack with water or milk
    • Wednesday: check containers, eat anything nearing its date, and cook a fresh dinner if needed

    Many people find that starting with just two or three repeat meals reduces decision fatigue without requiring a perfect system. If you have health conditions that affect what you can eat or store safely, check with a doctor before changing your routine. Adjust portions and timing to fit your own kitchen and schedule.

    More from the blog

    From FitLife Solutions

    Our book Healthy Lunchbox Recipes: Practical Meal Prep for Busy Adults goes further, as a digital eBook (PDF and EPUB) you can read on any device.

    Browse all our practical health and fitness guides at fitlifesolutions.site.

    New practical health guides and articles on WhatsApp: follow our channel.

    Earn by sharing our books with your audience: join our affiliate channel on Telegram for one ready-to-post book a day.

    This article is for general information only and is not a substitute for professional medical advice. Talk to your doctor or another qualified health professional before changing your diet, exercise or health routine, especially if you have a medical condition or take medication.
  • How to Pack Nutritious Work Lunches Without a Microwave, Fridge, or Cooking

    How to Pack Nutritious Work Lunches Without a Microwave, Fridge, or Cooking

    Packing lunch when your workplace has no microwave, no fridge, and no way to heat anything up forces you to think differently about food safety, texture, and satisfaction. This guide is for anyone who eats at a desk, in a vehicle, on a job site, or in a break room with only a plug for a kettle — people who need a real meal that travels at room temperature and still tastes good at noon.

    After reading, you will be able to:

    • Build a shelf-stable pantry of proteins, fats, and carbs that require no cooking
    • Assemble balanced cold-plate lunches and mason jar salads that stay crisp and safe until lunch
    • Pack snack-style bento boxes that deliver steady energy through long shifts
    • Apply food safety rules using insulated bags, ice packs, and time limits for perishables
    • Run a simple weekly prep routine so you never scramble in the morning

    No special equipment, no reheating, and no compromise on nutrition or flavor.

    Building a No-Cook, No-Chill Pantry: Shelf-Stable Proteins, Fats, and Carbs

    Start with proteins that need no refrigeration until opened. Canned fish — sardines, mackerel, salmon, light tuna — deliver omega-3s and 15 to 25 grams of protein per tin; choose water- or olive-oil-packed versions and drain well. Foil pouches are lighter and eliminate the can opener. Shelf-stable chicken or turkey packets work similarly. For plant options, keep vacuum-sealed lentils, black beans, or chickpeas on hand; they’re ready to eat after a rinse if you have a sink, or straight from the pouch if you don’t. Jerky, biltong, and meat sticks add chew and salt; look for brands with under 400 milligrams sodium per serving. Nut butters — peanut, almond, sunflower — supply fat and protein in squeeze packets or small jars. Hard cheeses like aged cheddar, gouda, or parmesan wedges can sit at cool room temperature for a day; wax-coated mini rounds last longer. Individual hummus cups and tahini packets round out the spreadable category.

    • Canned or pouched fish (sardines, mackerel, salmon, tuna)
    • Shelf-stable chicken or turkey packets
    • Vacuum-sealed cooked beans and lentils
    • Jerky, biltong, or low-sodium meat sticks
    • Single-serve nut butter packets
    • Wax-coated hard cheese mini rounds
    • Individual hummus or tahini cups

    Healthy fats keep energy steady. Packets of olives, roasted nuts, seeds, or trail mix with no added sugar travel without bruising. Avocado oil or extra-virgin olive oil mini bottles let you dress greens at the desk. For carbs, choose intact grains that don’t turn gummy: microwaveable rice or quinoa pouches (eat cold), precooked farro, or whole-grain crackers with at least three grams of fiber per serving. Dense breads like rye crisps, whole-wheat pita, or sprouted-grain tortillas hold up better than sliced sandwich bread. Dried fruit — unsweetened apricots, figs, raisins — adds quick glucose and fiber; pair with nuts to blunt the sugar spike. Store everything in a designated drawer or tote so you can grab, pack, and go without rummaging.

    Assembling Balanced Cold-Plate Lunches: Protein, Produce, and Flavor Without Reheating

    Start with a sturdy protein base that needs no heating: canned fish, smoked tofu, hard salami, or pre-cooked lentils from a shelf-stable pouch. Drain well and pat dry so excess liquid doesn't turn other components soggy. Layer in produce that holds up for hours — think shredded carrots, thinly sliced radishes, bell pepper strips, cherry tomatoes halved, or marinated artichoke hearts. Avoid delicate greens unless you pack them in a separate small container. Add a fat source for satiety and flavor: a spoonful of olive tapenade, a few olives, a drizzle of tahini, or a small wedge of aged cheese wrapped in parchment.

    Build flavor without a stove by using pantry acids and aromatics. A quick toss of protein and vegetables with lemon juice, vinegar, mustard, capers, or a spoonful of pesto wakes everything up. Sprinkle with seeds, nuts, or crispy fried onions just before eating to keep texture. Many people find that letting the assembled plate sit for ten minutes before packing allows flavors to meld without wilting.

    • Use a divided container or silicone cups to keep wet and dry items apart until lunch.
    • Pack a small jar of extra dressing or sauce to refresh the plate if it looks dry.
    • Include a whole-grain cracker, flatbread, or rice cake on the side for scooping.
    • If a component turns mushy or smells off, discard it and rely on the shelf-stable backups in your bag.

    Mason Jar Salads and Grain Bowls That Stay Crisp and Safe All Morning

    The secret to a mason jar salad that still crunches at noon is strict layering. Start with the heaviest, wettest ingredients at the bottom and finish with the lightest, driest on top. Pour two tablespoons of vinaigrette or hummus-thinned lemon juice into the jar first. Add a dense grain such as quinoa, farro, or pre-cooked brown rice — these absorb flavor without turning mushy. Next, layer sturdy vegetables: chickpeas, diced cucumber, shredded carrot, bell pepper strips, and cherry tomatoes halved. Follow with shelf-stable proteins like canned tuna, smoked salmon pouches, or marinated tope cubes. Sprinkle nuts, seeds, or roasted chickpeas for fat and crunch. Top with delicate greens — baby spinach, arugula, or torn romaine — pressed down gently. Seal the jar and keep it upright in an insulated bag with a slim ice pack against the metal lid.

    For grain bowls that travel in a rectangular container, use the same bottom-up logic but keep the dressing in a separate tiny jar. Cook grains the night before, spread them on a sheet pan to steam-dry, then portion. Roasted sweet potato cubes, pickled onions, and olives hold texture for hours. Add fresh herbs at the very top so they stay bright.

    • Dressing on the bottom or on the side — never in the middle.
    • Dry grains thoroughly; surface moisture creates soggy lettuce.
    • Pack a fork and a napkin; shaking the jar mixes everything evenly.
    • If the bag warms up, eat within four hours or toss the jar — safety first.

    Snack-Style Bento Boxes: Modular Nutrition for Long Desk Hours

    Think of a bento box as a choose-your-own-adventure lunch: small compartments keep flavors separate, portions stay reasonable, and you can graze across the afternoon without a single reheating step. Start with a sturdy container that has three to four sections or use silicone cups inside a larger box to create your own dividers.

    Build each box around a shelf-stable protein anchor. Tinned fish, smoked tofu, hard-boiled eggs (eaten within four hours of packing), vacuum-sealed chicken strips, or marinated tempeh all hold up well. Add a fat source for satiety — olives, nuts, seeds, a packet of nut butter, or a few cubes of aged cheese that tolerates cool room temperatures. For carbohydrates, include whole-grain crackers, rice cakes, a small wrap, or a portion of pre-cooked quinoa or farro tossed with olive oil and lemon so it doesn't clump.

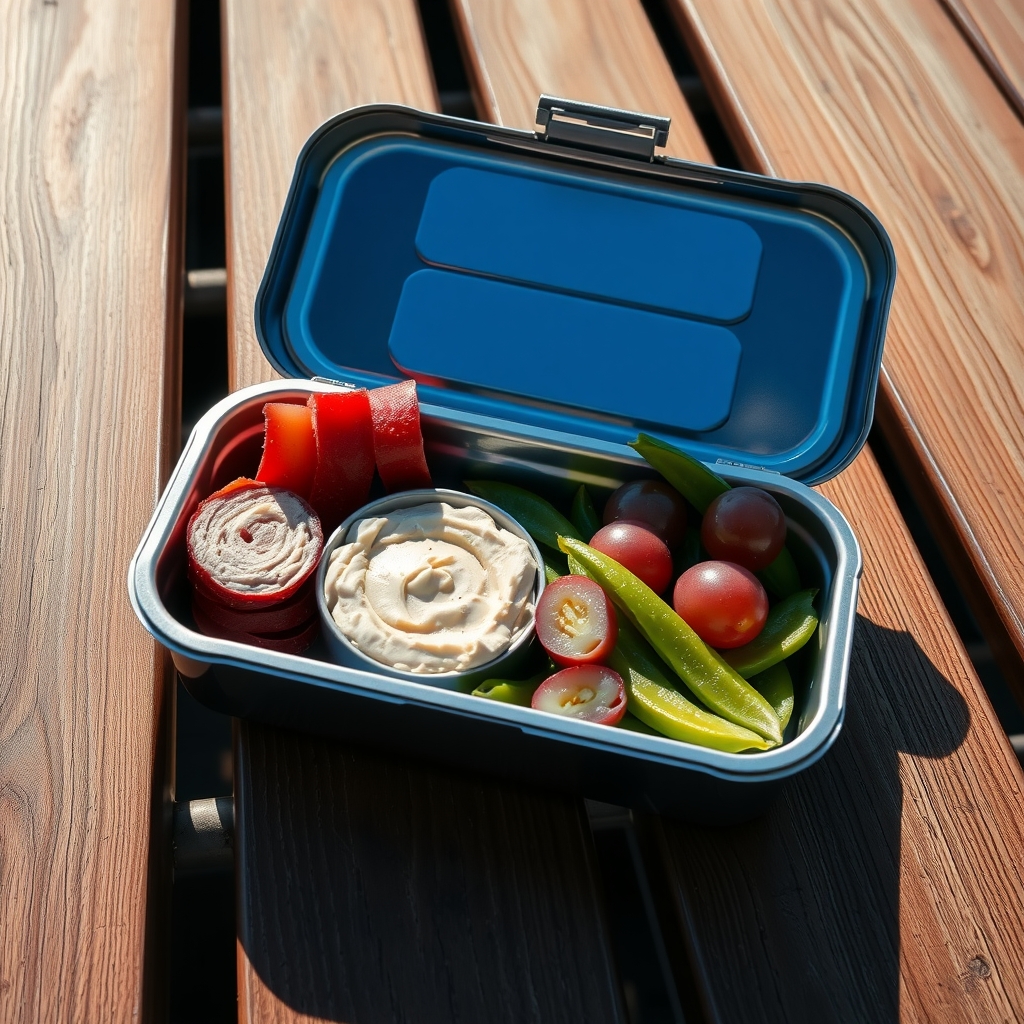
    Fill the remaining spaces with produce that travels crisp. Snap peas, baby carrots, radish halves, cucumber spears, grape tomatoes, and apple slices (tossed with a squeeze of lemon) stay firm for hours. A tiny container of hummus, tahini drizzle, or mustard gives you a dip without needing a spoon.

    • Pack a wet wipe and a fork so you can eat at your desk without a trip to the kitchen.
    • If a compartment leaks, silicone cups contain the mess and keep crackers dry.
    • Rotate proteins and produce weekly to avoid flavor fatigue; many people find a Sunday "component prep" session makes assembly take under five minutes each morning.
    • When the workday runs late, the modular layout lets you eat a little now and save the rest without the whole meal warming up.

    If you want this in more depth, our book Healthy Grilling: Simple Techniques for Nutritious Outdoor Cooking covers it step by step.

    Food Safety Strategies: Insulated Bags, Ice Packs, and Time Limits for Perishables

    An insulated lunch bag is your first line of defense. Choose one with a thick foam or reflective lining and a zippered closure that seals completely. Soft-sided bags pack flatter in a backpack, while boxier versions hold containers upright and reduce leaks. Place a frozen gel pack or a frozen water bottle against the most perishable item — usually the protein or a dairy-based dip — and put a second pack on top if the commute exceeds thirty minutes. A frozen bottle doubles as cold drinking water by lunchtime.

    Pack the bag tightly; air gaps warm faster than a full load. If you have space, tuck a small kitchen towel around containers to limit movement and add insulation. Keep the bag out of direct sun, off a hot car seat, and away from radiators or servers at the office. A desk drawer or a shaded corner works well.

    Follow the two-hour rule for anything that normally lives in a fridge: cut fruit, hummus, hard-boiled eggs, cheese, deli meat, yogurt, or cooked grains. The clock starts when the food leaves home refrigeration. If your commute plus morning meeting time pushes past two hours, swap one perishable component for a shelf-stable alternative — think canned fish, jerky, nut butter, or whole fruit with intact skins.

    • Freeze packs solid the night before; partially frozen packs lose cooling power quickly.
    • Use a fridge thermometer inside the bag occasionally; it should read 40°F or below when you open it at lunch.
    • Discard any perishable that smells off, looks slimy, or has been above 40°F for more than two hours.
    • Wipe the bag interior weekly with a diluted vinegar solution to control odor and bacteria.

    Weekly Prep Routines: Batch-Washing Produce, Portioning Proteins, and Rotating Menus

    Set aside 30 minutes on Sunday to turn your pantry staples into grab-and-go components for the week. Start with produce: fill a large bowl with cool water and a splash of vinegar, submerge sturdy vegetables like carrots, bell peppers, cucumbers, and cherry tomatoes, then spin dry in a salad spinner or pat thoroughly with clean towels. Moisture is the enemy of crisp texture, so ensure everything is bone-dry before storing in airtight containers lined with a paper towel to absorb residual dampness. Delicate greens such as spinach or arugula keep best washed, spun, and stored separately in a rigid container so they don't get crushed.

    Portion proteins next. Drain and rinse canned beans, chickpeas, or lentils; divide into half-cup servings in small containers or silicone cups. Open packets of tuna, salmon, or chicken and mix single servings with a spoonful of shelf-stable mayo, mustard, or olive oil plus herbs so they're seasoned and ready to dump onto a salad or into a wrap. Hard-boiled eggs (if you have stove access once a week) peel and store submerged in water to stay moist. Nut butters, seed packs, and individually wrapped cheese rounds or shelf-stable salami sticks can be counted out into daily allotments.

    Rotate menus by choosing two "base" grains such as pre-cooked quinoa pouches, instant rice, or couscous and two flavor profiles — perhaps Mediterranean with olives, feta, and lemon-herb dressing one week, and Southwest with black beans, corn, cumin-lime vinaigrette the next. Pre-portion dressings into leak-proof jars; shake before adding. Keep a running list on your phone of what you packed each day so you don't repeat the same combo three times in a row. When something turns mushy or smells off, toss it immediately and swap in a backup shelf-stable item from your desk stash.

    Putting It Together

    Start Sunday by washing and drying a week’s worth of sturdy produce — carrots, bell peppers, cucumbers, cherry tomatoes, snap peas — and storing them in lined containers so they’re ready to grab. Portion shelf-stable proteins into small jars or bags: canned tuna, salmon, chicken, beans, lentils, hard cheeses, nuts, seeds, and jerky. Cook a batch of quinoa, farro, or rice if you have stove access; otherwise pick up precooked pouches. Assemble three mason jar salads layering dressing, grains, protein, veg, and greens on top; seal and refrigerate. Pack two bento boxes with crackers, cheese, olives, fruit, hummus packets, and nut butter. Place everything in an insulated bag with two frozen gel packs each morning. Monday through Wednesday eat the jars; Thursday and Friday eat the bento boxes. Keep a backup stash at your desk: single-serve tuna, whole-grain crackers, a nut butter packet, and a piece of fruit that travels well. If a pack warms up or you forget it, swap in the backup and move the chilled meal to the next day. Adjust portions after day three based on hunger and schedule.

    More from the blog

    From FitLife Solutions

    Our book Healthy Grilling: Simple Techniques for Nutritious Outdoor Cooking goes further, as a digital eBook (PDF and EPUB) you can read on any device.

    Browse all our practical health and fitness guides at fitlifesolutions.site.

    New practical health guides and articles on WhatsApp: follow our channel.

    Earn by sharing our books with your audience: join our affiliate channel on Telegram for one ready-to-post book a day.

    This article is for general information only and is not a substitute for professional medical advice. Talk to your doctor or another qualified health professional before changing your diet, exercise or health routine, especially if you have a medical condition or take medication.
  • How to Cook for One Without Food Waste

    How to Cook for One Without Food Waste

    Cooking for one often feels like a battle against package sizes and perishable timelines. You buy a bunch of cilantro for one recipe and watch the rest turn to slime, or you cook a pot of chili that haunts your fridge for a week until you toss it. This guide is for anyone tired of that cycle — whether you live alone, travel for work, or simply eat on a different schedule than your household.

    After reading, you will be able to:

    • Shop for exactly what you need using bulk bins, deli counters, and strategic frozen aisles
    • Plan overlapping meals so a single ingredient — like a roasted chicken or a block of tofu — feeds you three different ways
    • Assemble satisfying no-cook plates when the stove stays off
    • Prepare proteins and grains using only hot water, a microwave, or acid
    • Freeze single portions the night you cook them so nothing lingers
    • Turn stems, peels, and herb roots into stocks, pestos, and crisp toppings
    • Organize your fridge and freezer with zones and labels that prevent forgotten food

    You will waste less, spend less, and eat better — without cooking every night.

    Strategic Grocery Shopping for Single-Serve Portions

    Buying for one means ignoring the "family size" logic that dominates most grocery stores. Start with a loose meal map for the next four to five days — just proteins, a grain base, and two or three vegetables you genuinely like — so you walk in with a filter instead of a wish list. Head straight for the bulk bins and the service counters. Ask the butcher for a single chicken thigh, two pork chops, or a quarter pound of ground turkey; most will rewrap it gladly. At the fish counter, request one portion sized for your pan. In produce, choose loose items over bags: three carrots, half a head of cabbage, a handful of green beans. Many stores will split a bunch of kale or a bag of grapes if you ask at the service desk.

    • Treat the salad bar and olive bar as your portion-controlled pantry: grab exactly the roasted beets, chickpeas, or marinated artichokes you need for tonight's grain bowl.
    • Buy herbs as living plants in small pots; snip what you need and keep the rest alive on a windowsill.
    • Choose eggs in six-packs or cartons of eight, and dairy in single-serve cups or small blocks you can grate yourself.
    • Skip pre-cut fruit and veg unless you'll use every piece today; the premium price and shorter shelf life work against you.

    If plans shift — a late meeting, a dinner invite — pivot immediately. Raw meat goes into the freezer in a labeled bag that night. Wilted greens become pesto or soup base. A half-avocado gets a squeeze of lemon, tight wrap, and a spot in the fridge for tomorrow's toast. The goal isn't perfection; it's a system that absorbs change without creating waste.

    Mastering Ingredient Cross-Utilization Across Meals

    The core strategy for cooking solo without waste is designing a "component map" before you shop. Pick three versatile base ingredients — one hearty green, one neutral grain, one adaptable protein — that can pivot across cuisines and textures for five to seven days. A bunch of kale, a cup of dry farro, and a block of firm tofu (or a dozen eggs) cover breakfast, lunch, and dinner with zero repetition fatigue.

    Start by prepping each component in its most neutral form. Wash and strip kale leaves; store stems separately for sautéing. Cook farro in unsalted water; spread on a tray to cool fast so grains stay distinct. Press tofu and cut into half-inch slabs, or boil eggs to medium. Keep everything plain in separate containers. Seasoning happens at assembly, not during prep, so the same farro becomes a lemon-herb breakfast bowl with a fried egg, a Mediterranean lunch with feta and olives, and a stir-fry base with soy-ginger glaze at dinner.

    • Breakfast: warm farro + wilted kale + runny egg + chili oil
    • Lunch: cold farro + massaged kale + cubed tofu + cucumber + tahini drizzle
    • Dinner: farro fried "rice" with kale stems, tofu crumbles, garlic, frozen peas
    • Snack: kale chips (stems too) baked with nutritional yeast

    When a component hits day four and texture shifts — farro gets sticky, kale wilts — pivot instantly. Blend wilted kale into pesto with nuts and cheese; freeze in an ice cube tray. Fry sticky farro into crisp cakes for a salad topper. Crumble aging tofu into a scramble with turmeric and nutritional yeast. The map isn't rigid; it's a decision tree that keeps you from staring at the fridge wondering what to make.

    No-Cook Assembly Meals Using Fresh Components

    Start with a sturdy base that requires zero heat: pre-washed salad greens, shredded cabbage, cooked grains from a pouch, or a bed of hummus spread on a plate. Layer on proteins that are ready to eat — canned beans rinsed well, smoked fish, boiled eggs from the store, cubed tofu marinated in soy sauce, or rotisserie chicken pulled into shreds. Add texture with raw vegetables sliced thin: radishes, cucumber, fennel, carrot ribbons made with a peeler, or snap peas halved lengthwise. Fruit brings brightness; try segmented orange, diced apple tossed with lemon juice, or a handful of berries.

    Finish with fat and acid. A drizzle of olive oil and vinegar works, but keep a few homemade dressings in small jars — lemon-tahini, miso-ginger, yogurt-dill — so assembly takes seconds. Sprinkle toasted nuts, seeds, or crumbled cheese last so they stay crisp.

    • Mediterranean jar: farro, chickpeas, cucumber, tomato, olives, feta, oregano, red wine vinaigrette
    • Asian slaw bowl: shredded cabbage, edamame, carrot, green onion, sesame-ginger dressing, cashews
    • Mexican plate: black beans, corn, avocado, pico de gallo, cotija, lime crema, tortilla chips for scooping

    If greens wilt faster than expected, blend them into a pesto with oil, nuts, and cheese — it keeps a week in the fridge and dresses pasta, eggs, or sandwiches. When canned beans taste flat, mash half with garlic, oil, and vinegar for an instant spread. A soft avocado? Mash it directly on toast with chili flakes and salt. The goal is a meal assembled in under ten minutes that feels complete, not compromised.

    Heat-Free Preparation Techniques for Proteins and Grains

    Canned fish, beans, and lentils are the backbone of heat-free protein. Drain a tin of sardines or mackerel, break it up with a fork, and toss it with lemon juice, chopped parsley, and a drizzle of olive oil; it’s ready for toast, crackers, or a bed of greens. For beans, rinse them well under cold water to cut sodium and the canned taste, then mash roughly with garlic powder, cumin, and a splash of vinegar for an instant dip or sandwich spread. Pre-cooked lentils from the refrigerated section need only a stir into vinaigrette and diced vegetables for a composed salad that holds for days.

    Grains that hydrate without heat save the most time. Couscous works by pouring boiling water over it, but bulgur wheat and rolled oats soften in cold liquid given enough hours. Combine a half-cup of bulgur with double the water or broth in a jar, shake, and refrigerate overnight; the grains plump fully and stay distinct. Quick oats turn creamy in yogurt or milk within twenty minutes — stir in chia seeds to thicken further. For rice, the only reliable no-heat route is pre-cooked pouches or freezing your own portions ahead (see the batch-cook section).

    • Sardines + lemon + herbs = protein base for three lunches
    • Rinsed canned beans + acid + spice = spread, filling, or salad topper
    • Bulgur or oats + cold liquid + time = ready-to-eat grain component
    • Pre-cooked lentils + vinaigrette + raw veg = complete bowl in two minutes

    If a grain stays hard after soaking, it’s usually too coarse for cold hydration — switch to a finer grade or use a pre-cooked version next time.

    If you want this in more depth, our book One-Pot Healthy Dinners: Simple Weeknight Cooking Made Practical covers it step by step.

    Single-Serve Batch Cooking with Immediate Freezing

    Cook a full recipe once, portion it immediately, and freeze the extras before they ever sit in the fridge long enough to spoil. This works best with dishes that hold moisture and texture after thawing: chili, lentil stew, bolognese, curry, cooked beans, and tomato-based sauces. Avoid freezing dishes heavy on cream, potatoes, or delicate greens; they tend to separate or turn mushy.

    Let the finished dish cool slightly — no more than an hour on the counter — then ladle into single-serve containers. Silicone muffin trays or 1-cup freezer jars work well; once frozen solid, pop the blocks into a labeled freezer bag to save space. Write the dish name and date on the bag with a marker. Most of these meals stay good for two to three months.

    Reheat straight from frozen in a microwave-safe bowl with a splash of water or broth, covered loosely, stirring halfway through. Or transfer a portion to the fridge the night before for a faster warm-up. If a sauce looks thin after thawing, simmer it uncovered for a few minutes; if it’s too thick, stir in a little stock or water.

    • Freeze cooked grains (rice, quinoa, farro) in ½-cup pucks on a parchment tray, then bag them.
    • Portion pesto, chimichurri, or herb-oil blends into ice-cube trays for instant flavor later.
    • Label everything; mystery blocks rarely get eaten.

    If a batch develops freezer burn, trim the affected edges and use the rest in a soup or casserole where texture matters less.

    Repurposing Scraps and Stems into New Dishes

    Turn broccoli stems into slaw instead of compost. Peel the tough outer layer with a vegetable peeler, then grate the tender core on a box grater or slice it into matchsticks. Toss with a splash of rice vinegar, a pinch of salt, and a drizzle of sesame oil for a side that lasts three days in a sealed jar. Carrot tops, often discarded, work like parsley: wash well, chop fine, and stir into grain bowls, compound butter, or a quick chimichurri for grilled tofu. The same goes for fennel fronds, radish greens, and beet leaves — sauté the latter with garlic and a squeeze of lemon for a warm salad component.

    Citrus peels have multiple lives. Before juicing a lemon or lime, zest the peel and freeze it in a small bag for baked goods or marinades. The spent halves can simmer in water with a cinnamon stick to deodorize the kitchen, then go down the garbage disposal to freshen it. Aquafaba, the liquid from a can of chickpeas, whips into a foam that replaces egg whites in mousses or meringues; freeze it in an ice-cube tray if you won't use it immediately.

    Stale bread ends become pangrattato: pulse in a food processor, toast in a dry pan with olive oil and garlic, then sprinkle over pasta or roasted vegetables. Herb stems — cilantro, parsley, dill — blend into green sauces or freeze in oil cubes for later sauté bases. Onion and garlic skins, plus carrot and celery ends, collect in a freezer bag until you have enough for a light vegetable stock; simmer thirty minutes, strain, and portion into jars for soup starters.

    When a scrap experiment fails — bitter broccoli peel, fibrous kale stems — compost without guilt. The goal is habit, not perfection.

    Smart Storage Systems to Extend Perishable Life

    The crisper drawer is where good intentions go to wilt. A few simple habits keep produce alive long enough to actually eat it. Wash berries only when you are ready to eat them; excess moisture invites mold. Store them in a single layer on a paper towel inside a container with the lid cracked. Leafy greens last longer if you roll them loosely in a clean kitchen towel before placing them in a bag — the towel absorbs condensation without drying the leaves out. Herbs like parsley and cilantro treat like cut flowers: trim the stems, stand them in a jar with an inch of water, cover loosely with a produce bag, and refrigerate. Basil prefers room temperature on the counter.

    • Onions and potatoes need cool, dark, separate spots; gases from onions make potatoes sprout faster.
    • Tomatoes stay on the counter stem-side down until fully ripe, then move to the fridge to pause aging.
    • Avocados ripen on the counter; once yielding, refrigerate to hold that perfect window for days.
    • Cut vegetables such as carrots, celery, and radishes stay crisp submerged in water in a sealed jar — change the water every two days.
    • Cheese breathes best wrapped in parchment or wax paper, then placed loosely in a plastic bag.

    Freeze anything you will not use in three days. Portion cooked grains, beans, and sauces into silicone muffin cups or small containers; pop them out once frozen and store in a labeled bag. Label everything with contents and date using painter's tape and a marker — it peels off clean. A quarterly freezer inventory prevents mystery blocks from becoming waste. Many people find that treating storage as active maintenance rather than passive holding cuts spoilage dramatically.

    Putting It Together

    Start with a simple framework: pick three proteins, four vegetables, and two grains that overlap across at least five meals. Shop once using the bulk-bin and loose-produce approach so you buy only what the plan calls for. Spend thirty minutes on Sunday washing greens, portioning proteins into single-serve bags, and cooking one pot of grains to cool and freeze in silicone cups. Keep a magnetic notepad on the fridge listing each component and its use-by date; cross items off as they go into a meal.

    Monday through Wednesday, build no-cook bowls: canned beans or smoked fish, pre-washed greens, chopped raw vegetables, a scoop of frozen grain thawed under warm water, and a drizzle of vinaigrette. Thursday and Friday, use the same vegetables in quick heat-free wraps or salads with the remaining protein. Saturday, turn any wilting herbs and vegetable stems into a pesto or stir them into a fried-rice-style pan with the last grain portion. Sunday, assess what remains — freeze, pickle, or blend into soup base.

    • Choose overlapping ingredients before you shop
    • Prep once, assemble daily
    • Track use-by dates visibly
    • Repurpose leftovers before they spoil

    More from the blog

    From FitLife Solutions

    Our book One-Pot Healthy Dinners: Simple Weeknight Cooking Made Practical goes further, as a digital eBook (PDF and EPUB) you can read on any device.

    Browse all our practical health and fitness guides at fitlifesolutions.site.

    New practical health guides and articles on WhatsApp: follow our channel.

    Earn by sharing our books with your audience: join our affiliate channel on Telegram for one ready-to-post book a day.

    This article is for general information only and is not a substitute for professional medical advice. Talk to your doctor or another qualified health professional before changing your diet, exercise or health routine, especially if you have a medical condition or take medication.
  • How to Build a Balanced Breakfast Bowl Using Oats, Yogurt, and Seasonal Fruit

    How to Build a Balanced Breakfast Bowl Using Oats, Yogurt, and Seasonal Fruit

    Mornings often feel rushed, and it can be tempting to grab something quick that leaves you hungry again by mid-morning. This guide is for anyone who wants a straightforward way to build a breakfast that actually holds you over until lunch — whether you are feeding a family, packing a jar for a commute, or just trying to eat more whole foods without a complicated recipe.

    By the end, you will be able to:

    • Choose oats that give you the texture and staying power you prefer
    • Pick a yogurt that fits your dietary needs, from dairy to plant-based
    • Select fruit at its peak for the best flavor and nutrition
    • Layer ingredients so every bite delivers a balance of protein, fiber, and healthy fats
    • Add crunch and natural sweetness without relying on refined sugar
    • Assemble a bowl that looks appealing and eats well from the first spoonful to the last

    No special equipment or obscure ingredients required — just a simple formula you can adapt to what you have on hand.

    Choosing the Right Oats for Texture and Nutrition

    The type of oats you choose sets the foundation for both the texture and the staying power of your bowl. Rolled oats, often labeled old-fashioned, are steamed and flattened, giving them a tender chew that softens quickly when mixed with yogurt. They hold their shape well enough to provide a pleasant bite but absorb moisture fast, making them ideal if you assemble your bowl just before eating. Steel-cut oats are simply chopped whole groats; they keep a distinct, nutty firmness even after soaking. Because they take longer to break down, they can help the breakfast feel more substantial for hours. If you prefer a creamy, almost pudding-like consistency, quick oats or instant varieties work well, though they tend to digest more rapidly and may leave you hungry sooner.

    Nutritionally, all three forms start as whole grains and deliver similar amounts of fiber, protein, and micronutrients per dry weight. The main differences lie in processing and glycemic impact. Less processed options like steel-cut and thick rolled oats generally have a lower glycemic index, meaning they release energy more gradually. Many people find this helps maintain steady focus through the morning. Quick oats are still a wholesome choice, especially when paired with protein and fat from yogurt and nuts, which further slow digestion.

    • Rolled oats: soft chew, ready in minutes, versatile for hot or cold prep
    • Steel-cut oats: hearty texture, best soaked overnight or cooked ahead
    • Quick oats: very soft, fastest to prepare, mild flavor

    If you have specific blood-sugar concerns or digestive sensitivities, checking with a doctor or dietitian can help you decide which variety fits your needs best.

    Selecting Yogurt Types to Match Dietary Goals

    The yogurt layer does more than add creaminess — it anchors the bowl with protein that steadies blood sugar and keeps hunger at bay. Plain varieties let you control sweetness while delivering live cultures that support digestion. Greek and Icelandic skyr tend to be thicker and higher in protein per spoonful, which many people find helpful for staying full through a busy morning. Regular plain yogurt offers a lighter texture and often more calcium per serving, making it a solid choice if you prefer a looser consistency. For plant-based eaters, unsweetened soy yogurt usually comes closest to dairy in protein content, while almond, oat, and coconut versions vary widely — check the label for at least 5 to 6 grams of protein per cup and minimal added gums or starches.

    Fat level is another lever you can pull. Full-fat yogurt carries fat-soluble vitamins and creates a richer mouthfeel that can reduce the urge to over-sweeten later. Low-fat and nonfat options cut calories but sometimes compensate with thickeners or extra sugar, so reading the ingredient list matters more than the front-of-package claim. If you’re managing cholesterol or following a specific medical plan, your doctor or dietitian can help you decide which fat level fits best.

    A quick checklist when you’re standing in the dairy aisle: – Choose plain over flavored to avoid hidden sugars – Look for “live and active cultures” on the seal – Aim for at least 10 grams of protein per ¾-cup serving – Skip versions with artificial sweeteners if you prefer a clean label – Stir well before scooping — whey separation is normal and harmless

    Taste a spoonful plain first; the tang tells you it’s fresh and gives you a baseline for how much fruit or drizzle of honey you’ll actually want.

    Identifying Peak-Season Fruits for Flavor and Freshness

    Choosing fruit at its seasonal peak means brighter flavor, better texture, and often a lower price tag. In spring, look for strawberries that smell sweet at the stem and rhubarb with crisp, glossy stalks. Summer brings juicy peaches, nectarines, and plums that yield slightly to gentle pressure, along with blueberries and raspberries that are plump and dry. Early fall offers figs that feel heavy for their size and apples with firm, unbruised skin. Winter citrus — oranges, mandarins, grapefruit — should feel dense and have smooth, brightly colored rinds.

    When you shop, use your senses. Smell the stem end of melons and stone fruit; a fragrant aroma usually signals ripeness. Berries should move freely in the container, not clump together in juice. For apples and pears, press near the stem — a slight give means ready to eat, while firmer fruit can sit on the counter for a few days. If you buy slightly underripe fruit, store it at room temperature away from direct sunlight, then refrigerate once it softens.

    • Spring: strawberries, rhubarb, early cherries
    • Summer: peaches, nectarines, plums, blueberries, raspberries, blackberries
    • Fall: figs, apples, pears, grapes, persimmons
    • Winter: oranges, mandarins, grapefruit, pomegranates, kiwi

    Many people find that mixing two textures — something soft like ripe peach slices and something firm like diced apple — keeps each bite interesting. If fresh options are limited, frozen fruit picked at peak ripeness works well; just thaw and drain excess liquid before layering. Wash all produce right before using, not before storing, to prevent mold. A quick rinse under cool water and a gentle pat dry is all most fruit needs.

    Balancing Macronutrients in Every Layer

    A satisfying breakfast bowl works because each layer contributes something different to the overall nutritional picture. Oats supply complex carbohydrates and soluble fiber that digest slowly, yogurt adds protein and calcium, and fruit brings natural sugars alongside vitamins and fiber. When these three components are present in roughly even visual proportions, the meal tends to deliver steady energy rather than a quick spike and crash. Many people find that aiming for about a half-cup of cooked oats, three-quarters of a cup of yogurt, and a cup of chopped fruit creates a balanced starting point, though individual needs vary.

    Protein is especially useful for satiety. Greek yogurt or skyr typically provides more protein per spoonful than regular yogurt, which can help the bowl keep you full longer. If you prefer plant-based yogurts, check the label — some varieties are quite low in protein, so you might stir in a spoonful of nut butter or sprinkle hemp seeds to close the gap. The oats themselves contribute a modest amount of protein, and pairing them with a higher-protein yogurt makes the combination more complete.

    Healthy fats round out the macronutrient profile and aid absorption of fat-soluble vitamins from the fruit. A tablespoon of chopped nuts, a sprinkle of ground flax, or a few pumpkin seeds adds richness without overwhelming the bowl. These additions also slow digestion slightly, which many people find extends the feeling of fullness.

    • Carbohydrates: oats and fruit for energy and fiber
    • Protein: yogurt, optionally boosted with nuts, seeds, or nut butter
    • Fat: nuts, seeds, or a drizzle of nut butter for staying power

    Adjust the ratios based on your appetite, activity level, and how the meal sits with you. If you have specific dietary goals or medical conditions, a registered dietitian or doctor can help fine-tune the proportions.

    If you want this in more depth, our book Grain Bowl Recipes: Building Balanced Meals with Whole Grains, Vegetables, and Proteins covers it step by step.

    Adding Crunch and Healthy Fats with Nuts and Seeds

    A handful of nuts or a spoonful of seeds turns a soft bowl into something with staying power. The contrast in texture wakes up the palate, while the healthy fats slow digestion and help the meal last until lunch. Walnuts bring a gentle bitterness that pairs well with sweet fruit, almonds add a clean crunch, and pecans offer a buttery richness. Pumpkin seeds contribute a subtle earthiness and a boost of minerals like magnesium and zinc. Chia and flax seeds absorb liquid and create a slight gel, thickening the yogurt layer without any extra effort. Toasting nuts in a dry skillet for a few minutes deepens their flavor and makes them crispier; let them cool completely before sprinkling so they don’t steam into sogginess.

    • Walnuts, almonds, pecans, or pistachios for crunch and omega-3s
    • Pumpkin seeds or sunflower seeds for mineral density and a nutty snap
    • Chia, ground flax, or hemp hearts for fiber and a creamy texture

    A tablespoon or two is usually enough. Many people find that mixing a few types keeps each bite interesting. If you’re watching sodium, choose raw or dry-roasted unsalted varieties. Those with nut allergies can rely on seeds alone for similar benefits. As with any dietary change, it’s wise to check with a doctor if you have specific health conditions or concerns about fat intake. Store nuts and seeds in the fridge or freezer to preserve their oils and prevent rancidity. A small jar on the counter makes it easy to grab a spoonful every morning.

    Sweetening Naturally Without Refined Sugar

    A touch of sweetness ties the bowl together, but you don't need refined sugar to get there. Ripe seasonal fruit often provides enough natural sugar on its own, especially when macerated briefly with a squeeze of lemon juice to draw out juices and concentrate flavor. If you want a little more, reach for whole-food options that bring minerals and fiber along with their sweetness.

    • A drizzle of raw honey or pure maple syrup adds floral or caramel notes; start with half a teaspoon and taste before adding more.
    • Medjool dates, pitted and blended into the yogurt, create a thick, caramel-like swirl with potassium and magnesium.
    • Unsweetened applesauce or mashed ripe banana can be stirred into the oats before soaking, distributing gentle sweetness through every bite.
    • A pinch of cinnamon, nutmeg, or cardamom amplifies the perception of sweetness without adding any sugar at all.

    Many people find that their palate adjusts quickly; after a week or two of less added sweetener, fruit tastes brighter and more satisfying. If you have specific health conditions such as diabetes, check with your doctor or a registered dietitian about the best natural sweeteners and portion sizes for your needs. The goal is a bowl that tastes delicious and supports steady energy, not a sugar spike.

    Assembling for Visual Appeal and Optimal Eating Order

    Start with a wide, shallow bowl so each layer stays visible and easy to reach. Spoon the cooked or soaked oats into the bottom, smoothing them gently with the back of the spoon to create an even base. Next, dollop the yogurt in the center and use a small offset spatula or the spoon's curve to spread it toward the edges, leaving a slight well in the middle for fruit juices to collect. This order — grains, then protein, then produce — helps the bowl hold its structure while you eat, so you get a bit of every component in each bite.

    Arrange the seasonal fruit in a pattern that feels natural to you: concentric circles, a diagonal sweep, or small clusters grouped by color. Slice larger pieces like peaches or strawberries thin enough to lie flat; leave berries whole for pops of contrast. If you're using a mix of textures — juicy melon, firm apple, soft fig — place the firmer items at the bottom of the fruit layer so they don't crush the delicate ones.

    Sprinkle nuts and seeds last, scattering them evenly across the surface so they stay crisp until the moment you eat. A drizzle of honey or maple syrup goes on just before serving, following the lines of your fruit design.

    • Use a spoon with a thin edge for clean layering
    • Chill the bowl briefly if the yogurt softens too quickly
    • Eat from the outside in to maintain the fruit arrangement longer
    • Keep extra toppings on the side for refreshing crunch mid-meal

    Putting It Together

    Start by picking one weekend morning to prep a batch of oats — overnight oats in jars or a pot of steel-cut oats that reheats well. Portion them into four containers so the base is ready on busy weekdays. While the oats cool, wash and slice enough seasonal fruit for three days; store berries unwashed in a paper-towel-lined container and keep stone fruit or melon in separate airtight boxes. Scoop yogurt into small jars or leave it in the original tub if you prefer spooning it fresh each morning. Toast a handful of nuts and seeds on a sheet pan, cool completely, then divide into snack-size bags.

    • Monday through Wednesday: layer oats, yogurt, fruit, and a sprinkle of nuts in a bowl or jar. Drizzle a little honey or maple syrup if you like.
    • Thursday and Friday: switch to a warm bowl — reheat oats with a splash of milk, top with yogurt, fresh fruit, and the remaining nuts.
    • Saturday: use leftovers for a freestyle bowl; add a spoonful of nut butter or a few dark chocolate chips if the mood strikes.
    • Sunday: reset. Wash containers, restock fruit, and make a new batch of oats for the coming week.

    Many people find this rhythm keeps decision fatigue low and breakfast satisfying without extra effort. Adjust portions to your appetite and check with a doctor if you have specific dietary needs.

    More from the blog

    From FitLife Solutions

    Our book Grain Bowl Recipes: Building Balanced Meals with Whole Grains, Vegetables, and Proteins goes further, as a digital eBook (PDF and EPUB) you can read on any device.

    Browse all our practical health and fitness guides at fitlifesolutions.site.

    New practical health guides and articles on WhatsApp: follow our channel.

    Earn by sharing our books with your audience: join our affiliate channel on Telegram for one ready-to-post book a day.

    This article is for general information only and is not a substitute for professional medical advice. Talk to your doctor or another qualified health professional before changing your diet, exercise or health routine, especially if you have a medical condition or take medication.
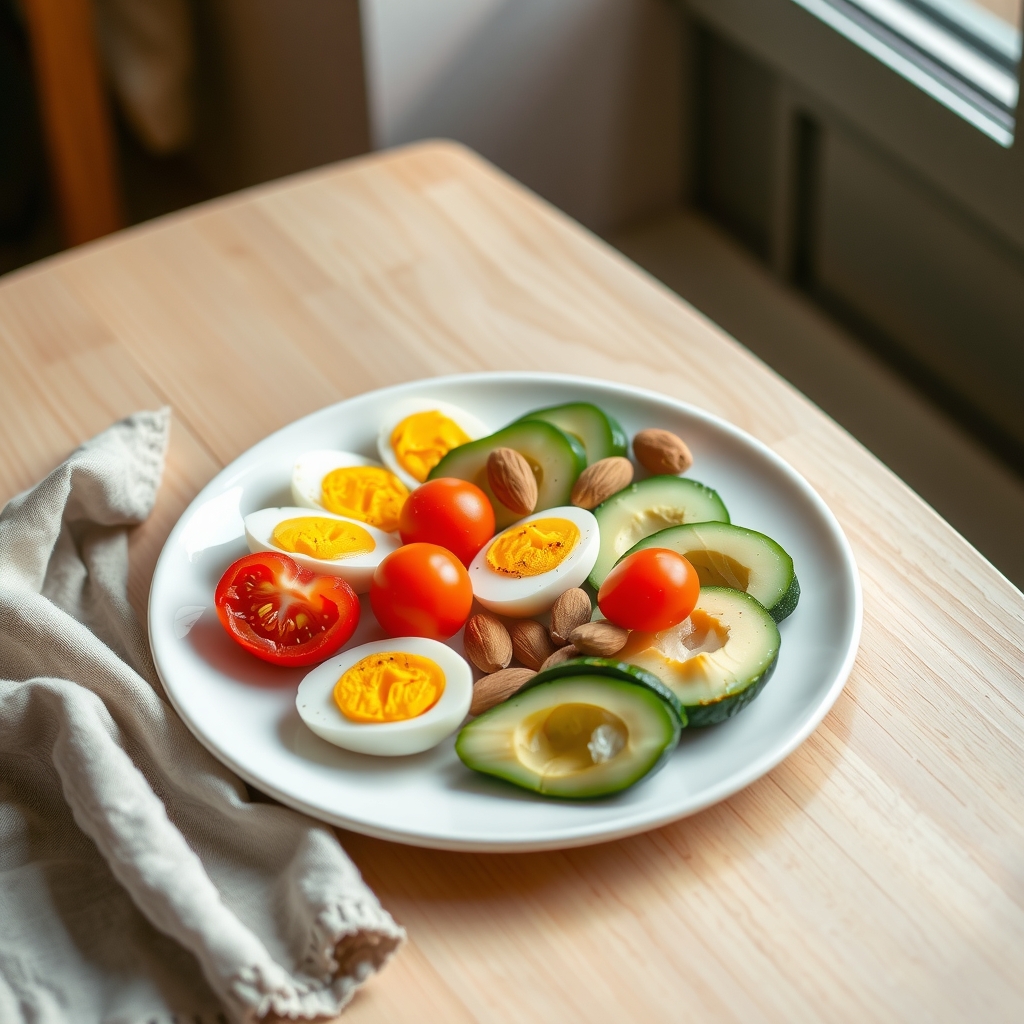
  • How to Pack a Nut-Free School Lunch That Stays Fresh Until Noon

    How to Pack a Nut-Free School Lunch That Stays Fresh Until Noon

    Packing a nut-free lunch that stays fresh until noon is a daily challenge for parents, caregivers, and anyone managing a school allergy policy. This guide is for you if you need reliable, food-safe methods that work with a morning rush and a lunchbox that sits at room temperature for hours. You will learn how to choose proteins, produce, and grains that hold their texture and safety without refrigeration, and how to layer sandwiches and wraps so they don't turn soggy. We cover practical ways to keep dairy or alternatives cold with strategic ice pack placement, plus crunchy snack ideas that stay crisp in reusable containers. You will also get a simple night-before prep routine that makes morning assembly quick and stress-free. By the end, you will be able to:

    • Build balanced, allergen-aware meals using whole foods instead of packaged snacks
    • Apply food-safety principles so everything tastes good and stays safe until lunch
    • Pack efficiently with the right containers and cooling gear for your child's bag

    Choosing Nut-Free Proteins That Hold Up Without Refrigeration

    Hard-boiled eggs are a lunchbox staple for good reason. When cooked until the yolk is fully set and kept in their shells until eating, they stay safe at cool room temperature for several hours. Peel them the night before, sprinkle lightly with salt, and tuck them into a small container with a silicone cupcake liner to prevent rolling. Many people find that a quick dip in ice water after boiling makes peeling easier and helps the eggs cool faster for packing.

    Roasted chickpeas offer a satisfying crunch and a solid hit of protein without any refrigeration needed. Toss canned chickpeas (rinsed and thoroughly patted dry) with olive oil and spices, then roast at 400°F until crisp. They hold their texture all morning in a vented container or a paper bag tucked inside the lunch box. For a softer option, a scoop of hummus in a leak-proof jar pairs well with crackers or veggie sticks — just keep the jar against an ice pack if the day will be warm.

    Sunflower seed butter and soy nut butter are reliable nut-free spreads that don't require cooling. Spread them thinly on whole-grain bread or a tortilla with a layer of banana slices or a drizzle of honey to keep the bread from drying out. Single-serve packets are handy for portion control and less mess.

    • Hard-boiled eggs (in shell until lunch)
    • Roasted chickpeas (fully crisp, cooled before packing)
    • Sunflower seed butter or soy nut butter packets
    • Shelf-stable turkey or chicken jerky (check labels for nut-free facilities)
    • Edamame (steamed, cooled, and lightly salted)

    Always pack these alongside a cold source if the classroom runs warm, and check with your child's school about any additional allergen policies beyond peanuts and tree nuts.

    Selecting Whole Fruits and Vegetables That Resist Bruising

    Whole fruits and vegetables that hold their shape through a morning in a backpack make packing easier and reduce waste. Choose varieties with firmer flesh and thicker skins, and handle them gently when washing and cutting. A quick rinse under cool water and a thorough pat-dry with a clean towel helps prevent excess moisture from softening the produce or creating condensation inside the container.

    Good candidates include apples, Asian pears, grapes, clementines, baby carrots, snap peas, cucumber spears, bell pepper strips, cherry tomatoes, and jicama sticks. These tend to resist bruising and maintain a pleasant texture for several hours at cool room temperature. If you prefer sliced apples or pears, toss the pieces in a little lemon juice or a commercial fruit preserver to slow browning; many people find this keeps them looking fresh until lunch.

    • Apples and Asian pears: slice or leave whole; pair with a small container of sunflower seed butter for dipping.
    • Grapes and berries: keep stems on grapes; pack berries in a rigid container so they don’t get crushed.
    • Clementines and mandarins: easy to peel and naturally portioned.
    • Baby carrots and snap peas: rinse and dry well; they stay crisp without extra prep.
    • Cucumber, bell pepper, jicama: cut into sticks or coins; store in a separate compartment to avoid leaking onto other items.

    Pack produce in reusable silicone cups, small bento-style compartments, or sturdy containers with tight-fitting lids. Placing a dry paper towel at the bottom absorbs any stray moisture. If your child’s school allows a mid-morning snack, portion a handful of veggie sticks into a separate bag so the main lunch stays intact. As always, check with a doctor or allergist if you have specific concerns about food sensitivities or choking hazards for younger children.

    Building Sandwiches and Wraps With Moisture-Resistant Layers

    Start with a sturdy base. Whole-grain bread, tortillas, pita pockets, or flatbreads hold their shape better than soft white slices and are less likely to turn soggy before lunch. Lightly toasting bread adds a subtle barrier against moisture without making it hard to chew.

    Create a moisture-resistant layer between the bread and any wet ingredients. A thin spread of hummus, sunflower seed butter, cream cheese, or dairy-free alternative seals the surface and adds flavor. For wraps, spread the layer all the way to the edges so the tortilla stays flexible but protected.

    Layer ingredients in the right order. Place the protein — sliced turkey, roasted chicken, hard-boiled egg, or seasoned beans — directly on the spread. Add cheese or a dairy-free slice next. Then come crisp vegetables that release little water:

    • Thinly sliced cucumber (seeds removed)
    • Shredded carrots
    • Bell pepper strips
    • Baby spinach or lettuce leaves patted completely dry

    Avoid tomato slices, pickles, or wet spreads like mustard inside the sandwich; pack them in a tiny separate container so your child can add them at the table.

    Roll wraps tightly and slice them in half, or cut sandwiches into quarters. Wrap each piece in parchment paper or a reusable sandwich bag before placing it in the lunchbox. The paper absorbs any minor condensation and keeps the bread from sticking to the container. Many people find this method keeps sandwiches tasting fresh and intact until the lunch bell rings.

    Packing Dairy and Dairy Alternatives Safely With Ice Packs

    Dairy and dairy alternatives add protein, calcium, and creaminess to a lunchbox, but they are also the items most sensitive to temperature. A small insulated lunch bag with one or two slim ice packs is usually enough to keep yogurt cups, cheese sticks, or plant-based alternatives at a safe temperature until noon. Place the ice packs flat against the bottom and along one side wall of the bag, then nestle the dairy containers directly against them so cold air circulates around each piece.

    Choose individual portions rather than a large tub that gets opened and closed. Single-serve Greek yogurt, cottage cheese cups, and string cheese hold their texture better than bulk versions that sit half-eaten. For dairy-free eaters, look for fortified soy, oat, or pea-protein yogurts and cheeses that list calcium and vitamin D on the label; many people find these nutritionally comparable to dairy when chosen carefully. Shelf-stable UHT milk boxes or plant-milk cartons can skip the ice pack entirely, which frees up space for other perishables.

    • Freeze a yogurt tube or a small water bottle the night before; it doubles as an extra cold source and thaws to a slushy treat by lunch.
    • Wrap cheese sticks in a cloth napkin before placing them next to the ice pack to prevent surface condensation from making the wrapper soggy.
    • Pack a tiny silicone cup of honey or maple syrup separately so kids can stir it in at the table instead of creating a runny mess inside the container.

    If your child has a diagnosed milk allergy or lactose intolerance, check with a doctor or dietitian to confirm that the alternatives you choose meet their specific nutrient needs. A well-chilled, portion-controlled dairy or dairy-free component rounds out the meal without relying on packaged snacks.

    Including Crunchy Snacks That Stay Crisp in Reusable Containers

    Crunchy snacks add texture and satisfaction to a lunchbox, but keeping them crisp until noon takes a little planning. The key is controlling moisture and air exposure. Start by choosing snacks that naturally hold their shape — think roasted chickpeas, baked lentil crisps, whole-grain crackers with a tight crumb, or freeze-dried vegetable pieces. These tend to resist softening better than puffed or fried options. Many people find that homemade batches, cooled completely before packing, stay crisper than store-bought versions that may have absorbed humidity during transit.

    Pack each crunchy item in its own small reusable container with a tight-fitting lid. Silicone lids or snap-lock boxes work well because they create a reliable seal without taking up much space. Avoid mixing moist foods like fruit or yogurt in the same compartment — even a little condensation can travel. If you like to include a dip, pack it separately in a leakproof mini jar and add it at lunchtime.

    A few practical habits help maintain crunch: – Toast nuts or seeds lightly before packing to drive off surface moisture (if your school allows them; otherwise use seeds like pumpkin or sunflower) – Line the bottom of the container with a paper towel to absorb any stray humidity – Pack the container upright in the lunch bag so it doesn’t get crushed

    If you’re including something like popcorn or rice cakes, add them the morning of — they’re especially sensitive to overnight humidity. A quick shake of the container before sealing can also help redistribute any settled moisture. With these small steps, crunchy snacks arrive intact and ready to eat.

    Using Insulated Lunch Gear and Strategic Ice Pack Placement

    A well-insulated lunch bag acts like a portable cooler, slowing the rise in temperature that can turn safe food risky by noon. Look for a bag with thick foam walls, a tight-sealing zipper, and a reflective inner lining that bounces heat away. Many people find that a boxy shape holds containers upright and leaves room for ice packs on multiple sides, which keeps the cold air circulating instead of pooling at the bottom.

    Place one flat ice pack against the bottom of the bag, then set the heaviest, most perishable items — yogurt cups, hummus containers, cheese sticks — directly on top of it. Add a second ice pack along one side wall or tucked between two containers so the chill wraps around the food. If you use a bendable gel pack, wrap it in a thin kitchen towel first; this prevents frost from making the outside of containers slick and keeps condensation from soaking into a sandwich wrap.

    • Choose a bag that fits your containers snugly; extra air space warms up faster.
    • Freeze a reusable water bottle overnight — it doubles as an ice pack and a cold drink by lunch.
    • Slip a small fridge thermometer into the bag occasionally; the temperature should stay at 40 °F or below until the lunch period.
    • Pack the bag in the morning, not the night before, so the insulation starts cold.

    A little planning with placement means the turkey roll-ups stay firm, the apple slices stay crisp, and everything tastes fresh when the lunch bell rings.

    Prepping Components the Night Before for Morning Efficiency

    Setting aside fifteen minutes after dinner can transform a frantic morning into a smooth departure. Start by washing and drying any produce that will travel whole — grapes, berries, cherry tomatoes, snap peas — then store them in lined containers so they’re ready to drop into the lunchbox. Slice cucumbers, bell peppers, or jicama and place them between paper towels in a sealed box; the towels absorb excess moisture that leads to sogginess. If you’re including a dip such as hummus or sunflower-seed butter, portion it into a small leak-proof cup and refrigerate it next to the veggies.

    Proteins that don’t need reheating — hard-boiled eggs, cubed baked tofu, roasted chickpeas, or pre-cooked chicken strips — can be divided into silicone cups or small containers tonight. For sandwiches and wraps, lay out the bread or tortillas and add your moisture barrier: a thin spread of cream cheese, dairy-free mayo, or mashed avocado goes on first, followed by lettuce or spinach, then protein, then another barrier layer. Wrap each one tightly in parchment or wax paper and store flat in a large container; this keeps fillings from shifting and bread from drying out.

    • Assemble trail-mix-style blends (pumpkin seeds, dried mango, coconut flakes, pretzel sticks) in individual snack bags
    • Fill reusable drink bottles with water or a shelf-stable milk box and chill overnight
    • Place ice packs in the freezer so they’re solid by morning
    • Line the insulated bag with a clean kitchen towel to catch condensation

    In the morning you’ll only need to transfer the pre-portioned components, tuck in the frozen packs, and zip the bag — no chopping, no measuring, no last-minute decisions.

    Putting It Together

    Start the week by picking two proteins, two fruits, two vegetables, and one crunchy snack that your child already likes. Shop once on Sunday, wash and dry produce, and portion proteins into small containers. Make a double batch of sandwich fillings — hummus with shredded carrot, or sunflower butter with thin apple slices — and store them separately from bread or wraps so nothing gets soggy.

    Each night, assemble the non-perishable parts: wrap, crackers, snack container, and a napkin. In the morning, add the cold items straight from the fridge — cheese stick, yogurt tube, prepped veggie sticks — and tuck an ice pack above and below them in the insulated bag. Keep a sticky note on the lunchbox with a quick checklist: protein, fruit, veg, crunch, cold pack. Many people find this visual cue cuts down on forgotten items.

    • Sunday: shop, wash, portion, make fillings
    • Monday–Friday: night-before dry pack, morning cold pack, ice packs in place
    • Adjust portions after day three based on what comes home uneaten

    If your child has specific dietary needs or allergies beyond nuts, check with a doctor or dietitian to confirm the plan covers their nutrition requirements.

    More from the blog

    From FitLife Solutions

    Browse all our practical health and fitness guides at fitlifesolutions.site.

    New practical health guides and articles on WhatsApp: follow our channel.

    Earn by sharing our books with your audience: join our affiliate channel on Telegram for one ready-to-post book a day.

    This article is for general information only and is not a substitute for professional medical advice. Talk to your doctor or another qualified health professional before changing your diet, exercise or health routine, especially if you have a medical condition or take medication.

  • How to Build a Balanced Snack Plate Using Protein, Fiber, and Healthy Fats

    How to Build a Balanced Snack Plate Using Protein, Fiber, and Healthy Fats

    If you often find yourself hungry again an hour after snacking, or you experience an afternoon energy dip that sends you searching for something sweet, this guide is for you. It is written for anyone who wants a practical way to build snacks that actually last — whether you are packing a lunchbox, working through a long shift, or simply trying to bridge the gap between meals without overthinking it.

    You do not need to count calories, weigh food, or follow a rigid plan. Instead, you will learn a simple three-part formula: pair a protein source with a high-fiber carbohydrate and a healthy fat. This combination helps slow digestion, steady blood sugar, and keep satisfaction going longer than a single-food snack typically does.

    By the end of this article, you will be able to:

    • Identify protein, fiber, and fat options that fit your preferences and budget
    • Assemble a balanced snack plate in under a minute using your hand as a portion guide
    • Mix and match flavors so the habit stays enjoyable, not repetitive
    • Prep components ahead of time for grab-and-go convenience

    As always, consider checking with a healthcare provider before making significant changes to your eating pattern, especially if you have specific medical conditions or dietary needs.

    Why the Protein-Fiber-Fat Trio Stabilizes Blood Sugar

    When you eat carbohydrates on their own, they break down into glucose and enter the bloodstream quickly, which can lead to a sharp rise in blood sugar followed by a sudden drop. That roller coaster often leaves you feeling tired, irritable, or hungry again within an hour. Adding protein, fiber, and healthy fats to the same snack changes the pace of digestion. Protein and fat slow the emptying of the stomach, while soluble fiber forms a gel-like matrix that delays glucose absorption. Together, they create a more gradual release of energy, helping you stay focused and satisfied until your next meal.

    Many people find that this combination also reduces the urge to graze mindlessly. When blood sugar stays steadier, the hormonal signals that drive cravings — especially for sweet or salty processed foods — tend to quiet down. You may notice fewer mid-afternoon slumps and a more even mood throughout the day.

    • Protein provides amino acids that support muscle repair and help regulate appetite hormones.
    • Fiber feeds beneficial gut bacteria and adds bulk that physically slows digestion.
    • Healthy fats aid in the absorption of fat-soluble vitamins and contribute to a feeling of fullness.

    This trio does not require precise measuring or special products. A handful of nuts with an apple, Greek yogurt with berries and chia seeds, or hummus with vegetable sticks all deliver the three components in a single bite. If you have a medical condition that affects blood sugar, such as diabetes, it is wise to check with your doctor or a registered dietitian before making significant changes to your eating pattern.

    Choosing Complete Proteins That Fit Any Eating Style

    Protein is the anchor of a balanced snack because it digests slowly, helps preserve muscle, and signals fullness to the brain. The goal is to choose complete proteins — those that supply all nine essential amino acids — while honoring the way you like to eat. Many people find that rotating a few reliable sources keeps snacks interesting without requiring a nutrition degree.

    If you eat animal products, hard-boiled eggs, Greek yogurt, cottage cheese, canned tuna or salmon, and sliced turkey or chicken breast are convenient staples. A single egg or a half-cup of cottage cheese delivers a solid protein boost with minimal prep. For plant-based eaters, soy stands out as a complete protein on its own; think edamame, tofu cubes, or tempeh strips. Quinoa, while technically a seed, also qualifies and works well chilled in a snack jar.

    Most other plant proteins are incomplete, but pairing them across the day — not necessarily in the same bite — covers your bases. For a single snack plate, you can combine complementary sources to create a complete profile:

    • Hummus with whole-grain pita or seed crackers
    • Nut butter on sprouted-grain toast
    • Black beans with a sprinkle of hemp seeds
    • Lentil salad tossed with pumpkin seeds

    Portion awareness matters more than precision. A serving roughly the size of your palm (or a half-cup of beans, a thumb of nut butter, one egg) is a practical starting point. If you have kidney concerns or follow a specialized diet, check with a doctor or registered dietitian before significantly increasing protein intake.

    High-Fiber Carbohydrates That Digest Slowly

    Fiber acts like a slow-release valve for the energy in carbohydrates, helping your blood sugar rise gradually instead of spiking and crashing. The best sources for a snack plate are whole or minimally processed foods that still contain their natural structure — think intact grains, legumes, starchy vegetables, and whole fruits. These take longer to chew and digest, which naturally extends fullness and gives your gut microbes something to ferment.

    Start with a cooked grain like quinoa, farro, brown rice, or steel-cut oats. A half-cup portion adds substance without heaviness. Roasted sweet potato cubes, winter squash, or corn kernels bring natural sweetness and a creamy texture that pairs well with savory proteins. Canned beans — rinsed well — are a pantry staple; chickpeas, black beans, or cannellini beans each offer a different flavor and mouthfeel. For a no-cook option, try a small apple or pear with the skin on, a handful of berries, or a few dried figs or apricots (unsulfured, if possible).

    • Quinoa, farro, brown rice, steel-cut oats
    • Roasted sweet potato, squash, corn
    • Rinsed canned beans: chickpeas, black beans, cannellini
    • Whole fruit with skin: apple, pear, berries
    • Unsulfured dried fruit: figs, apricots

    Many people find that rotating these options keeps snacks interesting and supports digestive regularity. If you’re increasing fiber quickly, add an extra glass of water and go slowly — your system may need time to adjust. As always, check with your doctor if you have a digestive condition or specific dietary needs.

    Selecting Healthy Fats for Satiety and Nutrient Absorption

    Healthy fats round out the snack plate by slowing digestion, helping you feel full longer, and allowing your body to absorb fat-soluble vitamins from the other foods on the plate. A small portion goes a long way, so the goal is to choose sources you enjoy and keep the amount in check.

    Whole-food fats tend to bring extra nutrients along for the ride. A quarter of an avocado adds creaminess plus potassium and fiber. A small handful of raw or dry-roasted nuts — almonds, walnuts, pistachios — delivers plant sterols and a satisfying crunch. Seeds such as chia, flax, pumpkin, or sunflower sprinkle easily onto yogurt or cottage cheese and contribute omega-3s and minerals. Olives offer a savory, salty option that pairs well with vegetables and cheese. If you prefer a spread, a thin layer of natural nut butter or tahini works nicely on whole-grain crackers or apple slices.

    For cooking or drizzling, extra-virgin olive oil and avocado oil are versatile staples that many people find work well at moderate heat. A teaspoon tossed with roasted chickpeas or vegetables adds richness without overwhelming the snack.

    • Avocado (about one-quarter fruit)
    • Nuts (a small handful, roughly one ounce)
    • Seeds (one to two tablespoons)
    • Olives (five to eight pieces)
    • Natural nut butter or tahini (one tablespoon)
    • Extra-virgin olive oil or avocado oil (one teaspoon for drizzling)

    Because fat is calorie-dense, using your thumb as a rough guide for spreads and oils, and a cupped hand for nuts and seeds, helps keep portions intuitive. If you have specific health conditions or take medications that affect fat digestion, check with your doctor or a registered dietitian for personalized guidance.

    Portion Guidelines Using Your Hand as a Measure

    Your hand is a portable, personalized portion tool that scales to your body size. No measuring cups or food scales required. Start with protein: a serving roughly the size and thickness of your palm (including fingers) works well for most adults. This could be a chicken breast, a block of tofu, a couple of eggs, or a scoop of Greek yogurt. For plant proteins like beans or lentils, a cupped handful is a closer match.

    • Protein: one palm (animal) or one cupped hand (legumes, tofu, tempeh)
    • Fiber-rich carbs: one cupped hand (cooked grains, roasted vegetables, fruit, beans if not counted as protein)
    • Healthy fats: one thumb tip to base (nuts, seeds, nut butter, avocado, cheese, olive oil drizzle)

    Vegetables that are low in starch — leafy greens, cucumber, peppers, snap peas — can fill the rest of the plate without strict limits. Many people find two open handfuls a comfortable visual cue.

    If you are taller or more active, you may need slightly larger portions; if you are smaller or less active, slightly smaller. The hand method adjusts naturally. When building a snack plate, aim for one portion from each of the three categories rather than full meal sizes. A palm of turkey, a cupped hand of quinoa salad, and a thumb of hummus creates a balanced mini-meal.

    Listen to hunger and fullness cues as you eat. If you finish and still feel hungry after 20 minutes, add another half portion of protein or fiber first. Checking with a doctor or registered dietitian can help tailor portions if you have specific health conditions or nutrient needs.

    Assembling the Plate: Visual Layout and Flavor Pairings

    Think of your plate as a simple clock face to keep the assembly intuitive. Place your protein portion at twelve o’clock, your high-fiber carbohydrate at four o’clock, and your healthy fat at eight o’clock. This spacing leaves a little open space in the center for a garnish of fresh herbs, a squeeze of citrus, or a sprinkle of seeds that ties everything together visually and flavor-wise.

    Color contrast makes the snack more appealing and often signals a broader nutrient mix. Pair pale chicken or tofu with deep-green snap peas and a few orange bell pepper strips. If you’re using canned salmon, add bright cucumber ribbons and a spoonful of ruby-red sauerkraut. A hard-boiled egg sits nicely beside steamed edamame and a few olives for a Mediterranean feel.

    Flavor pairings can turn a functional plate into something you genuinely look forward to. Consider these easy combos:

    • Greek yogurt, berries, and a drizzle of almond butter with a pinch of cinnamon
    • Turkey slices, whole-grain crackers, and hummus topped with smoked paprika
    • Cottage cheese, diced pear, and toasted walnuts with a dash of black pepper
    • Roasted chickpeas, cherry tomatoes, and feta crumbles finished with lemon zest

    Texture matters as much as taste. Aim for at least one creamy element, one crunchy element, and one juicy or tender component. If your protein is soft, choose a crisp vegetable or a seedy cracker. If your fat is liquid like olive oil, toss it with the carbohydrate first so it coats evenly. Taste once before you walk away; a tiny pinch of flaky salt or a grind of pepper often wakes up the whole plate. Many people find this visual rhythm becomes second nature after a few tries.

    Make-Ahead Strategies for Busy Weekdays

    Spending an hour on Sunday prepping building blocks can turn chaotic weekday mornings into a simple assembly line. Cook a batch of hard-boiled eggs, roast a tray of chickpeas with a little olive oil and salt, and grill or bake chicken strips seasoned with herbs. While the oven is on, sheet-pan a mix of sweet potato cubes, broccoli florets, and bell pepper strips; they reheat well and hold texture for days. Portion cooked quinoa, farro, or brown rice into small containers so the fiber base is ready to grab. Wash and dry berries, slice cucumber and carrots, and store them in airtight jars lined with a paper towel to absorb excess moisture.

    • Make mini snack boxes: one compartment protein, one fiber-rich carb or veggie, one healthy fat such as olives, nuts, or a dollop of hummus.
    • Freeze smoothie packs with spinach, frozen fruit, and a scoop of protein powder; add liquid and blend in the morning.
    • Portion nut butter into small ramekins or reusable pouches to pair with apple slices or whole-grain crackers.
    • Keep a jar of mixed seeds and a container of Greek yogurt at eye level in the fridge for quick access.

    Label containers with the date and eat within four days for best quality. If you have specific dietary needs or medical conditions, check with a doctor or registered dietitian before making large changes to your routine. Many people find that a little weekend effort reduces decision fatigue and keeps energy steadier through long workdays.

    Putting It Together

    Start by picking two proteins, two fiber-rich carbs, and two fats you already like. Shop for those six items this weekend so the kitchen is ready when Monday hits. Wash and chop vegetables, portion nuts into small containers, and cook a batch of beans or hard-boil eggs if they are on your list. Spend ten minutes Sunday evening arranging three snack boxes for Monday through Wednesday; the rest can be assembled the night before each day.

    • Monday: Greek yogurt with berries and a sprinkle of chia seeds
    • Tuesday: Hummus, cucumber slices, and a handful of almonds
    • Wednesday: Cottage cheese, cherry tomatoes, and a drizzle of olive oil
    • Thursday: Turkey roll-ups, snap peas, and a few olives
    • Friday: Hard-boiled egg, apple slices, and peanut butter

    Keep a small notebook or phone note to jot down what felt satisfying and what left you hungry an hour later. Adjust portions by adding a few more nuts or an extra spoonful of yogurt next week. Many people find that a quick check-in each Friday helps the routine settle without feeling rigid. If you have specific health conditions or take medication that affects blood sugar, check with your doctor before making consistent changes to snack timing or composition.

    More from the blog

    From FitLife Solutions

    Browse all our practical health and fitness guides at fitlifesolutions.site.

    New practical health guides and articles on WhatsApp: follow our channel.

    Earn by sharing our books with your audience: join our affiliate channel on Telegram for one ready-to-post book a day.

    This article is for general information only and is not a substitute for professional medical advice. Talk to your doctor or another qualified health professional before changing your diet, exercise or health routine, especially if you have a medical condition or take medication.

  • How to Choose a Supportive Mattress for Better Sleep and Back Health

    How to Choose a Supportive Mattress for Better Sleep and Back Health

    Waking up with a stiff back or feeling unrested can make the entire day harder, and the mattress you sleep on plays a central role in how your body recovers overnight. This guide is for anyone shopping for a new bed — whether you are replacing a worn-out model, moving into a new home, or simply ready to invest in better rest. It is especially useful if you deal with occasional aches, share a bed with a partner, or have never felt confident navigating the endless options in a showroom or online.

    By the end of this article, you will be able to: – Identify the firmness level that keeps your spine in a neutral line for your usual sleep position – Compare the feel and support characteristics of memory foam, latex, hybrid, and innerspring constructions – Spot the specifications that signal durability, such as foam density and coil gauge – Evaluate edge support, motion isolation, and temperature regulation for your household needs – Walk into a store or browse a website with a clear checklist so you can test models efficiently

    A supportive mattress may improve comfort and alignment, but persistent pain deserves a conversation with a healthcare provider before you assume a new bed will resolve it.

    Understanding Mattress Firmness Levels and Spinal Alignment

    Firmness is often the first spec shoppers notice, yet it is also the most misunderstood. The goal is not to find the hardest or softest surface available, but to match the mattress to the way your body weight presses into it so the spine can rest in a neutral, relatively straight line. A surface that is too yielding lets the hips and shoulders sink too deeply, creating a hammock effect that rounds the lower back. One that is too rigid pushes back against those same pressure points, forcing the spine into an exaggerated arch. Many people find that a medium-firm feel works well for a wide range of body types because it offers enough give to cushion joints while still providing a stable base for the lumbar region.

    Body weight plays a large role in how firmness actually feels. A lighter sleeper may experience a medium mattress as quite firm, while a heavier sleeper might sink through the comfort layers of the same model and feel the support core. Because of this, it helps to think in terms of support layers rather than a single firmness label.

    • Side sleepers often need a softer top layer to cradle shoulders and hips without cutting off circulation.
    • Back sleepers usually benefit from a balanced feel that fills the natural curve of the lower back.
    • Stomach sleepers typically require a firmer surface to prevent the pelvis from sinking too far and hyperextending the spine.

    When you lie down in a showroom or during a home trial, spend at least ten to fifteen minutes in your usual position. Notice whether your lower back feels supported or if there is a gap you can slide a hand into. If you have existing back concerns, checking with a doctor or physical therapist before buying can help you narrow the range that suits your specific needs.

    Evaluating Material Types: Memory Foam, Latex, Hybrid, and Innerspring

    Memory foam contours closely to the body, which many people find helps reduce pressure points at the hips and shoulders. The material responds to heat and weight, creating a cradling feel that can keep the spine in a neutral line for side sleepers. Traditional versions tend to retain warmth, so look for gel-infused or open-cell designs if you sleep hot. Density matters here: higher-density foams generally last longer and offer deeper support, while lower-density options feel softer but may develop body impressions sooner.

    Latex provides a responsive, slightly bouncy surface that pushes back more quickly than memory foam. Natural latex, derived from rubber tree sap, is durable and naturally resistant to dust mites and mold, which can be helpful for allergy-sensitive sleepers. It sleeps cooler than most foams and comes in a range of firmness levels, often labeled by ILD (indentation load deflection). Many people find the buoyant feel makes it easier to change positions during the night.

    Hybrid mattresses combine a coil support core with thick comfort layers of foam or latex. This design aims to give the pressure relief of foam with the airflow and edge support of springs. Coil gauge and count affect firmness and motion transfer; pocketed coils move independently, which can reduce disturbance from a partner. The thickness and quality of the top layers determine how much contouring you feel.

    Innerspring models rely on a network of metal coils for support, usually topped with a thin pillow top or fiber pad. They tend to be firmer, cooler, and more affordable, but offer less contouring for pressure relief. Edge support is often strong, making it easier to sit on the side of the bed. If you prefer a traditional, on-top-of-the-bed feel and sleep primarily on your back or stomach, this type may suit you well.

    Matching Mattress Support to Your Primary Sleep Position

    Your dominant sleep position shapes how a mattress supports your spine through the night. Side sleepers often need a surface that cushions the shoulders and hips while keeping the waist supported, so a medium to medium-soft feel with enough contouring can help prevent the spine from bowing. Back sleepers typically benefit from a medium-firm to firm mattress that fills the natural curve of the lower back without letting the hips sink too deeply. Stomach sleepers usually require a firmer surface to keep the midsection from dipping, which can strain the neck and lower back. If you shift positions, a responsive medium-firm mattress with balanced contouring and push-back tends to work well across the board.

    • Side sleepers: look for pressure relief at shoulders and hips with lumbar support
    • Back sleepers: prioritize even support that maintains the natural lumbar curve
    • Stomach sleepers: choose a firmer feel to prevent excessive hip sinkage
    • Combination sleepers: seek responsive materials that adapt quickly as you move

    Body weight also interacts with position. Lighter individuals may feel comfortable on slightly softer surfaces, while heavier sleepers often need firmer support to achieve the same alignment. Many people find that trying a mattress in their usual sleep position for at least 10 to 15 minutes in a showroom, or using a generous home trial, gives the clearest sense of fit. If you have chronic back pain or a diagnosed spinal condition, checking with a healthcare provider before buying can help you match the right support level to your specific needs.

    Assessing Pressure Relief and Weight Distribution Capabilities

    Pressure relief and weight distribution are often the difference between waking up refreshed and waking up with aches. When a mattress contours to your body, it spreads your weight across a larger surface area, reducing the intensity of force on any single point. This is especially important at the shoulders, hips, and lower back, where bones sit close to the skin. Many people find that a mattress with good pressure relief helps them change positions less often during the night, which can lead to deeper, more continuous sleep.

    Different materials handle this task in different ways. Memory foam tends to hug the body closely, creating a cradling sensation that many side sleepers appreciate. Latex offers a more responsive push-back, distributing weight evenly while making it easier to move. Hybrid models combine foam or latex comfort layers with a coil system, aiming to give both contouring and underlying support. Innerspring beds with thick pillow tops can also provide a plush surface, though the pressure relief depends heavily on the quality and thickness of the comfort layers above the coils.

    Your body weight plays a big role in how much pressure relief you need. Heavier individuals often sink deeper into a mattress, so they may benefit from thicker comfort layers or higher-density foams that resist bottoming out. Lighter sleepers might prefer softer surfaces that allow them to sink in enough to feel the contouring effect. If you share a bed, look for a mattress that balances both needs without creating a deep valley where partners roll together.

    • Press your hand into the mattress and notice how quickly it rebounds; slower recovery often means deeper contouring.
    • Lie in your usual sleep position for at least ten minutes in the store or during a home trial.
    • Check for any numbness or tingling in your arms or legs, which can signal inadequate pressure relief.
    • Consider a mattress topper as a low-cost way to adjust pressure relief if your current bed feels too firm.

    If you have existing joint issues, circulatory concerns, or chronic pain, it is wise to discuss mattress choices with a healthcare provider who understands your history.

    Considering Edge Support and Motion Isolation for Shared Beds

    When you share a bed, the perimeter and the way movement travels across the surface become just as important as the center support. Strong edge support lets you sit on the side to tie your shoes or sleep near the boundary without feeling like you might roll off. Many people find that reinforced foam encasements or thicker perimeter coils keep the usable sleep surface consistent from center to corner. This can be especially helpful if one partner tends to migrate toward the edge during the night or if you use the bed’s edge for daily routines.

    Motion isolation determines whether you feel every toss, turn, or trip to the bathroom. Materials that absorb energy locally — such as memory foam, pocketed coils, or latex — tend to limit ripple effects so one person’s movement does not become the other’s disturbance. A hybrid with individually wrapped coils and a thick comfort layer often strikes a practical balance: the coils provide responsive support while the foam layers dampen vibration.

    Quick checklist for shared beds: – Press down near the edge and note how much the surface compresses compared to the center – Have a partner shift positions while you lie still; observe how much motion you detect – Look for perimeter reinforcement details in the specifications rather than relying on marketing language alone – Consider a split-king adjustable base if sleep schedules or firmness preferences differ significantly

    If chronic pain or a medical condition affects sleep quality, checking with a doctor before investing in a new mattress can help you prioritize the features that matter most for your situation.

    Testing Durability Indicators: Density, Coil Gauge, and Warranty Terms

    Durability often decides whether a mattress keeps supporting your spine for years or starts to sag after a few months. Two of the most reliable clues live in the specifications: foam density and coil gauge. For memory foam or polyfoam layers, look for a density of at least 1.8 pounds per cubic foot in the comfort layers and 2.0 or higher in the base; lower numbers tend to soften and lose shape faster. In latex, a higher ILD (indentation load deflection) paired with a dense core usually signals longer life. For innerspring and hybrid models, coil gauge matters — lower gauge numbers mean thicker, stiffer wire. A gauge between 12 and 15 is common; gauges of 13 or lower often hold up better under daily use. Pocketed coils with a high coil count can also distribute wear more evenly than older Bonnell units.

    Warranty terms add another layer of insight. Most reputable brands offer 10-year limited warranties, but the details tell the real story. Check what depth of sag triggers coverage — many policies only apply once an impression reaches 1.5 inches without weight on the bed, which may be deeper than the point where you feel a loss of support. Prorated versus non-prorated coverage matters too; non-prorated periods mean the manufacturer covers full replacement or repair costs for longer. Also note whether the warranty requires a specific foundation or frame, since using the wrong base can void it.

    • Foam density: 1.8+ lb/ft³ comfort, 2.0+ lb/ft³ base
    • Latex: higher ILD and dense core
    • Coil gauge: 13 or lower for thicker wire
    • Sag threshold: often 1.5 inches unweighted
    • Warranty type: non-prorated coverage length

    If you have a history of back issues, it may be worth discussing mattress lifespan expectations with a healthcare provider who understands your support needs.

    Factoring in Temperature Regulation and Breathability Features

    Temperature regulation plays a quiet but powerful role in sleep quality and spinal health. When a mattress traps body heat, you may shift positions more often to find a cooler spot, which can pull your spine out of alignment and interrupt deep sleep cycles. Many people find that a sleep surface that stays close to a neutral temperature helps them settle into a supportive position and stay there longer.

    Materials behave differently when it comes to airflow and heat retention. Traditional memory foam tends to absorb and hold warmth, though newer open-cell and gel-infused versions improve breathability. Latex, especially natural or aerated types, generally allows more air movement through its structure. Hybrids and innersprings benefit from the open space between coils, which promotes steady airflow across the sleep surface. Covers made from phase-change fabrics or moisture-wicking textiles like Tencel or bamboo-derived rayon can also help pull heat and humidity away from the body.

    • Look for ventilated foam layers or perforated latex if you tend to sleep warm.
    • Check whether the cover is removable and washable, as buildup of oils and dust can reduce breathability over time.
    • Consider a slatted foundation or platform with spacing that lets air circulate beneath the mattress.

    If you share a bed, temperature preferences may differ. Some models offer dual-zone cooling features or allow each side to be customized with separate toppers. For those who experience night sweats or have conditions that affect body temperature, it is wise to discuss sleep environment strategies with a healthcare provider. A cooler, drier sleep surface supports both comfort and the consistent spinal alignment that leads to more restorative rest.

    Putting It Together

    Start by narrowing your list to two or three models that match your sleep position, preferred firmness range, and material preferences. Spend the first two days reading detailed specifications — density for foam, coil gauge for innerspring, latex type — and comparing warranty terms side by side. If possible, visit a showroom on day three to lie on each candidate for at least 15 minutes in your usual sleep position; bring your own pillow to simulate real conditions. Pay attention to how your lower back feels and whether your shoulders or hips sink too deeply.

    Days four through six are for home trials if the brands offer them. Unbox one mattress at a time, sleep on it for two nights, and note morning stiffness, temperature comfort, and any pressure points. Keep a simple log: date, mattress, sleep quality, and how your back feels upon waking. Rotate through your top choices without rushing.

    By day seven, review your notes and eliminate any option that caused consistent discomfort. Many people find that a short, structured trial period clarifies preferences better than specs alone. If back pain persists regardless of mattress, consider checking with a doctor or physical therapist to rule out underlying issues before making a final purchase.

    More from the blog

    From FitLife Solutions

    Browse all our practical health and fitness guides at fitlifesolutions.site.

    New practical health guides and articles on WhatsApp: follow our channel.

    Earn by sharing our books with your audience: join our affiliate channel on Telegram for one ready-to-post book a day.

    This article is for general information only and is not a substitute for professional medical advice. Talk to your doctor or another qualified health professional before changing your diet, exercise or health routine, especially if you have a medical condition or take medication.

  • How to Organize Your Fridge and Pantry to Reduce Food Waste

    How to Organize Your Fridge and Pantry to Reduce Food Waste

    If you have ever tossed a limp bag of greens or discovered a jar of sauce years past its date, you know how quietly food waste adds up. This guide is for anyone who wants a calmer kitchen — whether you are cooking for one, feeding a family, or simply trying to make groceries stretch further. You do not need a massive fridge or a walk-in pantry; you just need a system that works with the space you have.

    By the end of this article, you will be able to:

    • Group foods in your refrigerator by temperature needs so everything stays fresher longer
    • Set up a simple rotation habit that naturally brings older items forward
    • Choose containers and labels that let you see what you have at a glance
    • Create a small "eat me first" spot for the most perishable ingredients
    • Organize dry goods by category and date so nothing gets lost in the back
    • Build a quick weekly check-in that connects what you have to what you will cook
    • Adapt your storage when seasons change or you buy in bulk

    The goal is not perfection. It is a practical rhythm that keeps food visible, accessible, and used.

    Zone Your Refrigerator by Temperature and Food Type

    Your refrigerator isn't a single cold box; it is a collection of microclimates. Understanding these temperature zones helps you store food where it will stay fresh longest. The upper shelves tend to maintain the most consistent temperature, making them ideal for ready-to-eat foods like leftovers, drinks, yogurt, and deli meats. The lower shelves are usually the coldest part of the unit, so reserve this space for raw meat, poultry, and fish — preferably in a dedicated drawer or on a plate to catch any drips and prevent cross-contamination.

    The crisper drawers are designed to control humidity. Many models allow you to adjust the vent: a high-humidity setting (vent closed) works well for leafy greens, herbs, broccoli, and carrots, which wilt when they lose moisture. A low-humidity setting (vent open) suits fruits and vegetables that release ethylene gas as they ripen, such as apples, pears, melons, and stone fruit; the airflow helps carry the gas away so it doesn't speed up spoilage for neighboring produce.

    The door is the warmest zone because it gets a blast of room-temperature air every time you open it. Use this area for condiments, sauces, pickles, juice, and butter — items with preservatives or high acid/salt content that tolerate temperature fluctuation. Avoid storing milk or eggs in the door, even if the shelves seem shaped for them; they will last longer on an interior shelf.

    A quick zone cheat sheet: – Upper shelves: leftovers, drinks, ready-to-eat snacks – Lower shelves: raw meat, poultry, seafood (contained) – High-humidity drawer: greens, herbs, crisp vegetables – Low-humidity drawer: ethylene-producing fruits – Door: condiments, juices, pickles, butter

    Implement a First-In, First-Out Rotation System

    When you bring groceries home, the natural habit is to place new items at the front of the shelf, pushing older ingredients to the back where they are easily forgotten. A first-in, first-out rotation flips that habit so the food that has been waiting longest gets used first. Start by removing everything from one shelf or drawer at a time. Check dates and condition, then return items with the earliest expiration or purchase date to the front. Newer purchases go behind them. This simple shuffle keeps perishables moving through your kitchen instead of languishing until they spoil.

    In the refrigerator, apply this to produce drawers, deli bins, and condiment shelves. For leafy greens or berries, transfer them to a clean container lined with a paper towel and place the older batch in front of the newer one. Eggs, yogurt, and plant milks follow the same logic: line them up by date so you reach for the oldest carton automatically. In the freezer, stack bags of vegetables or portions of soup with the earliest freeze date on top. A strip of masking tape and a marker make dating effortless.

    • Write the purchase or prep date on every container before it goes in.
    • Keep a roll of tape and a marker on the fridge door for quick labeling.
    • When unloading bags, place new items to the back or bottom of each zone.
    • Do a quick front-to-back scan while putting away leftovers each night.

    Many people find that this rhythm becomes second nature after a few weeks. It reduces the chance of discovering a fuzzy container weeks later and helps you plan meals around what needs eating now. If you have specific dietary needs or health conditions, check with a doctor or registered dietitian for personalized storage guidance.

    Use Clear, Labeled Containers for Visibility

    Clear containers turn a cluttered shelf into a visual inventory. When you can see what you have at a glance, you are less likely to buy duplicates or let items disappear behind taller jars. Choose rectangular or square shapes in a few consistent sizes; they stack neatly and make the most of limited shelf depth. Glass works well for acidic foods and reheating, while lightweight BPA-free plastic is handy for high shelves or kids' snacks. Matching lids keep seals tight and prevent the frustration of hunting for the right top.

    Label every container with the contents and the date it was opened or prepared. A simple strip of masking tape and a marker works fine, or you can use reusable chalkboard labels if you prefer a cleaner look. Include the "use by" date for store-bought items and a "prepped on" date for leftovers. This small habit removes the guesswork that leads to unnecessary tossing.

    Consider these practical tips for getting started: – Transfer grains, beans, nuts, and flour from torn bags into airtight bins the moment you unpack groceries. – Portion large blocks of cheese or cooked proteins into meal-sized containers so you only open what you need. – Keep a roll of tape and a marker in a kitchen drawer so labeling never feels like a chore.

    Many people find that the upfront effort of decanting pays off in faster meal prep and fewer mystery containers lurking in the back. The goal is a system that feels intuitive, not a project that adds work.

    Designate an 'Eat Me First' Bin for Perishables

    One of the simplest habits that keeps food from disappearing into the back of the fridge is setting aside a dedicated spot for items that need attention soon. Choose a shallow bin, a basket, or even just a specific shelf at eye level and label it clearly so everyone in the household knows its purpose. This becomes the first place you look when you are deciding what to cook for dinner or packing a lunch.

    Place anything approaching its peak in this zone: half a bag of spinach, the last few berries, a block of cheese with a week left on the date, cooked grains that should be eaten within a few days, or leftovers from Monday night. When you unload groceries, take a moment to scan what you already have and move those priority items into the bin before adding the new purchases behind them.

    A few guidelines help the system run smoothly:

    • Keep the container small enough that it forces you to process it regularly.
    • Use a dry-erase marker on the bin or a sticky note to jot down what is inside if the contents are not obvious.
    • Make it a habit to check this spot first when you open the door, turning potential waste into the starting point for your next meal.

    Many people find that this single step reduces the surprise of discovering spoiled produce weeks later. It also makes meal planning feel less like a puzzle because the most urgent ingredients are already gathered in one place.

    Organize Pantry Staples by Category and Expiration

    Start by grouping similar items together so you can see exactly what you have at a glance. Keep baking ingredients like flour, sugar, and leaveners on one shelf; canned goods such as beans, tomatoes, and broth on another; grains, pasta, and legumes in a third zone; and snacks, spices, and oils in their own areas. This category approach prevents duplicate purchases and makes it easier to spot gaps before you head to the store.

    Within each category, arrange packages by expiration date with the soonest dates in front. When you bring home new groceries, slide them behind the older stock rather than stacking on top. A quick visual scan each week helps you catch items that are creeping toward their best-by window. Many people find it helpful to keep a small clipboard or magnetic notepad on the pantry door to jot down staples that need using soon.

    Consider these practical habits to keep the system running smoothly: – Transfer bulk grains, nuts, and dried fruit into clear, airtight containers labeled with the purchase or expiration date. – Store heavier items like large cans or jars on lower shelves for safety and stability. – Reserve eye-level space for the ingredients you reach for most often. – Group meal-specific kits — such as taco night or soup basics — in a basket so everything stays together.

    A tidy, date-ordered pantry reduces the chance that food gets pushed to the back and forgotten. It also makes weekly inventory checks faster, giving you a clear picture of what needs to be cooked before you shop again.

    Create a Weekly Inventory and Meal Planning Routine

    Taking fifteen minutes each week to review what you have on hand can shift your kitchen from reactive to intentional. Before you write a grocery list, open the fridge, freezer, and pantry and note what needs to be used soon. A simple notepad on the counter or a note on your phone works well. Jot down quantities: half a bag of spinach, three eggs, an open jar of salsa. This snapshot becomes the foundation for your meal plan, so you cook from what you already own instead of buying duplicates.

    Build your weekly menu around those perishable items first. If you see wilting herbs and a block of feta, plan a frittata or grain bowl for Tuesday. Leftovers get a designated night — maybe Thursday — so they don’t linger until they’re unrecognizable. Keep the plan flexible; a sticky note on the fridge with "Mon: stir-fry, Tue: soup" is enough structure without feeling rigid.

    • Check expiration dates while you inventory; move anything close to the front.
    • Cross-reference your list with the "Eat Me First" bin so nothing hides.
    • Note staples running low (rice, beans, oil) so they go on the shopping list automatically.
    • Involve household members by asking for one meal request each week.

    After shopping, put new items behind older ones and update your inventory note. Over time, this rhythm reduces impulse purchases, shortens prep time, and helps you feel more in control of your food budget. Many people find they waste less simply because they know what’s there before it disappears.

    Adjust Storage Habits for Seasonal and Bulk Purchases

    Seasonal abundance and bulk deals can save money, but they also test the limits of your storage system. When you bring home a case of peak-season tomatoes or a warehouse-club pack of chicken thighs, the usual zones can quickly overflow. Start by creating a temporary overflow plan before you shop. Clear a shelf in the freezer or a corner of the pantry so incoming items have a designated landing spot instead of piling up on the counter.

    Break bulk packages into meal-sized portions right away. Divide large cuts of meat, blocks of cheese, or big bags of grains into the clear containers you already use, then label them with the contents and date. This keeps your first-in, first-out rotation intact and prevents a single massive package from hiding smaller items behind it. For produce, take a few minutes to wash, trim, and store items in the proper humidity drawers; many people find that prepping berries or greens immediately extends their usable life.

    Preserve what you cannot use within a week. Freeze herbs in oil cubes, blanch and freeze vegetable scraps for stock, or turn extra fruit into quick jams or compotes. A simple dehydrator or low oven can turn surplus apples, mushrooms, or tomatoes into shelf-stable snacks that fit neatly into your pantry categories.

    • Freeze flat in zip-top bags to maximize space and speed thawing.
    • Keep a running list on the freezer door so nothing gets buried and forgotten.
    • Rotate seasonal preserves into your weekly meal plan so they stay in the flow.

    When the season ends or the bulk supply runs low, wipe down the temporary zones and return them to their regular purpose. This rhythm keeps your system flexible without letting short-term abundance create long-term clutter.

    Putting It Together

    Start with a quick reset. Pull everything out of the refrigerator and pantry, wipe the shelves, and sort items into keep, toss, and donate piles. Check dates and be honest about what you will actually use. This first pass usually takes an hour or two, depending on how long it has been since the last deep clean.

    Next, apply the zones you planned. Place condiments and drinks in the door, ready-to-eat foods on the upper shelves, raw proteins in the bottom bin, and produce in the humidity drawers. In the pantry, group baking supplies, grains, canned goods, and snacks into their own sections. Transfer loose items into clear containers and label them with a marker and tape.

    Set up the "Eat Me First" bin in the front of the fridge and fill it with anything nearing its peak. Write a simple inventory list on a notepad or phone note — just categories and rough quantities.

    • Day 1: Reset and zone
    • Day 2: Containerize and label
    • Day 3: Build the first inventory list
    • Day 4: Plan three meals using what is in the "Eat Me First" bin
    • Day 5: Shop only for gaps, sticking to the list
    • Day 6: Cook one batch meal for the week ahead
    • Day 7: Review what worked, adjust zones, and note what to buy next time

    Many people find that a low-stakes first week builds momentum without feeling overwhelming.

    More from the blog

    From FitLife Solutions

    Browse all our practical health and fitness guides at fitlifesolutions.site.

    New practical health guides and articles on WhatsApp: follow our channel.

    Earn by sharing our books with your audience: join our affiliate channel on Telegram for one ready-to-post book a day.

    This article is for general information only and is not a substitute for professional medical advice. Talk to your doctor or another qualified health professional before changing your diet, exercise or health routine, especially if you have a medical condition or take medication.