Author: Ahumuza

  • Meal Prep Without a Microwave: No-Heat and Cold-Friendly Strategies

    Meal Prep Without a Microwave: No-Heat and Cold-Friendly Strategies

    You open your bag at noon and the meal inside is exactly as you packed it: cool, crisp, and ready to eat. No hunting for a communal microwave, no waiting in line, no rubbery reheated texture. This guide is for anyone who works on a job site, travels in a van, studies in a library with a strict no-appliance policy, or simply wants to reclaim the 20 minutes a day spent queuing for heat. It also solves the grocery puzzle for people avoiding rice, chicken, or subscription boxes, and for those managing a tight fridge or no fridge at all.

    After reading, you will be able to: – Build complete lunches and dinners from shelf-stable proteins, raw vegetables, and fruit that taste better after a few hours in a container – Choose produce that stays safe and appealing without refrigeration for a full workday – Assemble meals in the morning using acid-based dressings that soften raw ingredients by noon – Pack a week of food using only insulated bags, frozen water bottles, and stackable containers – Shop once at bulk bins, ethnic markets, or seasonal gluts without a recurring fee or special equipment

    No-Cook Protein Foundations: Canned Fish, Legumes, and Shelf-Stable Dairy

    Building a week of cold lunches starts with protein that requires zero heat and zero refrigeration until opened. Canned fish, shelf-stable legumes, and certain dairy products deliver complete nutrition without a stove, a microwave, or a subscription service. The key is selecting varieties packed in water, olive oil, or brine rather than heavy sauces that turn grainy when cold.

    Choosing and Using Canned Fish

    Sardines, mackerel, and skipjack tuna hold texture better than albacore after days in a container. Drain the liquid well, then flake the fish directly into your meal jar with a fork. If the flavor feels too aggressive, stir in a spoonful of Greek yogurt or a squeeze of lemon the night before; the acid softens the edges. For anyone avoiding fish, canned chicken works the same way — look for chunks in water with no added broth.

    Legumes That Travel Well

    Firm beans keep their shape. Chickpeas, black beans, and cannellini survive a week in acid-based dressings without turning mushy; kidney beans and lentils often split. Rinse them under cold water until the foam stops, then spin dry in a salad spinner or pat thoroughly with towels. Excess moisture is the enemy of texture. Toss the dried beans with oil and salt immediately — they absorb flavor overnight.

    Shelf-Stable Dairy Options

    • Individually sealed waxed cheese rounds (Babybel style) or aged cheddar sticks stay safe at room temperature for a full workday.
    • Shelf-stable UHT milk boxes or single-serve powdered milk packets rehydrate overnight oats without a fridge.
    • Powdered whey or collagen stirs into dressings for a protein boost without changing texture.

    Grain-Free Carbohydrate Bases: Root Vegetables, Fruit, and Raw Oats

    Root vegetables, fruit, and raw oats form the backbone of grain-free, no-heat meal prep because they deliver substantial energy without a stove. Sweet potatoes, carrots, beets, and parsnips can be peeled, grated, or spiralized raw; their natural sugars concentrate when massaged with salt and acid, softening texture in twenty minutes. Apples, pears, mango, and berries add quick glucose and moisture, while bananas mash into a binder for oat-based mixtures. Rolled or quick oats require only liquid — water, nut milk, or juice — and time to hydrate into a chewy base similar to overnight oats but sturdy enough for savory applications. All three categories travel well at room temperature for a workday.

    Prep Methods That Keep Texture Intact

    Grate firm roots on the large holes of a box grater or use a julienne peeler for noodle-like strands; toss immediately with lemon juice or vinegar to prevent oxidation. For oats, use a one-to-one ratio of oats to liquid by volume, stir in a pinch of salt and a spoonful of fat (tahini, olive oil, nut butter), then let sit at least four hours or overnight. Fruit should be cut no more than a few hours before eating unless submerged in citrus juice. If a batch turns too wet, stir in chia seeds or ground flax to absorb excess moisture. If too dry, drizzle additional oil or citrus juice and let rest ten minutes. These adjustments keep meals palatable without reheating.

    Fridge-Free Produce Selection and Acid-Based Preservation Techniques

    When you cannot rely on a refrigerator, your produce strategy shifts from "what keeps longest" to "what survives handling and improves with acid." Choose vegetables with low water content and high structural density: cabbage, carrots, radishes, fennel, celery root, and thick-skinned cucumbers. For fruit, select firm apples, citrus, green mangoes, and underripe pears. Avoid leafy greens, tomatoes, berries, and stone fruit; they degrade into mush or mold within hours at room temperature. Wash everything thoroughly in cool water with a splash of vinegar, dry completely, and store whole. Cut surfaces invite spoilage.

    Acid as Preservation

    A 1:1 ratio of 5% vinegar (apple cider, white wine, or rice) to water creates a brine that lowers pH enough to slow bacterial growth on dense vegetables for two to three days at cool room temperature. Submerge matchstick carrots, thinly sliced cabbage, or radish coins in jars with a pinch of salt and aromatics like mustard seed, garlic, or dill. The salt draws out water, the acid penetrates, and the texture firms rather than softens. For fruit, toss apple or pear matchsticks in straight lemon or lime juice; the antioxidant effect prevents browning and the acid brightens flavor. Drained pickles and acid-tossed fruit become ready-to-eat components that add crunch and cut through rich proteins and fats.

    • Pack brine-pickled vegetables in small screw-top jars; keep the produce submerged.
    • Carry a lemon wedge to freshen cut fruit or dressed salads just before eating.
    • If a jar smells yeasty, fizzy, or distinctly alcoholic, discard it.
    • When ambient temperature exceeds 75°F, consume acidified produce within 24 hours.

    Cold-Assembly Meal Formulas: Balancing Texture, Fat, and Acid Without Heat

    A cold meal lives or dies by contrast. Without the unifying warmth of a stove, you need deliberate layers: something chewy, something crisp, something rich, and something bright to wake the palate. Start with a sturdy base — soaked oats, shredded root vegetables, or a dense bread — that won't turn to mush after twelve hours in a bag. Add a protein that holds its shape: flaked mackerel, rinsed chickpeas, or cubed firm tofu pressed dry. Then build the bridge with fat and acid. A spoonful of tahini thinned with lemon juice, a drizzle of olive oil hit with vinegar, or a smear of miso whisked into yogurt coats the dry ingredients and carries flavor into every bite. Finish with texture: toasted seeds, broken crackers, thinly sliced fennel, or a handful of herbs treated like a salad green, not a garnish.

    The Three-Component Rule

    Every container needs only three decision points to stay interesting all week. Pick one base, one protein-fat bundle, and one acid-crunch finish. For example: soaked oats + sardines mashed with mayo and mustard + grated carrot tossed in cider vinegar and sunflower seeds. Or: rye crisps + white beans tossed in pesto + quick-pickled onions and parsley. Rotate the acid (lemon, lime, rice vinegar, sherry vinegar) and the fat (olive oil, sesame oil, nut butter, cheese) to shift the cuisine without new recipes. Salt each layer as you go; cold dulls salinity, so season slightly heavier than you would a hot dish. Taste after assembly, then again after an hour — the acid softens raw edges and the fat rounds sharp corners, creating a cohesive dish that never saw a pan.

    If you want this in more depth, our book Healthy Lunchbox Recipes: Practical Meal Prep for Busy Adults covers it step by step.

    Flavor-Forward Marinades and Dressings That Mellow Raw Ingredients Overnight

    Acid and salt are the quiet workhorses of no-heat meal prep. A well-built dressing does more than add flavor; it softens dense vegetables, rounds out raw alliums, and binds disparate ingredients into something that tastes intentional rather than assembled. The key is giving it time. Most vinaigrettes and marinades need at least four hours in a sealed container to do their work, and many improve after twelve. Make your dressings on Sunday, portion them into small jars, and let the chemistry happen while you sleep.

    Build a Base Ratio You Can Trust

    Start with three parts fat to one part acid, then season aggressively with salt. Extra-virgin olive oil, toasted sesame oil, or a neutral oil like grapeseed each steer the profile in a different direction. For acid, reach for lemon juice, lime juice, sherry vinegar, rice vinegar, or apple cider vinegar. A teaspoon of Dijon or a smashed garlic clove per half-cup of dressing helps emulsify and adds depth. Whisk hard or shake in a lidded jar until thick and opaque. Taste on a piece of the vegetable you plan to dress — raw kale needs more salt and acid than cucumber — and adjust before you combine.

    • Shallot-lemon vinaigrette: minced shallot, lemon juice, olive oil, pinch of sugar, black pepper. Excellent on shredded carrot, fennel, or canned chickpeas.
    • Miso-ginger dressing: white miso, rice vinegar, sesame oil, grated ginger, splash of water to thin. Softens cabbage and daikon overnight.
    • Herb-yogurt sauce: thick plain yogurt, chopped dill and parsley, garlic, lemon zest, olive oil. Clings to roasted root vegetables eaten cold or room-temp beans.
    • Chili-lime oil: neutral oil, lime zest and juice, crushed red pepper, fish sauce or soy. Wakes up jicama, mango, and canned mackerel.

    Pack dressing separately if you prefer crisp texture, or toss the night before for a softer, more integrated bite. If a salad looks wilted by day three, refresh with a squeeze of fresh citrus and a drizzle of new oil.

    Portable Packing Systems for Temperature Control Without Refrigeration Access

    Packing meals without refrigeration access means managing three variables: starting temperature, insulation layers, and time. Freeze a stainless steel water bottle or a dedicated ice brick overnight; place it at the bottom of an insulated lunch bag, then build the meal on top in a wide-mouth glass jar or a locking plastic container. A folded cotton napkin between the cold source and the food prevents frost burn on delicate greens. For longer commutes, nest the insulated bag inside a soft cooler sleeve lined with a reflective emergency blanket — this adds roughly two extra hours of safe temperature hold without adding bulk.

    Layered Packing Order

    • Bottom: frozen bottle or ice brick wrapped in napkin
    • Middle: dense, moisture-resistant items (marinated beans, chopped root vegetables, hard cheese, cured meats)
    • Top: fragile textures (herbs, sprouts, sliced fruit, toasted nuts)
    • Lid pocket or side compartment: dressing in a tiny screw-top jar, utensils, dry seasoning blend

    This order keeps condensation dripping onto sturdy ingredients instead of turning salad greens to mush. If the bag will sit in a hot car, add a second frozen bottle on top of the jar before sealing the cooler sleeve. Many people find that pre-chilling the empty containers in the freezer for ten minutes while assembling the meal extends the cold window noticeably. When a leak happens — usually a cracked dressing jar — keep a spare zip-top bag and a microfiber cloth in the outer pocket for immediate containment. If the ice brick thaws early, swap it for a gas-station bag of ice and repack; the meal stays safe as long as the core ingredients still feel refrigerator-cold to the touch.

    Subscription-Free Ingredient Sourcing: Bulk Bins, Ethnic Markets, and Seasonal Gluts

    Building a microwave-free meal prep routine gets expensive if you rely on pre-portioned pouches or specialty health-food aisles. The most reliable way to keep costs down is to shorten the supply chain between the harvest and your container. This means buying ingredients in their least processed form from sources that move high volume with low overhead.

    Where to Shop and What to Buy

    Bulk bins at independent grocers or co-ops let you take exactly the amount of raw nuts, seeds, dried beans, oats, or spices you need for the week. You avoid packaging markup and the stale product that sits in branded bags for months. Bring your own clean jars or cloth bags; weigh them empty first so the cashier can tare the scale. Ethnic markets — Latin American, Asian, Middle Eastern, African — often carry the same staples in larger bags for a fraction of the price. Look for 25-pound sacks of dried chickpeas, lentils, or black beans; 5-pound blocks of firm tofu (often shelf-stable until opened); tins of sardines, mackerel, or mussels; and jars of preserved lemons, capers, or roasted peppers that add instant flavor without cooking. Produce terminals or wholesale clubs that sell to the public are another lever. A case of slightly blemished apples, carrots, or cabbage costs little and stores for weeks in a cool corner.

    • Walk the market 30 minutes before closing; vendors often discount rather than pack up.
    • Split a case with a neighbor if storage space is tight.
    • Ask the produce manager for "seconds" boxes — they rarely advertise them.
    • Freeze extra citrus juice in ice-cube trays for dressings later.

    When a seasonal glut hits — tomatoes in August, squash in October — buy heavy, prep once (slice, salt-drain, pack in vinegar or oil), and you have ready-to-eat components for months without a subscription fee.

    Key Takeaways and Your First Week

    The core of microwave-free meal prep rests on a few reliable habits. – Build every meal around a no-cook protein, a dense carbohydrate that eats well cold, and a fat source that carries flavor without heat. – Use acid and salt early; they soften raw vegetables and mellow canned legumes overnight so textures improve instead of degrading. – Pack insulation first, food second; a frozen water bottle and a thick towel often outperform a thin gel pack for an eight-hour stretch. – Source staples in bulk when possible, but buy produce in amounts you will actually assemble within three days.

    Your First Week

    Monday and Tuesday keep it simple: canned sardines, pre-peeled carrots, apple slices, and a jar of olive-oil-lemon dressing you shook together Sunday night. Wednesday introduces a soaked-oat base — rolled oats covered with water and a pinch of salt in a sealed container overnight — topped with chickpeas, chopped celery, and a spoonful of tahini thinned with vinegar. Thursday and Friday repeat the oat formula but swap the fruit and add a handful of nuts for crunch. Saturday is assembly day: drain and rinse three cans of beans, peel a batch of carrots, wash greens, and portion dressing into small lidded jars. Sunday stays light — leftovers combined into one big salad — while you restock for the next cycle. Adjust portions after day three based on hunger, not a calculator.

    More from the blog

    From FitLife Solutions

    Our book Healthy Lunchbox Recipes: Practical Meal Prep for Busy Adults goes further, as a digital eBook (PDF and EPUB) you can read on any device.

    Browse all our practical health and fitness guides at fitlifesolutions.site.

    New practical health guides and articles on WhatsApp: follow our channel.

    About the author

    Ahumuza Mark is the founder of FitLife Solutions in Luwero, Uganda. He publishes practical, plain-language guides on everyday health, fitness and habits, and approves every article before it goes online. He is not a doctor: our articles are general information, so please read our Health Disclaimer and talk to a health professional about your own situation. Questions or corrections? Contact us.

    This article is for general information only and is not a substitute for professional medical advice. Talk to your doctor or another qualified health professional before changing your diet, exercise or health routine, especially if you have a medical condition or take medication.


  • Why Walking More Often Beats Running for Everyday Health

    Why Walking More Often Beats Running for Everyday Health

    If you have ever finished a run feeling wrecked for the rest of the day, or skipped a workout entirely because you didn't have the energy for a hard effort, this article is for you. It is written for busy adults who want daily movement to feel doable, not draining, and for anyone whose knees, hips, or lower back complain when the pace picks up. You do not need to be an athlete; you just need a pair of shoes and a willingness to walk out the door.

    After reading, you will be able to: – Structure a weekly walking routine that fits around work and family without requiring a recovery day – Adjust pace, terrain, and direction to target different muscles and energy systems – Recognize the signals that tell you when to push a little longer and when to pull back – Combine short walks and one longer weekend session to accumulate more total activity than a typical running plan allows – Decide confidently when a run adds value and when a walk is the smarter choice for long-term consistency

    Why Walking More Often Outperforms Running for Sustainable Daily Health

    Walking more often outperforms running for sustainable daily health because it removes the friction that stops most people before they start. You do not need special clothes, a shower afterward, or a recovery day. You can step out the door in what you are wearing, walk for ten minutes, and return ready for the next task. That low barrier means you actually do it on busy Tuesdays, rainy Thursdays, and weeks when sleep is short. Consistency compounds; a 20-minute walk you complete every day beats a 45-minute run you manage twice a month.

    The daily sustainability advantage

    Many people find they can stack walking onto existing routines without rearranging their lives. Park farther from the entrance, take a lap around the building between meetings, or walk while on a phone call. These micro-sessions add up without requiring willpower or a training plan. Running, by contrast, usually demands a dedicated block, warm-up, cool-down, and laundry. When life gets chaotic, the run is the first thing cut; the walk stays because it fits in the cracks.

    If you miss a day, simply resume the next morning — no guilt, no "make-up mileage." Track consistency with a simple check mark on a calendar or a step goal that feels easy to hit. If fatigue or soreness appears, shorten the duration but keep the frequency. Check with a doctor before increasing daily volume significantly if you have cardiovascular or orthopedic concerns.

    Why Walking Is More Effective Than Running for Joint Longevity and Injury Prevention

    Walking places far less peak force on your knees, hips, and ankles than running does. Each running step can generate a load several times your body weight, while a walking step typically stays closer to one to one-and-a-half times body weight. That difference adds up fast when you multiply it by thousands of steps per day. Many people find they can walk daily for years without the nagging aches that often sideline a running routine, especially if they have a history of joint irritation or are carrying extra weight.

    Lower impact, longer career

    • Choose shoes with a wide toe box and a modest heel-to-toe drop; replace them when the midsole feels compressed, usually every 300 to 500 miles.
    • Keep your cadence around 100 to 120 steps per minute to shorten your stride and reduce braking forces.
    • Walk on varied surfaces — grass, dirt trails, tracks — instead of concrete every session to distribute load differently.
    • If a joint feels sharp pain (not just muscle fatigue), stop, ice for ten minutes, and take an extra rest day; see a clinician if it persists beyond a few days.
    • Add two short strength sessions per week: bodyweight squats, glute bridges, and calf raises build the muscles that absorb impact before it reaches the joint.

    Consistency beats intensity for joint longevity. A 30-minute walk you actually do every day protects cartilage far better than a 45-minute run you quit after two weeks.

    Why Walking Is More Beneficial Than Running for Metabolic Health and Fat Utilization

    Walking at a comfortable pace keeps your heart rate in a zone where your body prefers fat as its primary fuel source. When you push into a hard run, the demand for quick energy shifts the balance toward stored carbohydrates. That shift is not bad, but it means a larger share of the calories you burn during the session comes from glycogen rather than body fat. For someone focused on metabolic flexibility — the ability to switch between fuel sources efficiently — frequent, lower-intensity movement offers a practical way to train that system without the fatigue that often follows high-intensity work.

    Steady state supports insulin sensitivity

    A brisk 30- to 45-minute walk after a meal can blunt the post-meal glucose spike more pleasantly than a sprint interval session that leaves you drained. The muscle contractions during walking pull glucose from the bloodstream without requiring a large insulin response. Over weeks, this pattern helps cells stay responsive to insulin. Many people find they can fit two or three short walks into a workday — after breakfast, lunch, and dinner — where a single run would be logistically impossible.

    • Walk 10–15 minutes within 30 minutes of finishing a meal
    • Keep pace conversational; you should not be gasping
    • If weather blocks you, march in place or pace a hallway
    • Track how you feel, not just step counts

    Lower stress hormone load

    Hard running spikes cortisol acutely. In moderation that stress drives adaptation, but when life is already stressful the extra load can interfere with recovery, sleep, and next-day appetite regulation. Walking delivers the metabolic upside — improved lipid oxidation, better glucose handling — while simultaneously down-regulating the nervous system. If you have a history of adrenal fatigue symptoms or thyroid concerns, check with a doctor before adding high-intensity volume; walking rarely requires that conversation.

    Why Walking Is More Efficient Than Running for Time-Crunched Lifestyles and Recovery

    Walking fits into the cracks of a busy day in a way running rarely can. You can lace up regular shoes, step out the door, and log ten minutes between meetings or while waiting for the kettle to boil. There is no need to change clothes, drive to a trail, or budget extra time for a post-run shower and cool-down. That lower barrier to entry means you are far more likely to actually do it on a chaotic Tuesday, and consistency over weeks matters more than intensity on a single perfect Saturday.

    The recovery advantage

    Because walking keeps your heart rate in a lower zone, it acts as active recovery rather than another stressor on your system. A brisk 20-minute walk after a poor night’s sleep or a heavy strength session can reduce stiffness and improve circulation without spiking cortisol. Many people find they can walk daily without the accumulated fatigue that forces unplanned rest days after hard runs. If you feel unusually sore, short of breath, or dizzy, scale back and check with a doctor before pushing further.

    • Keep a pair of supportive shoes at your desk or in the car for spontaneous walks.
    • Use walking meetings or phone calls to stack movement with work tasks.
    • Aim for two to three 10-minute blocks if a single 30-minute window does not exist.
    • Treat walking as a non-negotiable appointment on your calendar, not a bonus.

    If you want this in more depth, our book Running: A Practical Guide for New Runners covers it step by step.

    Why Walking Is More Effective Than Jogging for Building Consistent Movement Habits

    Walking asks very little of your schedule, your gear, or your recovery capacity, which makes it far easier to repeat day after day. A jog often requires a change of clothes, a sports bra, a shower afterward, and a body that feels up to impact. A walk only asks for comfortable shoes and a door you can open. That low barrier means you can slot it into a lunch break, a phone call, or the ten minutes while dinner simmers without rearranging your life.

    Build the habit first

    Consistency grows from actions you can complete even on your worst days. Aim for a daily minimum you cannot talk yourself out of — ten minutes out the door and back. If you feel good, keep going; if not, you still hit the target. Track streaks on a wall calendar or a simple habit app; the visual chain reinforces the identity of someone who moves every day. Pair the walk with an existing anchor: morning coffee, the school run, the post-dinner cleanup. When the anchor happens, the walk starts automatically.

    • Set a "no-zero" rule: even a five-minute loop counts.
    • Keep a pair of walking shoes by the door you use most.
    • Use a podcast or audiobook you only allow yourself during walks.
    • If weather or schedule derails you, do laps inside while on a call.

    When motivation dips, shrink the goal instead of skipping. A single block walked maintains the neural pathway better than a perfect week followed by two weeks off. If aches or fatigue appear, swap a walk for gentle mobility work rather than stopping completely; the habit loop stays intact while your body recovers.

    Why Walking Backwards Burns More Calories and Engages Neglected Muscle Groups

    Walking backward changes the mechanical demands on your body in ways forward walking cannot replicate. Because you cannot rely on momentum or the usual heel-to-toe roll, your quadriceps, tibialis anterior, and hip flexors must work harder to control each step. The glutes and calves also fire in a different sequence to stabilize the pelvis. This unfamiliar pattern raises heart rate and oxygen consumption at the same nominal speed, so you expend more energy per minute without increasing impact forces. Many people find it a practical way to add intensity on recovery days or when joints feel sensitive.

    Muscles and mechanics

    • Quadriceps and tibialis anterior control knee extension and foot placement instead of relying on passive momentum.
    • Glutes and hip flexors alternate to stabilize the pelvis with each reverse stride.
    • Calves and foot intrinsics manage balance on a less predictable base of support.
    • Core musculature engages to maintain upright posture while vision and vestibular input shift.

    Start on a flat, obstacle-free surface such as a track, quiet cul-de-sac, or long hallway. Walk backward for 30 to 60 seconds, then turn and walk forward for the same duration; repeat for five to ten minutes. Keep steps short, land softly on the forefoot, and glance over your shoulder every few strides rather than twisting your neck continuously. If balance feels unsteady, hold a light rail or use a treadmill at 1.5 to 2.0 mph with the safety clip attached. Stop if you feel knee pain, dizziness, or sharp discomfort in the lower back. As with any new movement pattern, check with a doctor or physical therapist if you have existing joint issues, vestibular conditions, or recent surgery before adding backward walking to your routine.

    Why Walking Can Burn More Total Calories Than Running Over a Typical Week

    Running burns more calories per minute, yet many people find they actually expend more total energy across a week by walking. A hard 30-minute run often leaves you sore, hungry, and inclined to sit for the rest of the day. A 45-minute walk feels easier, so you stay active afterward — pacing while on calls, taking the stairs, doing a quick evening stroll. That non-exercise movement adds up fast.

    Weekly volume wins

    • Aim for 30 to 60 minutes of brisk walking most days instead of two or three intense runs.
    • Break it into two 20-minute sessions if a single block feels hard to protect.
    • Track steps or time, not pace; consistency beats speed for cumulative burn.
    • Add a weighted backpack or find gentle hills once the routine feels automatic.
    • If fatigue spikes, drop duration by ten minutes rather than skipping the day.

    When a run gets missed because of weather, schedule conflicts, or lingering soreness, the weekly total drops to zero for that session. A walk is rarely derailed by the same obstacles. Over seven days, five 40-minute walks usually outpace two 35-minute runs that never happened. If you have a history of cardiac or metabolic conditions, check with a doctor before increasing daily volume significantly.

    Key Takeaways and Your First Week

    Walking more often builds a foundation that lasts because it protects your joints, keeps your stress response in check, and fits into real life without a recovery debt. Consistency beats intensity when the goal is showing up day after day. Adding variety like backward walking fills the gaps that forward motion leaves.

    Your first week

    Start with a baseline you know you can hit. Aim for a 20-minute walk at a conversational pace on Monday, Wednesday, and Friday. On Tuesday and Thursday, do a 10-minute walk and add two minutes of backward walking on a flat, clear surface like a track or quiet cul-de-sac. Keep your phone in your pocket and use the time to notice your breathing and stride. Saturday is optional — if you feel good, take a 30-minute stroll; if not, rest. Sunday is a full rest day. If any session leaves you sore for more than a few hours, cut the next walk by five minutes. Check with your doctor before starting if you have cardiovascular or joint conditions. The only metric that matters this week is whether you showed up.

    More from the blog

    From FitLife Solutions

    Our book Running: A Practical Guide for New Runners goes further, as a digital eBook (PDF and EPUB) you can read on any device.

    Browse all our practical health and fitness guides at fitlifesolutions.site.

    New practical health guides and articles on WhatsApp: follow our channel.

    About the author

    Ahumuza Mark is the founder of FitLife Solutions in Luwero, Uganda. He publishes practical, plain-language guides on everyday health, fitness and habits, and approves every article before it goes online. He is not a doctor: our articles are general information, so please read our Health Disclaimer and talk to a health professional about your own situation. Questions or corrections? Contact us.

    This article is for general information only and is not a substitute for professional medical advice. Talk to your doctor or another qualified health professional before changing your diet, exercise or health routine, especially if you have a medical condition or take medication.
  • Why Reheating Meat Left Out Overnight Does Not Make It Safe

    Why Reheating Meat Left Out Overnight Does Not Make It Safe

    You found a package of chicken on the counter this morning that sat out since last night's dinner prep. The smell seems fine and you hate wasting food, so the instinct is to cook it thoroughly and move on. This article is for anyone who has stood in that exact spot, wondering if high heat can erase the risk of a simple mistake.

    After reading, you will be able to:

    • Explain why reheating does not undo toxins already produced by bacteria
    • Identify the specific microbes that survive normal cooking temperatures
    • Apply the two-hour rule without guessing or relying on smell
    • Decide confidently when to discard meat instead of taking a chance

    The stakes are higher than a wasted grocery bill

    Foodborne illness from temperature-abused meat can cause days of misery or land vulnerable people in the hospital. Understanding the science behind the danger zone helps you protect your household without overthinking every meal. The following sections break down what actually happens when meat sits out and why the safest choice is often the simplest one: throw it out.

    The Danger Zone: How Room Temperature Accelerates Bacterial Growth

    Between 40 °F and 140 °F, most foodborne bacteria multiply rapidly. A single cell can become millions in a few hours, and the warmer the kitchen, the faster the clock ticks. Leaving raw or cooked meat on the counter overnight gives those microbes an uninterrupted window to reach dangerous levels.

    Why the Range Matters

    Below 40 °F bacterial metabolism slows enough that growth is minimal. Above 140 °F most vegetative cells die. In the middle, however, common pathogens such as Salmonella, Clostridium perfringens, and Staphylococcus aureus can double every 20 minutes under ideal conditions. Overnight exposure often means eight to twelve hours in that sweet spot — enough time for a microscopic contamination to become a serious dose.

    Practical Checks

    • Use a refrigerator thermometer to confirm the unit stays at 40 °F or colder.
    • Set a timer when meat comes out for prep; two hours is the maximum at room temperature, one hour if the room is above 90 °F.
    • Divide large roasts or pots of stew into shallow containers before chilling so the center cools through the danger zone quickly.
    • If you discover meat has sat out longer than the limit, discard it. The cost of replacement is far lower than the risk of illness.

    Heat-Stable Toxins: Why Cooking Cannot Reverse Bacterial Damage

    When bacteria multiply in meat left at room temperature, many species produce metabolic byproducts called heat-stable toxins. Unlike the bacteria themselves, these protein-based poisons do not break down at normal cooking temperatures. Bringing the internal temperature of the meat to 165 °F (74 °C) will kill most vegetative cells, but the toxins they have already released remain chemically intact and biologically active. If you eat that reheated meat, you are consuming the poison along with the protein.

    Why heat fails to fix the problem

    Most common foodborne toxins — such as the enterotoxins produced by *Staphylococcus aureus* and the emetic toxin from *Bacillus cereus* — retain their structure and potency after 30 minutes at boiling temperature. Standard reheating methods (oven, microwave, stovetop, grill) rarely exceed 212 °F (100 °C) at the food surface, far below the sustained, extreme heat required to denature these specific proteins. Pressure canning reaches higher temperatures, but that process is designed for shelf-stable jars, not for salvaging a steak left on the counter.

    Toxins that survive typical reheating

    • *Staphylococcus aureus* enterotoxins (cause rapid-onset vomiting and diarrhea)
    • *Bacillus cereus* emetic toxin (causes nausea and vomiting within 1–6 hours)
    • *Clostridium perfringens* enterotoxin (produced in the gut after ingestion, but spores survive cooking and germinate later)

    Because you cannot see, smell, or taste these toxins, the only reliable control is preventing their production in the first place. Keep raw and cooked meats out of the 40–140 °F (4–60 °C) danger zone; if the two-hour window has passed, discard the item rather than gambling on reheating.

    Spore-Forming Bacteria: The Microbes That Survive Reheating

    Some bacteria do not just grow and release toxins; they build armored survival capsules called endospores. When conditions turn harsh — such as the high heat of reheating — these spores shut down their metabolism and wait. Standard cooking temperatures kill the active cells, but the spores can survive boiling, baking, and even brief pressure cooking. Once the food cools back into the danger zone, the spores germinate into active bacteria again, often with fewer competing microbes to slow them down. This means a piece of meat left out overnight can harbor a second wave of contamination that reheating actually triggers rather than prevents.

    Common spore-formers in meat

    • *Clostridium perfringens* thrives in cooked meats cooling slowly at room temperature; its spores survive reheating and can cause intense abdominal cramping and diarrhea within hours.
    • *Bacillus cereus* is often linked to rice but also grows on protein-rich foods; some strains produce a heat-stable emetic toxin that causes vomiting shortly after ingestion.
    • *Clostridium botulinum* is rarer in aerobic conditions but can appear in anaerobic pockets of large roasts or vacuum-sealed packs; its spores survive normal reheating and the toxin is among the most potent known.

    Because you cannot see, smell, or taste spores, the only reliable control is preventing their germination in the first place. Keep hot foods above 140 °F (60 °C) or chill them below 40 °F (4 °C) within two hours of cooking. If meat has been left out longer, discard it — reheating will not make it safe.

    Time vs. Temperature: Why the Two-Hour Rule Exists

    The two-hour rule is not an arbitrary number; it represents the practical limit for keeping bacterial growth slow enough that the food remains safe to eat later. At typical room temperatures, many common foodborne bacteria can double their population every 20 minutes. In two hours, a single cell can multiply into thousands, and in four hours, into millions. This exponential growth means the total bacterial load — and the toxins they produce — crosses a threshold where reheating becomes ineffective. The clock starts the moment the meat hits the counter, not when you finish cooking it or when you sit down to eat.

    The Temperature Multiplier

    Temperature dramatically changes the math. The "danger zone" spans 40°F to 140°F (4°C to 60°C), but the risk is not flat across that range. At 70°F, the two-hour window applies. At 90°F or above — common at picnics, in parked cars, or near stoves — the safe window shrinks to one hour because bacteria reproduce significantly faster. Conversely, if the meat was held just above 40°F, you have slightly more margin, but relying on that precision is risky without a verified thermometer. Many people find it helpful to treat any meat left out for an unknown duration as exceeding the limit.

    Practical Tracking Habits

    • Set a timer on your phone the moment cooked or raw meat leaves temperature control.
    • Use shallow containers to cool leftovers rapidly before refrigerating; large pots stay in the danger zone too long.
    • If you discover meat has been out past the limit, discard it. The cost of replacement is far lower than the cost of foodborne illness.

    If you want this in more depth, our book Freezer Recipes: Healthy Make-Ahead Meals for Busy Weeks covers it step by step.

    Sensory Deception: Why Smell and Appearance Are Unreliable Safety Indicators

    You pull the container from the counter, give it a sniff, and it smells fine. The color looks normal, maybe just a little dull. Your brain registers "safe," but your nose and eyes are lying to you. The bacteria and toxins that cause foodborne illness are microscopic, odorless, and colorless. By the time meat develops a sour smell, a slimy film, or a gray-green patch, the population has often exploded into the millions. The absence of those signs means only that spoilage organisms haven't taken over yet—not that pathogenic bacteria or their toxins are absent.

    The Silent Threshold

    Many dangerous bacteria, including *Staphylococcus aureus* and *Clostridium perfringens*, produce heat-stable toxins while the meat sits in the danger zone. These toxins do not cloud the liquid, change the texture, or create a smell detectable by humans. A piece of chicken or beef can harbor a full dose of enterotoxin while looking and smelling identical to a fresh cut. Relying on sensory checks creates a false sense of security that leads directly to preventable illness.

    • Spoilage bacteria and pathogenic bacteria are different populations; one signals age, the other signals danger.
    • Toxins are chemical compounds, not living organisms, so they produce no gas or slime.
    • Visual cues like iridescent sheen or color change indicate oxidation or spoilage, not toxin presence.

    If the meat has been left out past the two-hour window, the only safe decision is to discard it. No inspection, smell test, or quick sear can verify safety.

    High-Risk Meats: How Protein Density and Moisture Increase Hazard

    Not all meats carry the same level of risk once they enter the danger zone. The combination of high protein content and abundant moisture creates an ideal environment for rapid bacterial multiplication and toxin production. Ground meats are especially vulnerable because the grinding process distributes surface bacteria throughout the entire batch, increasing the total volume where microbes can thrive. Similarly, poultry skin and processed products like sausages or deli meats often retain more surface moisture and have complex textures that protect bacteria from brief heat exposure.

    Why Protein and Moisture Matter

    Bacteria require water activity and nitrogen-rich nutrients to reproduce and synthesize toxins. Muscle tissue provides both in abundance. The denser the protein matrix and the higher the available water content, the faster populations of *Clostridium perfringens*, *Staphylococcus aureus*, and *Bacillus cereus* can reach dangerous levels. Cured or salted meats may slow growth slightly, but they do not stop it once temperatures rise above 40°F. Organ meats such as liver or kidney are even more perishable due to their extreme nutrient density and delicate structure.

    • Ground beef, turkey, and chicken
    • Stews, casseroles, and bone-in roasts that cool slowly
    • Deli slices, hot dogs, and pre-cooked sausages
    • Liver, kidney, and other organ meats
    • Marinated or tenderized cuts where surface bacteria have been pushed inward

    If any of these items have been left out for more than two hours, the safest action is disposal. No reheating method can reliably undo the toxins already produced in these high-risk matrices.

    Safe Handling Protocols: What to Do Instead of Reheating Questionable Meat

    When you discover meat has been left out past the safe window, the only reliable action is to discard it. No cooking method, marinade, or visual inspection can undo the risk. Wrap the item securely in a bag before placing it in the trash so pets or wildlife cannot access it. Clean every surface the meat touched — countertops, cutting boards, utensils, container exteriors — with hot, soapy water, then follow with a kitchen sanitizer or a diluted bleach solution (one tablespoon unscented bleach per gallon of water). Wash your hands thoroughly for at least twenty seconds afterward.

    Quick decision checklist

    • If the meat sat at room temperature longer than two hours (or one hour above 90 °F), throw it out.
    • If you are unsure how long it was out, treat it as unsafe.
    • Do not taste, smell, or reheat to "test" it.
    • Replace the meal with a shelf-stable protein such as canned beans, tuna, or eggs cooked fresh.

    Build habits that prevent the dilemma

    Store raw meat on the bottom shelf of the refrigerator at 40 °F or below, and freeze anything you will not cook within one to two days. Thaw frozen items in the fridge, in cold water changed every thirty minutes, or in the microwave — never on the counter. Set a timer when you pull meat out to prep so it never sits forgotten. Keep a food thermometer handy; cook poultry to 165 °F, ground meats to 160 °F, and whole cuts to 145 °F with a three-minute rest. These routines cost only minutes and remove the guesswork that leads to risky shortcuts.

    Key Takeaways and Your First Week

    The core lessons from this article are straightforward: – Bacteria multiply rapidly in the danger zone (40°F–140°F), and reheating kills the germs but not the heat-stable toxins they already produced. – Spores from bacteria like *Clostridium perfringens* and *Bacillus cereus* survive boiling temperatures and can reactivate once the food cools down again. – You cannot rely on smell, color, or texture to detect these toxins; contaminated meat often looks and smells perfectly normal. – The two-hour rule (one hour above 90°F) is a hard safety limit, not a guideline for quality.

    Your First Week

    Start by auditing your current habits. Check your refrigerator temperature with an appliance thermometer to confirm it sits at 40°F or below. Place a timer or sticky note near the stove as a visual cue to refrigerate leftovers within two hours of cooking. Practice portioning large batches of meat into shallow containers before you sit down to eat; this speeds cooling and removes the temptation to leave the pot on the counter. If you discover meat that has sat out too long, discard it immediately without tasting. Replace the lost protein with shelf-stable options like canned beans, eggs cooked fresh, or peanut butter so the meal plan stays intact. Many people find that prepping a "plan B" protein on Sunday prevents risky decisions on busy weeknights.

    More from the blog

    From FitLife Solutions

    Our book Freezer Recipes: Healthy Make-Ahead Meals for Busy Weeks goes further, as a digital eBook (PDF and EPUB) you can read on any device.

    Browse all our practical health and fitness guides at fitlifesolutions.site.

    New practical health guides and articles on WhatsApp: follow our channel.

    About the author

    Ahumuza Mark is the founder of FitLife Solutions in Luwero, Uganda. He publishes practical, plain-language guides on everyday health, fitness and habits, and approves every article before it goes online. He is not a doctor: our articles are general information, so please read our Health Disclaimer and talk to a health professional about your own situation. Questions or corrections? Contact us.

    This article is for general information only and is not a substitute for professional medical advice. Talk to your doctor or another qualified health professional before changing your diet, exercise or health routine, especially if you have a medical condition or take medication.
  • How to Improve Posture at a Desk Job With Ergonomic Adjustments and Daily Habits

    How to Improve Posture at a Desk Job With Ergonomic Adjustments and Daily Habits

    If you spend most of your workday at a desk and notice stiffness in your neck, tight shoulders, or a dull ache in your lower back by late afternoon, this guide is for you. It is written for office workers, remote employees, students, and anyone else whose role requires long stretches of sitting and screen time. You do not need a specialized background in ergonomics or a budget for expensive equipment to make meaningful changes.

    By the end of this article, you will be able to:

    • Adjust your chair, monitor, and desk height so your spine stays in a neutral, supported position
    • Arrange your keyboard and mouse to keep your shoulders relaxed and wrists straight
    • Insert brief, practical movement breaks that interrupt static loading without derailing your workflow
    • Perform a handful of targeted exercises that activate deep core and scapular muscles right at your workstation
    • Build a simple end-of-day routine to restore tissue length and joint mobility
    • Choose accessories that reinforce good habits rather than becoming clutter

    These steps work together as a system. If you have an existing injury or persistent pain, check with a healthcare professional before starting new movement patterns.

    Optimize Chair Settings for Neutral Spine Alignment

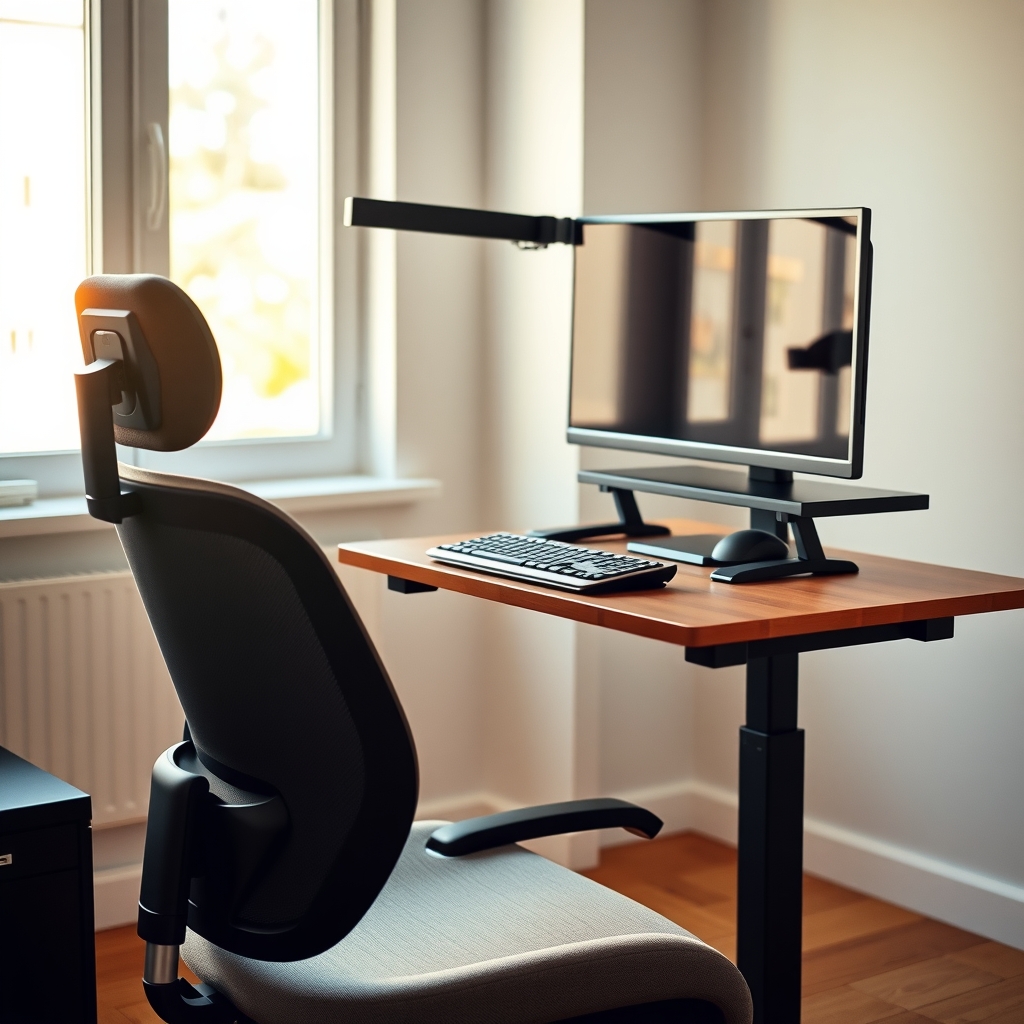
    Start by sitting all the way back so your pelvis contacts the seat back. If the chair has a lumbar adjustment, raise or lower it until the curve fills the natural hollow of your lower back without pushing you forward. Many people find that a small rolled towel placed at belt level works when the built-in support sits too high or low. Set the seat height so your feet rest flat on the floor and your thighs are roughly parallel to the ground; if the desk forces your elbows higher, use a stable footrest rather than perching on the front edge of the seat. Adjust seat depth so you have two to three finger-widths between the front edge and the back of your knees — this prevents pressure on the popliteal area and lets you use the backrest fully. Unlock the recline tension and lean back 100 to 110 degrees for keyboard work; a slight recline shifts load off the lumbar discs while keeping your head over your shoulders. If the chair has adjustable armrests, lower them until your shoulders relax and your elbows hang at about a 90 to 100 degree angle when typing. Armrests that hit the desk edge force you to hunch or perch forward.

    • Feet flat, thighs parallel, small gap behind knees
    • Lumbar support in the small of the back, not the mid-back
    • Recline unlocked, 100 to 110 degrees for typing
    • Armrests low enough to keep shoulders down

    Check these settings each morning; chairs shift over time and so does your body. If you feel pressure points, numbness, or increasing discomfort after 30 minutes, readjust or consider a different chair model. Persistent pain warrants a conversation with a healthcare provider.

    Position Monitor and Input Devices to Eliminate Forward Head Posture

    Place the top of your monitor at or slightly below eye level so your gaze falls naturally on the upper third of the screen without tilting your chin down. If you use a laptop, raise it on a stable stand or a stack of books and add an external keyboard and mouse; this separates the screen height from the hand position and keeps your neck in a neutral line with your spine. Sit at an arm's length from the display, roughly 50 to 70 centimeters, adjusting closer or farther until text is sharp without leaning forward. Tilt the screen back 10 to 20 degrees to reduce glare and match the downward angle of your eyes.

    Center the monitor directly in front of you; if you reference documents, use an inline document holder between the keyboard and screen so your head stays midline. Position the keyboard so your elbows stay near your sides at about 90 degrees, with wrists floating straight, not bent up or down. Keep the mouse on the same plane and within easy reach — avoid stretching to the side. A compact keyboard without a number pad often lets the mouse sit closer, reducing shoulder abduction.

    • Top of screen at eye level; laptop on stand with external input devices
    • Viewing distance arm's length; slight backward tilt
    • Monitor centered; documents inline between keyboard and screen
    • Keyboard and mouse at elbow height, wrists neutral, mouse close

    If you catch yourself craning forward, pull your chin back gently as if making a double chin, then reset the screen distance. Many people find a quick "chin tuck" cue every 30 minutes breaks the forward-head habit. If neck discomfort persists beyond a few days of adjustments, consider checking with a healthcare provider to rule out other contributors.

    Configure Desk Height and Layout for Relaxed Shoulders and Supported Arms

    Desk height drives shoulder position more than most people realize. If the surface sits too high, you shrug to reach the keyboard; too low, you lean forward and round the upper back. Aim for a height where your forearms rest parallel to the floor with elbows bent around ninety degrees and shoulders relaxed away from your ears. A quick test: drop your hands to your sides, bend elbows to ninety degrees, and note where your fingertips land. That level is your target keyboard plane. If the desk is fixed and too high, raise the chair and add a stable footrest so thighs stay supported and feet are flat. If the desk is too low, place sturdy risers under the legs or use a height-adjustable platform for the monitor and keyboard tray.

    Keep the primary work zone — keyboard, mouse, and frequently referenced documents — within a comfortable arc so you don't reach forward or twist. Center the keyboard with the B key aligned to your midline; place the mouse on the same level and immediately beside it to avoid shoulder abduction. A document holder positioned between monitor and keyboard or just to the side keeps reference material at eye level and prevents repeated neck flexion.

    • Set desk or keyboard tray so forearms are parallel to floor with shoulders down
    • Center keyboard on body midline; mouse touching keyboard edge
    • Use a document holder to keep papers at screen height
    • Keep phone, water, and notebooks in the secondary zone to avoid overreaching

    If shoulders creep up during the day, pause, exhale fully, and let them drop before resuming. Many people find a brief reset every thirty minutes prevents the gradual climb toward the ears. If discomfort persists, check with a healthcare professional to rule out underlying issues.

    Integrate Micro-Movement Breaks to Counteract Static Loading

    Sitting still for hours loads the same tissues continuously, which often leads to stiffness in the hips, thoracic spine, and shoulders. The goal is not to leave your desk every few minutes but to interrupt that static load with brief, intentional movement. Set a gentle timer for every 30 to 45 minutes. When it goes off, spend 60 to 90 seconds moving through a short sequence before returning to work.

    Start by standing and shifting weight side to side, letting the hips unlock. Roll the shoulders backward five times, then forward five times. Reach both arms overhead and lean gently left, then right, opening the rib cage. Perform five seated or standing cat-cow cycles: round the back while tucking the chin, then arch slightly while lifting the chest. Finish with three deep breaths, expanding the belly on the inhale and lengthening the exhale.

    • Stand, weight shift side to side, 10 seconds
    • Shoulder rolls back x5, forward x5
    • Overhead reach with side bend, each side 10 seconds
    • Cat-cow cycles x5
    • Three diaphragmatic breaths

    If a meeting runs long and you miss a window, do not skip the next one; just do it as soon as you can. Many people find that linking the break to a natural transition — ending a call, sending an email, refilling water — makes the habit stick. If any movement aggravates existing pain, scale the range or check with a healthcare provider before continuing.

    If you want this in more depth, our book Ergonomics: Designing Your Workspace for Health and Comfort covers it step by step.

    Strengthen Deep Core and Scapular Stabilizers With Targeted Desk Exercises

    Sitting for hours lets the deep stabilizers that hold your spine and shoulder blades in place go quiet. When those muscles disengage, the upper traps, levator scapulae, and low-back extensors take over, creating the tightness and ache many people feel by late afternoon. Reactivating the deep core and scapular stabilizers does not require a gym session; it only needs a few deliberate contractions spread through the day.

    Start with a seated diaphragmatic reset. Sit tall, feet flat, and place one hand on the lower ribs. Inhale through the nose, expanding the ribs laterally and posteriorly rather than lifting the chest. Exhale fully through pursed lips while gently drawing the navel toward the spine without flattening the low back. Repeat five breaths every hour; this cues the transverse abdominis and pelvic floor to share the load with the lumbar spine.

    For the scapulae, use the wall-slide pattern adapted to your chair. Sit with your back against the chair, elbows bent to ninety degrees and tucked near your ribs. Press the forearms lightly into the armrests or your thighs, then slide the elbows upward as if tracing a "Y" on the wall behind you. Keep the shoulders down and feel the lower trapezius and serratus anterior engage. Pause two seconds at the top, then lower slowly. Two sets of eight repetitions, twice daily, are enough to remind the brain of the pattern.

    Add a prone press-up if you have floor space during a longer break. Lie face down, forearms on the floor, and press the pubic bone down while lifting the chest a few centimeters. Hold three breaths, focusing on length through the crown of the head rather than hyperextension. This counters the flexion bias of desk work without compressing the lumbar facets.

    • Seated diaphragmatic breathing: five breaths, hourly
    • Seated wall-slide "Y": two sets of eight, mid-morning and mid-afternoon
    • Prone press-up: three breaths, once during a longer break

    If any movement increases radiating symptoms, dizziness, or sharp joint pain, stop and check with a clinician before continuing. Consistency beats intensity; a few mindful reps every day will serve you better than an occasional marathon session.

    Build End-of-Day Reset Rituals to Restore Tissue Length and Joint Mobility

    After hours of sitting, the hips, chest, and upper back often shorten and stiffen. A short, consistent reset routine helps restore length and mobility before you transition to the rest of your evening. Aim for five to ten minutes within thirty minutes of finishing work. Move slowly and breathe into each position.

    Start with a supported hip flexor stretch. Kneel on one knee with the other foot forward, tuck the pelvis under, and gently shift weight forward until you feel a stretch in the front of the hip on the kneeling side. Hold for thirty seconds per side. If kneeling bothers your knee, place a folded towel underneath or do the same stretch standing with one foot on a low chair behind you.

    Next, open the chest and thoracic spine. Lie lengthwise on a foam roller or a rolled-up firm blanket positioned along your spine, head and hips supported. Let your arms fall open to the sides, palms up. Stay for one to two minutes, breathing deeply. If the roller feels too intense, use a thinner roll or skip it and do a doorway pec stretch instead: forearms on the doorframe, step one foot through until you feel a gentle stretch across the chest, hold thirty seconds.

    Finish with a few cat-cow cycles on hands and knees, then sit back into child's pose with arms extended forward, letting the lower back broaden. If any position causes sharp pain, stop and check with a healthcare provider before continuing. Many people find this sequence reduces the tightness that builds up during the day and makes the next morning feel easier.

    Select and Use Ergonomic Accessories That Reinforce Sustainable Habits

    A well-chosen accessory should solve a specific mismatch between your body and the workstation, not simply add clutter. Start by identifying the one or two spots where you consistently deviate from neutral alignment despite the adjustments already made. If your feet dangle or you perch on the front edge of the seat, a stable footrest with a textured, angle-adjustable surface lets you plant your soles firmly, which encourages the pelvis to stay back in the chair. If the monitor still sits too low after using its built-in stand, a simple riser — or a stack of sturdy books — brings the top third of the screen to eye level without forcing you to crane your neck.

    For keyboard and mouse work, a low-profile tray that tilts slightly negative (front edge lower than back) keeps wrists in a straighter line and shoulders relaxed. Choose a tray wide enough to hold both input devices side by side so you do not reach outward for the mouse. A vertical or trackball mouse can reduce forearm pronation for people who feel wrist fatigue, while a split keyboard lets each hand find a natural angle. Test any new device for at least three full workdays before deciding; the learning curve often masks the real benefit.

    Lumbar cushions and seat wedges are useful only when the chair itself cannot be adjusted to support your curve. Pick a firm, contoured cushion that fills the gap without pushing you forward. A document holder placed inline between keyboard and monitor prevents repetitive neck rotation when referencing papers. Finally, a timer app or wearable vibration reminder reinforces the micro-break habit without relying on willpower. Many people find that paring down to the few accessories that address their actual pain points works better than buying a full "ergonomic kit" at once. If discomfort persists after two weeks of consistent use, check with a healthcare provider to rule out underlying issues.

    Putting It Together

    Start Monday by picking one adjustment from each earlier section and applying it before you open your laptop. Raise the chair so feet rest flat and hips sit slightly above knees. Pull the monitor to arm’s length with the top line at eye level. Set the keyboard tray or desk surface so elbows stay near your sides at roughly 90 degrees. Keep a sticky note at eye level that reads "ears over shoulders" as a gentle cue. Set a timer for 45 minutes; when it sounds, stand, roll shoulders back, and take three slow breaths before sitting again.

    • Monday–Wednesday: focus only on the setup and the hourly stand-up cue. Notice where fatigue creeps in.
    • Thursday–Friday: add two desk exercises — chin tucks and scapular wall slides — during one break each morning and afternoon.
    • Saturday: do the end-of-day reset routine (doorway pec stretch, thoracic rotation, hip flexor lunge) once, holding each 20–30 seconds per side.
    • Sunday: review what felt sustainable. Keep the changes that required almost no willpower; tweak or drop the rest.

    If any stretch or movement sharpens pain, stop and check with a clinician before continuing. Many people find that consistency with a few small habits beats a perfect plan abandoned after three days.

    More from the blog

    From FitLife Solutions

    Our book Ergonomics: Designing Your Workspace for Health and Comfort goes further, as a digital eBook (PDF and EPUB) you can read on any device.

    Browse all our practical health and fitness guides at fitlifesolutions.site.

    Marketing a product or service of your own? Get chapter 1 of The Digital Marketing Guide free by email.

    New practical health guides and articles on WhatsApp: follow our channel.

    Earn by sharing our books with your audience: join our affiliate channel on Telegram for one ready-to-post book a day.

    This article is for general information only and is not a substitute for professional medical advice. Talk to your doctor or another qualified health professional before changing your diet, exercise or health routine, especially if you have a medical condition or take medication.

  • Eating Healthy on a Budget Without Cooking: No-Heat Meals and Smart Buys

    Eating Healthy on a Budget Without Cooking: No-Heat Meals and Smart Buys

    You open the fridge after a long shift or a late study session and the last thing you want is a stove. Maybe your kitchen is a hot plate and a mini-fridge, maybe the power is out, or maybe you just refuse to heat the apartment in July. This guide is for anyone who needs real meals — protein, fiber, color, crunch — without turning on a burner, spending a fortune, or living on protein bars.

    After reading, you will be able to:

    • Stock a no-cook pantry for roughly $50 that covers breakfast, lunch, and snacks for a week
    • Pick ready-to-eat proteins that cost less per gram than takeout chicken
    • Assemble five repeatable meal formulas that keep calories in check without counting
    • Adapt the same framework whether you shop at Aldi, Tesco, a Manila wet market, or a campus convenience store
    • Prep seven days of grab-and-go containers in half an hour on Sunday

    No meal is perfect for every body. If you have specific health conditions or dietary restrictions, check with a doctor or registered dietitian before making big changes.

    Smart Grocery Staples: Building a No-Cook Pantry for Under $50

    Start by scanning your cupboards for what you already own — half a bag of oats, a jar of peanut butter, a few cans of beans — so you only buy what fills gaps. Aim to spend roughly thirty to forty dollars on shelf-stable basics and save the rest for fresh items like bananas, carrots, or a block of tofu that week. Shop the bulk bins or store-brand aisles for the lowest unit price on oats, brown rice, lentils, and sunflower seeds; a pound of each often costs under two dollars total. Canned fish, beans, and tomatoes are protein and flavor anchors — grab four to six cans when they are on sale. Add a large tub of plain yogurt or a shelf-stable carton of soy milk for calcium and creaminess in cold dishes. Round out the pantry with a jar of tahini or peanut butter, a bottle of vinegar, soy sauce, olive oil, and a shaker of dried herbs; these turn plain ingredients into meals without heat.

    • Rolled oats (2 lb)
    • Brown rice or quinoa (1 lb)
    • Dry lentils or split peas (1 lb)
    • Canned chickpeas, black beans, tuna, sardines (4–6 cans)
    • Peanut butter or tahini (16 oz)
    • Sunflower seeds or peanuts (1 lb)
    • Canned diced tomatoes (2 cans)
    • Olive oil, vinegar, soy sauce, dried oregano or cumin
    • Plain yogurt or shelf-stable soy milk (32 oz)
    • Fresh: bananas, carrots, cabbage, apples (rotate weekly)

    If a can dents or a bag tears, transfer contents to a clean jar immediately to avoid waste. When prices spike, swap lentils for split peas or peanut butter for sunflower seed butter — similar nutrition, often cheaper. Many people find this core list covers breakfasts, lunches, and snacks for a week; adjust quantities to your appetite and check with a doctor if you have specific dietary needs.

    Protein Without the Pan: Affordable Ready-to-Eat Sources That Keep You Full

    Canned fish is one of the highest-protein, lowest-effort staples you can keep on hand. A standard 5-ounce can of chunk light tuna in water delivers around 20 grams of protein for well under a dollar in most US stores; sardines and mackerel often cost even less per gram and bring calcium and omega-3s with them. Look for sales on 4- or 12-packs and rinse briefly if sodium is a concern. Rotisserie chicken from the grocery deli works out to roughly $2 to $3 per pound of edible meat once you strip the skin and bones — shred it into containers for salads, wraps, or cold grain bowls. Hard-boiled eggs are another workhorse: a dozen large eggs often sell for $2 to $4, and you can buy them pre-cooked and peeled if your budget allows the markup. Cottage cheese and Greek yogurt (plain, large tubs) hit 12 to 20 grams of protein per cup; portion them into single-serve jars with a spoonful of peanut butter or a drizzle of honey to balance the tang.

    • Canned beans and lentils: drain, rinse, toss with vinegar and oil for an instant 7 to 9 gram protein base.
    • Smoked tofu or vacuum-packed firm tofu: cube straight into noodle salads; 10 to 14 grams per 3-ounce block.
    • Jerky or biltong: watch sugar and sodium, but 9 to 12 grams per ounce makes it a shelf-stable backup.
    • Edamame (frozen, shelled): thaw under running water for 9 grams per half-cup.
    • Cheese sticks or mini Babybel rounds: 5 to 7 grams each, portion-controlled.

    If a protein source feels repetitive, rotate two or three each week rather than buying ten kinds at once. Many people find that keeping three "grab bins" in the fridge — one for fish, one for dairy, one for plant — makes assembly automatic. Check with a doctor if you have specific sodium or cholesterol restrictions before relying heavily on cured or canned items.

    Assembly-Only Meals: 5 No-Heat Formulas for Weight-Loss Friendly Lunches

    Start with a base of pre-washed salad greens or shredded cabbage; they cost less per serving than bagged mixes and last longer. Add a ready-to-eat protein such as canned light tuna, drained canned chicken, hard-boiled eggs from the deli case, or a scoop of cottage cheese. Layer in a fiber-rich carbohydrate like canned beans rinsed well, pre-cooked lentils from the vacuum pouch, or a handful of microwaveable rice you let cool. Finish with a healthy fat — a quarter avocado, a sprinkle of sunflower seeds, or a drizzle of olive oil — and a no-sugar dressing such as lemon juice with mustard or a tablespoon of Greek yogurt thinned with water. Many people find this ratio keeps them full through the afternoon without the crash that follows refined carbs.

    • Mexican bowl: black beans, corn, salsa, rotisserie chicken, cabbage slaw, lime
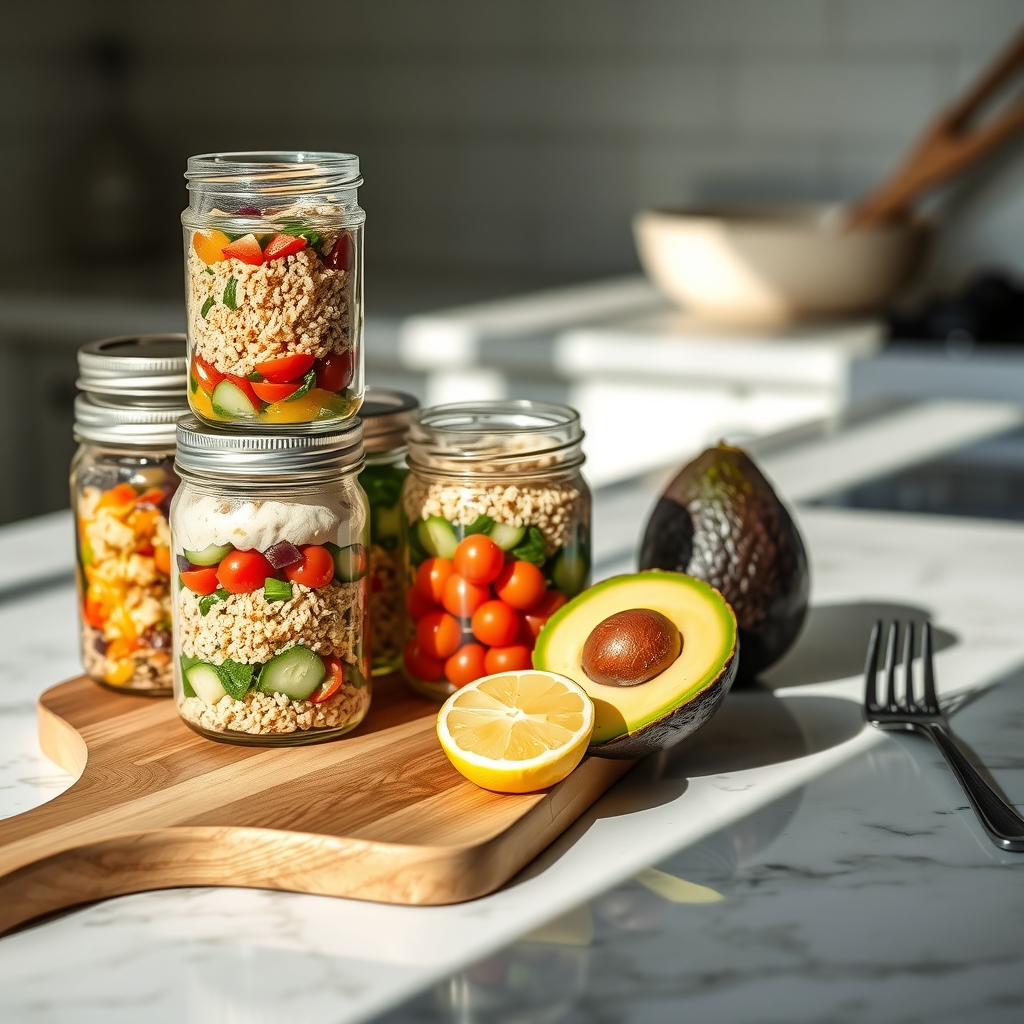
    • Mediterranean jar: chickpeas, cucumber, tomato, feta, olives, oregano, red-wine vinegar
    • Asian slaw: shredded carrots, edamame, shelled peanuts, pre-cooked shrimp, ginger-soy drizzle
    • Italian antipasto: white beans, pepperoncini, artichoke hearts, salami slices, basil, balsamic
    • Curried lentil salad: vacuum-pack lentils, raisins, celery, cashews, curry powder, yogurt dressing

    If a can tastes metallic, rinse the contents under cold water for thirty seconds. When greens wilt early, toss them into the next day’s smoothie or stir into hot oatmeal. Portion each formula into wide-mouth jars with dressing at the bottom; they stay crisp for four days. Adjust salt after assembling, not before, because canned items vary. Check with a doctor if you need to limit sodium or potassium for medical reasons.

    Dorm-Room & Tiny Kitchen Hacks: Eating Well in College Without a Stove

    Living in a dorm or a tiny apartment often means sharing one microwave or having zero counter space, but you can still build satisfying meals with a few compact tools and smart habits. Start with a sturdy 1.5-quart food storage container that doubles as a mixing bowl — use it to combine canned beans, pre-washed greens, and a squeeze pouch of tuna or chicken, then eat straight from it to skip dishes. A small insulated lunch bag with a slim ice pack keeps Greek yogurt, string cheese, or hummus safe all day between classes, and a collapsible silicone bowl stores flat in a drawer but expands for hearty salads or grain bowls.

    Keep a "pantry bin" under your bed or on a high shelf: stock single-serve olive oil packets, shelf-stable tofu, vacuum-sealed beets, instant oatmeal cups, and nut butter jars. These survive temperature swings and don’t need refrigeration until opened. For flavor without bulk, carry a mini spice kit — salt, pepper, red pepper flakes, and garlic powder in tiny screw-top containers from the travel aisle.

    • Wash produce in a colander in the bathroom sink; spin dry in a clean pillowcase if there’s no salad spinner.
    • Use a manual can opener (the $2 metal kind) — electric ones break and take outlets.
    • Prep three days of lunches at once: layer dressing, sturdy veg, protein, and greens in jars so nothing gets soggy.
    • If the shared fridge is unreliable, freeze a water bottle overnight; it chills your lunch bag and becomes drinking water by noon.

    Many people find a $15 electric kettle (if allowed) invaluable for instant oats, couscous, or rehydrating dried mushrooms — check your housing rules first. When space is truly tight, prioritize calorie-dense, nutrient-rich items like peanut butter, canned mackerel, and sunflower seeds over bulky low-calorie fillers. If you have dietary restrictions or health conditions, check with a doctor or campus dietitian before relying heavily on shelf-stable proteins.

    If you want this in more depth, our book Vegetable-Forward Cooking: Simple Methods for Everyday Meals covers it step by step.

    Regional Price Hacks: Adapting No-Cook Strategies for UK, Philippines & US Markets

    Prices and product availability shift dramatically between countries, so a no-cook pantry that works in Ohio needs tweaking for London or Manila. In the US, canned beans, rotisserie chicken, and Greek yogurt are often the cheapest ready-to-eat proteins per gram; store brands at Aldi, Walmart, or Costco keep the bill low. Canned tuna or salmon packed in water is a staple, but watch sodium if you're eating it daily. Frozen edamame thaws in the fridge and adds plant protein without cooking. For produce, bagged coleslaw mix, baby carrots, and frozen berries offer the most nutrition per dollar with zero prep.

    In the UK, tinned pulses (baked beans, butter beans, chickpeas) are pantry gold — often under £0.50 a tin at supermarkets like Lidl, Aldi, or Tesco value lines. Reduced-fat hummus, quark, and cottage cheese provide high protein for £1–£1.50 per pot. Look for "wonky veg" boxes or frozen chopped onions, peppers, and spinach to skip chopping. Tinned mackerel in tomato sauce delivers omega-3s cheaper than fresh fish. Oatcakes or wholemeal wraps store well and need no toasting.

    In the Philippines, sardines in tomato sauce (like Mega or Ligo) and canned tuna flakes in oil are affordable protein anchors at ₱15–₱25 per can. Pair with instant brown rice or microwaveable plain rice packs (₱20–₱30) if you have a kettle or microwave. Fresh options: boiled eggs from the corner store (₱8–₱10 each), tokwa (firm tofu) eaten cold with vinegar-soy dip, and unripe mango or guava for vitamin C. Wet markets often sell pre-shredded green papaya or carrots for ensalada cheaper than supermarkets. Shelf-stable UHT milk or soy milk boxes (₱25–₱35) work for overnight oats.

    • US: Rotisserie chicken, canned beans, Greek yogurt, frozen edamame, bagged slaw
    • UK: Tinned pulses, quark, cottage cheese, tinned mackerel, frozen veg mixes
    • Philippines: Canned sardines/tuna, boiled eggs, tokwa, UHT milk, wet-market pre-cut veg

    Always compare unit prices (per 100g or per serving) rather than shelf price. Many people find that shopping late for markdowns on ready-to-eat proteins — rotisserie chicken, pre-cooked prawns, tofu packs — cuts costs 30–50%. If a staple spikes in price, swap to another protein in the same category (e.g., canned salmon for tuna, lentils for chickpeas) rather than dropping the meal format. Check with a doctor if you have sodium restrictions or specific dietary needs before relying heavily on canned or processed items.

    Reddit-Tested Shopping Lists: Community-Vetted Buys That Maximize Nutrition per Dollar

    Reddit communities like r/EatCheapAndHealthy and r/MealPrepSunday consistently highlight a handful of items that deliver maximum nutrition for minimal spend without ever touching a stove. The consensus centers on canned fish, legumes, eggs, and strategic produce choices that stay fresh for days. A typical "starter haul" discussed in weekly threads often looks like this:

    • Canned light tuna or sardines in water (watch for sales at $0.80–$1.20 per can)
    • Canned chickpeas, black beans, and lentils ($0.60–$0.90 per can; dry bags are cheaper if you can soak overnight)
    • Dozen large eggs (often the cheapest complete protein per gram)
    • Bulk rolled oats and peanut butter for breakfasts and calorie density
    • Carrots, cabbage, onions, and apples — the produce that lasts two weeks in a crisper drawer
    • Frozen spinach or mixed vegetables (cheaper than fresh, zero waste)
    • Block cheddar or mozzarella (grate yourself; pre-shredded costs more and dries out)
    • Greek yogurt tubs (plain, 32 oz) for protein, probiotics, and sauces
    • Whole-wheat tortillas or pita (freeze extra packs)

    Many people find that buying store brands for the canned and pantry items cuts 20–30% off the bill with no noticeable quality drop. A common failure point is grabbing "healthy" labeled snacks — roasted chickpea packets, protein bars, veggie straws — which inflate cost per calorie. If your cart exceeds budget, swap the snacks for an extra can of beans and a banana. Shoppers in high-cost areas report success splitting bulk warehouse trips with a friend to hit unit prices without storage issues. Always compare price per ounce on the shelf tag; the larger jar isn't always the better deal. If you have specific dietary restrictions or health conditions, check with a doctor or dietitian before making major shifts.

    Cold Meal Prep Systems: Batch-Assembling 7 Days of Healthy Meals in 30 Minutes

    Spend thirty minutes on Sunday and you can walk away with a week of grab-and-go meals that never touch a stove. Start by clearing a clean surface and lining up seven identical containers — wide-mouth jars or rectangular boxes work best for stacking. Choose two base formulas from the earlier section (for example, the bean-and-grain bowl and the tuna-and-veggie salad) so you only prep two component sets but get variety through different toppings.

    Batch the shelf-stable bases first. Drain and rinse three cans of beans, mix with two cups of pre-cooked microwaveable rice or quinoa pouches, and portion into four containers. In the other three, flake two cans of tuna or chicken, stir in a spoonful of mayo or Greek yogurt, and fold in a bag of pre-shredded coleslaw mix for crunch. Keep wet ingredients separate: pack cherry tomatoes, cucumber chunks, and berries in small zip-top bags or silicone cups so they stay crisp until lunch.

    Add flavor layers last. Divide a bulk tub of hummus, a jar of salsa, and a squeeze bottle of vinaigrette into tiny condiment containers. Sprinkle nuts, seeds, or shelf-stable cheese crisps into snack-size bags. Seal everything, stack in the fridge, and label lids with a dry-erase marker if you share space.

    When a container leaks or greens wilt early, swap the wet veg into a fresh bag and eat that meal first. If appetite shifts, remix tomorrow’s base with a different sauce or add a hard-boiled egg from the store-bought pack. The system flexes — you stay fed.

    Putting It Together

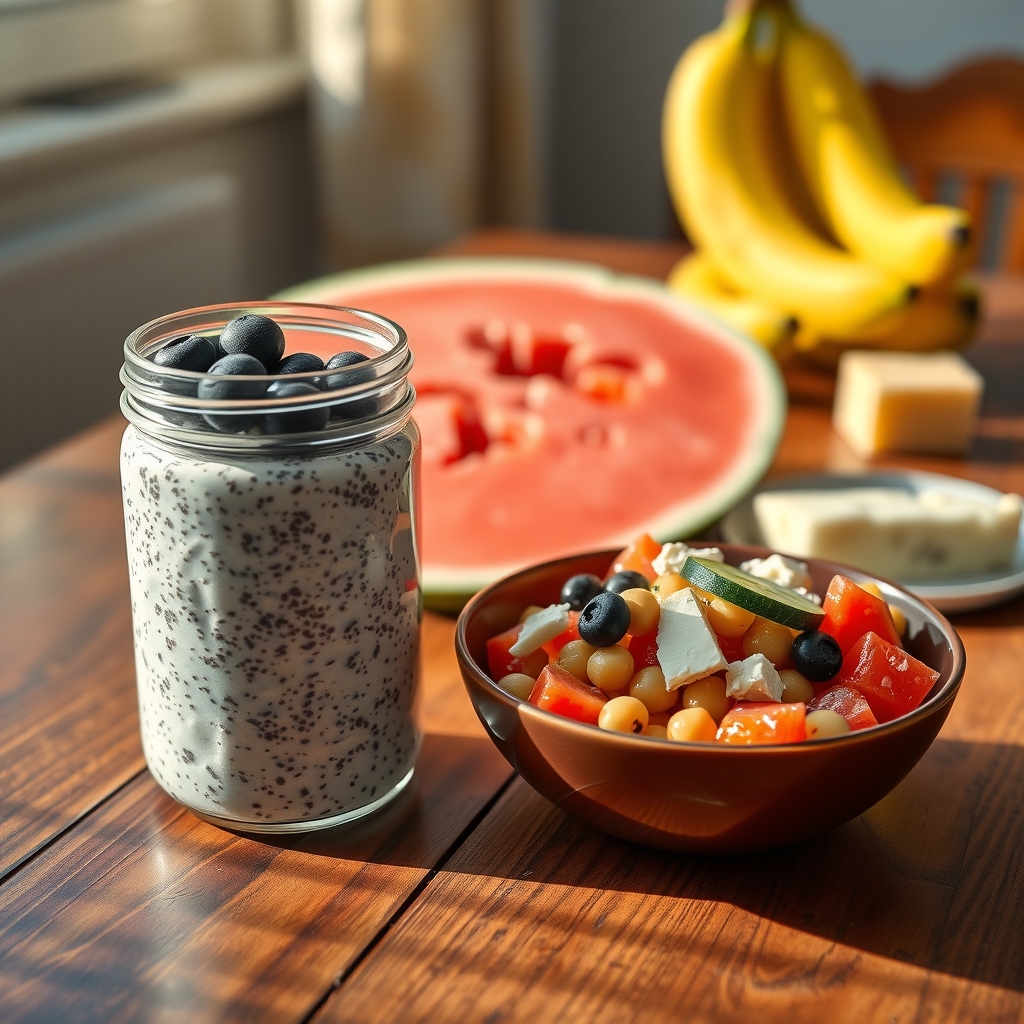
    Start with a single grocery trip using the pantry staples and proteins that fit your local prices. Spend the first evening washing and portioning produce — rinse canned beans, chop cabbage or carrots, divide nuts and seeds into small containers. Assemble three lunch jars using the grain-plus-bean-plus-vegetable formula; keep dressing separate until you eat. Make two breakfast jars with oats, milk or water, chia, and whatever fruit is cheapest this week. For dinners, plan three no-cook plates: canned fish with pre-washed greens and a spoonful of hummus, cottage cheese with cucumber and whole-grain crackers, and a bean salad with corn, peppers, and a squeeze of lime. Keep the remaining proteins and produce visible at eye level in the fridge so they get used first.

    • Day 1–2: Eat the assembled lunches and breakfasts; adjust portion sizes if you feel hungry or overly full.
    • Day 3: Swap one lunch for a peanut-butter wrap with banana if you need variety.
    • Day 4–5: Use leftover chopped vegetables in a quick tuna or chickpea salad; add a hard-boiled egg if you have access to a kettle.
    • Day 6–7: Finish open jars, then note what ran out and what you barely touched.

    If something spoils or you tire of a combination, replace just that component next week rather than overhauling the whole system. Many people find a 15-minute Sunday reset keeps the rhythm going. Check with a doctor before making major dietary changes if you have health conditions.

    More from the blog

    From FitLife Solutions

    Our book Vegetable-Forward Cooking: Simple Methods for Everyday Meals goes further, as a digital eBook (PDF and EPUB) you can read on any device.

    Browse all our practical health and fitness guides at fitlifesolutions.site.

    New practical health guides and articles on WhatsApp: follow our channel.

    About the author

    Ahumuza Mark is the founder of FitLife Solutions in Luwero, Uganda. He publishes practical, plain-language guides on everyday health, fitness and habits, and approves every article before it goes online. He is not a doctor: our articles are general information, so please read our Health Disclaimer and talk to a health professional about your own situation. Questions or corrections? Contact us.

    This article is for general information only and is not a substitute for professional medical advice. Talk to your doctor or another qualified health professional before changing your diet, exercise or health routine, especially if you have a medical condition or take medication.
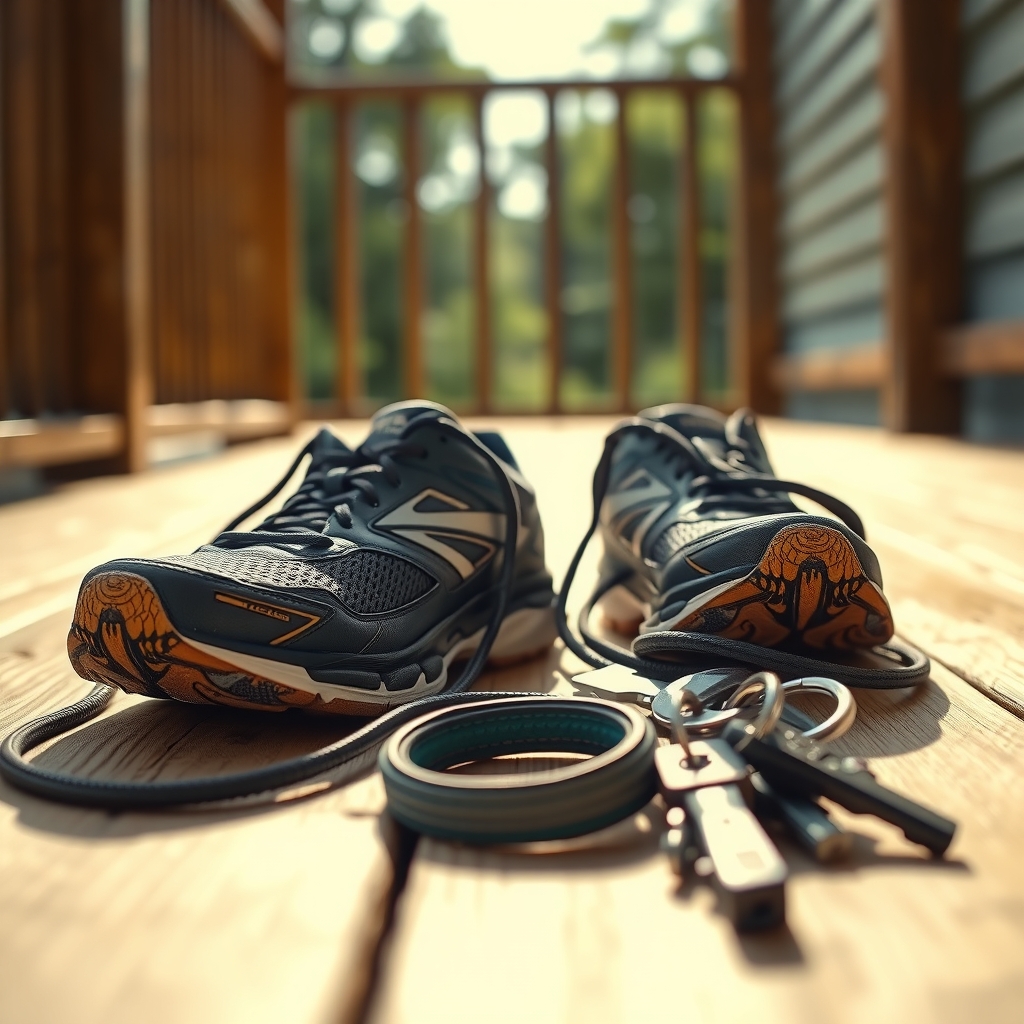
  • Why Restaurant Meals Often Undermine Health Goals

    Why Restaurant Meals Often Undermine Health Goals

    You sit down at a restaurant intending to order something light, and thirty minutes later you realize the "healthy" salad arrived drenched in dressing, the portion could feed two people, and you have no real idea what went into the sauce. This section is for anyone who wants to enjoy meals out without routinely undoing the eating habits they maintain at home. It speaks to people managing weight, blood pressure, blood sugar, or simply trying to feel better after dinner.

    After reading, you will be able to:

    • Spot the menu language and preparation cues that signal extra calories, sodium, and saturated fat
    • Ask specific, polite questions that get you useful information without slowing down service
    • Adjust portion size in real time using simple plate strategies
    • Navigate social pressure and "clean plate" habits without awkwardness
    • Build a personal fallback plan for the nights when the menu offers nothing that fits your goals

    You will finish with a practical toolkit you can use at your very next meal out.

    Hidden Calories and Portion Distortion in Restaurant Meals

    Restaurant kitchens are built for consistency and speed, not for your personal nutrition targets. A "serving" of pasta on a menu often weighs two to three times what a standard reference portion looks like, and the plate arrives already sauced, buttered, or finished with oil. Many people find they eat everything in front of them simply because it is there, especially when conversation distracts from fullness cues. Appetizers, bread baskets, and "shareable" sides add another layer of calories before the main course even lands.

    • Ask for a to-go box when the food arrives and set aside half the portion immediately.
    • Order an appetizer as your main dish and add a side of steamed vegetables or a simple salad.
    • Request sauces, dressings, and butter on the side so you control how much gets used.
    • Split an entrée with a dining companion and order an extra vegetable side to fill the gap.
    • Skip the bread basket or ask the server not to bring it; out of sight makes it easier to skip.

    If you overeat at one meal, the next step is not restriction but a return to your normal pattern: hydrate, move a little, and eat the next meal when you are actually hungry. Checking in with a registered dietitian can help you translate restaurant portions into your daily needs without guesswork.

    Excessive Sodium, Sugar, and Unhealthy Fats in Prepared Foods

    Restaurant kitchens rely on sodium, sugar, and certain fats to deliver consistent flavor quickly and to extend shelf life. A single entrée can contain more than a day’s worth of sodium, often coming from broths, marinades, cured meats, cheese, and the heavy hand on the salt shaker during every cooking step. Added sugars appear not just in desserts but in salad dressings, glazes, barbecue sauces, and even tomato-based pasta sauces to balance acidity. Unhealthy fats show up in the oil used for deep frying, the butter finished on steaks and vegetables, and the partially hydrogenated oils still found in some shelf-stable bakery items and fryer shortenings.

    These ingredients are rarely listed on the menu, and servers may not know the exact amounts. You can reduce exposure with a few specific habits:

    • Ask for sauces, dressings, and gravies on the side so you control the quantity.
    • Request that vegetables and proteins be prepared without added butter or oil; many kitchens will steam or dry-grill on request.
    • Choose grilled, roasted, or poached items over fried, breaded, or "crispy" descriptions.
    • Skip the free bread basket or ask the server to remove it after one piece.
    • Opt for oil and vinegar instead of creamy house dressings.
    • Share a dessert or order a fruit-based option if you want something sweet.

    If you have high blood pressure, diabetes, or lipid concerns, check with your doctor about daily sodium, sugar, and fat targets so you have concrete numbers to guide your choices.

    Lack of Ingredient Transparency and Cooking Method Control

    When you cook at home, you decide exactly what goes into the pan. At a restaurant, that control largely disappears. Menus rarely list the type of oil used for sautéing, whether a sauce base contains added thickeners or preservatives, or if vegetables were blanched in salted water before hitting the plate. A dish described as "grilled" may still be finished with a heavy brush of butter or oil, and "roasted" items are often tossed in more fat than you would use at home. Even simple-sounding proteins can be pre-marinated in solutions high in sodium or sugar that the menu does not disclose.

    Cooking methods also change the nutritional profile in ways you cannot see. Deep-frying is obvious, but pan-frying often uses far more oil than a home cook would add. High-heat searing can create compounds some people prefer to limit, while long braises may concentrate sugars from reduced sauces. Cross-contact is another factor; grills and fryers handle many different proteins and allergens, making it difficult to avoid specific ingredients if you have sensitivities.

    You can regain some footing by asking direct questions: – Ask what oil the kitchen uses for cooking and finishing. – Request sauces, dressings, and marinades on the side. – Confirm whether vegetables are steamed, boiled, or sautéed, and ask for "dry" preparation if possible. – Inquire about pre-marinades or brines on meats and fish.

    Many people find that servers are willing to check with the chef when questions are specific and polite. If the staff cannot answer, choosing simply prepared items — like a plain grilled fish or steamed vegetables — reduces the unknowns. People managing specific health conditions should check with a doctor or dietitian about which hidden ingredients matter most for their situation.

    The Psychology of Menu Design and Overordering Triggers

    Restaurants design menus to guide your eyes and wallet toward high-margin items, often the ones least aligned with health goals. Descriptive language like "crispy," "smothered," or "artisan" triggers cravings, while strategic placement — top right corner, highlighted boxes, or a separate "chef's specials" insert — draws attention first. Photos of indulgent dishes increase order rates, and removing dollar signs or using rounded numbers ($14 vs $13.99) reduces the pain of paying. Decoy pricing makes a $28 entrée look reasonable next to a $42 one, pushing you toward the middle option rather than a lighter choice.

    Portion framing works similarly. "Half portions" or "lunch sizes" often appear only on request, while the default plate is calibrated for value perception, not satiety. Free bread, chips, or amuse-bouche arrive before you decide, stimulating appetite and committing you to the meal. Servers trained to upsell — "Would you like truffle oil on that?" — add calories and cost with minimal friction.

    Common triggers to recognize: – Bolded, boxed, or photographed items – Flowery adjectives that signal added fat, sugar, or salt – "Shareable" platters sized for four but ordered for two – Bundled combos that include a drink, side, and dessert – Limited-time offers that create urgency

    Awareness neutralizes the nudge. Scan the whole menu before looking at specials. Decide on a protein and vegetable base first, then see what fits. Ask for sauces on the side and whether a half portion is available — even if unlisted. If the table orders multiple apps, suggest one shared starter and skip the basket. You stay in control when you treat the menu as information, not instruction.

    If you want this in more depth, our book Vegetable-Forward Cooking: Simple Methods for Everyday Meals covers it step by step.

    Breaking Down the True Cost: Markups, Fees, and Hidden Expenses

    The price on the menu is rarely the price you pay. A dish listed at $18 often lands on your credit card statement closer to $28 once tax, a standard 20 percent tip, and increasingly common service fees are added. Many restaurants now include a three to five percent "kitchen appreciation" or "wellness" surcharge that appears only at the bottom of the receipt. If you order a $14 cocktail and a $8 appetizer to share, the baseline cost jumps before the main course arrives. Delivery apps compound this: the same meal can cost 30 percent more than dining in due to menu markups, delivery fees, service fees, and a tip calculated on the inflated subtotal.

    These markups reflect real overhead — rent, labor, insurance — but they also mean you are paying a premium for ingredients that cost a fraction at the grocery store. A pasta dish with $2 of flour, eggs, and canned tomatoes might be priced at $24. A glass of house wine often covers the wholesale cost of the entire bottle. When health goals push you toward "cleaner" menu items like grilled fish or grain bowls, the markup frequently climbs higher because those proteins and fresh vegetables carry steeper wholesale prices for the kitchen.

    Hidden expenses also show up in decision fatigue. You may add a side salad "to be healthy" and a bread basket "for the table," turning a $22 intention into a $45 reality. The financial pressure can then trigger a "get my money's worth" mindset, encouraging you to finish oversized portions or order dessert you didn't want.

    Ways to see the real cost before you commit: – Add tax, tip, and any listed surcharges to the menu price in your head before deciding if the meal fits your budget. – Check the restaurant’s website or call ahead to ask about automatic fees so there are no surprises at the table. – Set a hard ceiling — including all fees — before you open the menu, and order only what fits that number. – If you are picking up takeout, skip the delivery app and order directly; you avoid menu markups and extra fees instantly.

    Social and Environmental Pressures That Derail Health Intentions

    The atmosphere of a restaurant is engineered to keep you comfortable and ordering. Lighting is often dimmed to relax inhibitions, music tempo may slow your eating pace just enough to linger over another drink, and the scent of butter or fried oil primes appetite before you even open the menu. These cues bypass fullness signals that would normally stop you at home.

    Social dynamics add another layer. When a group shares appetizers or splits the check evenly, the cost of an extra side or dessert feels negligible, so you say yes to things you would skip alone. Celebrations create a "special occasion" mindset that frames overindulgence as mandatory rather than optional. Even well-meaning companions can apply subtle pressure — "just taste this" or "you're no fun tonight" — that makes declining feel awkward.

    Environmental friction works against you, too. Long waits for a table leave you hungry and more likely to overorder. Large tables encourage family-style service where portions blur. Free refills on soda or bottomless bread baskets turn a single choice into repeated decisions without a natural stopping point.

    Practical ways to stay grounded: – Eat a protein-rich snack 30 minutes before you leave so hunger doesn't drive the first order. – Decide on your "one treat" — a glass of wine, a shared dessert, the bread — before you sit down. – Order first when possible; it reduces the cascade of copying others' choices. – Keep a water glass full and sip between bites to pace yourself. – If pressure builds, a simple "I'm good, thanks" with a smile usually ends the push without explanation.

    Practical Strategies for Healthier Choices When Dining Out

    Before you arrive, spend two minutes looking at the menu online. Pick one main dish and decide on a simple modification — sauce on the side, double vegetables instead of starch, or grilled instead of fried. Having a plan reduces the pull of impulsive ordering when you are hungry and distracted.

    At the table, order water first and sip it while you decide. Ask the server how the protein is cooked and what comes in the sauce; many kitchens use butter, oil, or heavy cream by default. Request that vegetables be steamed or roasted dry, and ask for dressings, condiments, and cheese to be served separately. If the portion looks large, ask for a to-go box when the food arrives and put half away before you start eating. This single habit turns one meal into two and keeps calories in check.

    • Choose appetizers that are vegetable- or broth-based rather than fried or cheese-heavy.
    • Share an entrée or order two appetizers as your main course to control portion size.
    • Limit alcohol to one drink, then switch to sparkling water with lime; liquid calories add up fast and lower inhibition around food.
    • Eat slowly, put your fork down between bites, and check in with your fullness cues halfway through.

    If the meal goes off track — bread basket emptied, extra sides ordered, dessert pressed on you — pause. Acknowledge it without judgment, drink water, and reset at the next meal. One heavy dinner does not undo weeks of consistent choices. If you have specific medical conditions such as hypertension or diabetes, check with your doctor or a registered dietitian for personalized sodium, carbohydrate, or fat targets before you dine out.

    Putting It Together

    Start by picking two meals this week where you will cook at home instead of ordering. Choose recipes that reheat well so leftovers cover a third meal. Before any planned restaurant visit, spend five minutes reading the menu online and decide on one main dish and one vegetable side; this reduces impulse additions when you arrive. At the restaurant, ask for sauces and dressings on the side and box half the portion before eating. Drink a full glass of water before the bread basket arrives. If a social event pushes you toward a heavier meal, eat a protein-rich snack beforehand so you are not ravenous. Track what you spend on dining out for seven days; the total often clarifies priorities faster than calorie counts.

    • Cook two meals, plan leftovers for a third.
    • Pre-select orders from online menus.
    • Sauces on the side, box half immediately.
    • Water first, bread later.
    • Protein snack before social pressure.
    • Log dining spend for one week.

    Adjust the plan next week based on what felt sustainable, not perfect. Many people find that consistency with a few habits matters more than a flawless streak. Check with a doctor if you have specific dietary restrictions or health conditions that require tailored guidance.

    More from the blog

    From FitLife Solutions

    Our book Vegetable-Forward Cooking: Simple Methods for Everyday Meals goes further, as a digital eBook (PDF and EPUB) you can read on any device.

    Browse all our practical health and fitness guides at fitlifesolutions.site.

    New practical health guides and articles on WhatsApp: follow our channel.

    About the author

    Ahumuza Mark is the founder of FitLife Solutions in Luwero, Uganda. He publishes practical, plain-language guides on everyday health, fitness and habits, and approves every article before it goes online. He is not a doctor: our articles are general information, so please read our Health Disclaimer and talk to a health professional about your own situation. Questions or corrections? Contact us.

    This article is for general information only and is not a substitute for professional medical advice. Talk to your doctor or another qualified health professional before changing your diet, exercise or health routine, especially if you have a medical condition or take medication.

  • How to Walk More Steps Each Day With Simple Habit Changes

    How to Walk More Steps Each Day With Simple Habit Changes

    You open your phone at the end of the day and see a step count that barely moved. Between desk work, commuting, and evening fatigue, the idea of hitting a high target feels like another chore you don't have time for. This guide is for anyone who wants to move more without restructuring their whole life around a workout plan.

    You will learn how to measure where you are right now and set a daily number that actually fits your schedule. From there, we show how to attach short walks to things you already do — coffee breaks, phone calls, school pickups — so the steps pile up without a separate "exercise" block. You will also get practical adjustments for walking more quietly on hard floors, carrying yourself with more presence, and moving in a way that feels natural and expressive.

    • Know your real baseline and pick a target you can hit most days
    • Fold walking into existing routines instead of adding new ones
    • Tweak footwear, stride, and posture for comfort and confidence
    • Build volume through five- to ten-minute micro-walks

    If you have joint pain, dizziness, or a recent injury, check with a clinician before increasing daily walking volume.

    Build a Baseline: Track Current Steps and Set a Realistic Daily Target

    Start by wearing a phone or simple pedometer for three typical days without changing anything. Note the total at bedtime each night and write it down. The average of those three days is your true baseline — not a guess, not a goal, just data. Many people find they sit thousands of steps below where they assumed they were.

    Next, pick a daily target that feels like a stretch but not a leap. A common approach is adding 500 to 1,000 steps to your baseline for the first week. If your average is 3,200, aim for 4,000. If it is 6,800, aim for 7,500. The number should be specific, measurable, and reachable on a normal weekday without heroic effort. Write it on a sticky note or set it as your device goal.

    Track every day for two weeks. Use the same device in the same pocket or wrist position. Mark each day as hit or miss on a calendar or app. Do not judge the misses; just notice patterns. Most days under target? Drop the goal by 500 steps. Hitting it easily five days out of seven? Add 500 more for the next week.

    • Keep the tracker charged and on your body before you get out of bed.
    • Log the number before you brush your teeth at night.
    • Adjust the target only on Sundays, never midweek.

    If you have a health condition that affects mobility or balance, check with your doctor before setting a step goal. The aim is consistency, not a personal best.

    Stack Walking onto Existing Routines: Commute, Chores, and Breaks

    Look at your current schedule and spot the fixed anchors: the commute, household chores, and scheduled breaks. These are reliable hooks for extra steps because they already happen. For the commute, park at the far end of the lot or get off the bus one stop early. If you work from home, walk around the block before you sit down and again when you log off to simulate a transition. During phone calls that don’t require a screen, stand and pace. Even a slow wander around the room adds up over an hour.

    Chores are hidden step opportunities. Carry groceries in one bag at a time. Fold laundry standing at a counter, then walk each stack to its room separately. While waiting for the microwave or the kettle, do laps of the kitchen or hallway. Take the trash out to the curb instead of the garage can. Sweep the porch or garage floor with a push broom; the back-and-forth motion covers surprising ground.

    Scheduled breaks — coffee, lunch, the afternoon stretch — are ideal for micro-walks. Keep a pair of supportive shoes under your desk or by the door so there’s no friction to start. Walk for the first five minutes of your lunch break before you eat. Use the restroom on a different floor. Walk to a colleague’s desk instead of messaging.

    If a day goes sideways and you miss a walk anchor, don’t discard the rest. Pick the next routine — maybe the evening dog walk or the post-dinner cleanup — and add two extra minutes there. Consistency across the week matters more than perfection on any single day.

    Design Your Environment for Effortless Extra Steps Indoors and Out

    Small changes to your surroundings can make extra steps happen without willpower. At home, place frequently used items just far enough to require movement. Keep the phone charger in the kitchen so you walk to check messages. Store the TV remote on a shelf in the hallway instead of the coffee table. Put a laundry basket at the top of the stairs so each load adds a climb. In the kitchen, set a timer across the room; when it beeps, you walk to turn it off. A standing desk or high counter lets you pace during calls without planning a workout.

    Outdoors, park at the far end of the lot every time. Choose the entrance farthest from your destination at the mall or office park. If you take transit, get off one stop early and walk the rest. Walk around the block before checking the mailbox. Circle the playground while the kids play instead of sitting on the bench.

    • Keep a pair of supportive slip-on shoes by the most used door so stepping out takes seconds.
    • Set a recurring calendar reminder labeled "perimeter walk" for a two-minute lap of the building or yard.
    • Use a water bottle that holds only a cup; refilling it forces regular trips to the kitchen.
    • Arrange furniture to create clear walking paths rather than dead-end corners.

    When weather or schedule blocks outdoor time, walk laps around the largest room or up and down a hallway. If a step goal feels out of reach on a chaotic day, aim for three five-minute indoor walks instead. Many people find that reducing friction works better than adding motivation. Consult a healthcare professional before significantly increasing activity if you have mobility concerns or chronic conditions.

    Use Micro-Walks to Accumulate Volume Without Dedicated Workout Time

    Micro-walks are short, intentional bouts of walking that last anywhere from one to five minutes. They require no special clothing, no travel to a gym, and no block of uninterrupted time. The goal is to sprinkle these tiny doses throughout the day so they add up to a meaningful step total without ever feeling like a workout.

    Start by identifying natural transition points. When you finish a phone call, stand and pace the room for two minutes. While waiting for the kettle to boil, walk a figure-eight pattern through the kitchen and hallway. If you drive to work, park in the farthest spot and walk the lot before and after your shift. Parents can circle the playground perimeter while watching practice instead of sitting on the bench. Office workers can take the long route to the restroom or walk to a colleague’s desk instead of sending a message.

    Keep a mental or written checklist of your personal micro-walk triggers: – Post-meal: walk for three minutes to aid digestion – Top of the hour: stand, stretch, walk one lap of the floor – Commercial break or episode credits: pace the living room – Waiting for a child, partner, or ride: walk circles nearby

    If you miss a trigger, don’t try to make it up all at once. Just catch the next one. On days when pain, fatigue, or schedule chaos derail the plan, aim for a single five-minute walk at lunch or after dinner. Consistency over weeks matters more than perfection on any single day. If you have a heart condition, joint issue, or are new to regular movement, check with a doctor before increasing daily activity significantly.

    If you want this in more depth, our book Vegetarian Protein Recipes: Complete Meals for Every Day covers it step by step.

    Walk Quietly: Footwear, Stride Mechanics, and Surface Awareness

    Walking quietly often comes down to three adjustable factors: what is on your feet, how your foot meets the ground, and what surface you choose. Start with footwear. A flexible sole that lets you feel the floor encourages a lighter landing. Thin rubber or leather outsoles transmit more sensory feedback than thick foam, so you naturally shorten your stride and reduce impact. If your shoes squeak, sprinkle a little baby powder or cornstarch under the insole to stop the friction noise. Replace worn heels promptly; an angled wear pattern forces a heavier heel strike.

    Adjust your stride mechanics next. Aim to land with your foot under your hip rather than reaching far ahead. A shorter step reduces the braking force that creates a loud slap. Let your heel kiss the ground first, then roll smoothly through the midfoot to the toes. Keep your knees soft — locked knees transmit shock straight up the skeleton and amplify sound. Many people find that imagining they are walking on eggshells cues a quieter, more controlled gait.

    Surface awareness completes the picture. Indoors, carpet, cork, or rubber flooring absorbs sound better than tile or hardwood. Outdoors, packed dirt, grass, or a running track is quieter than concrete or gravel. When you must cross a noisy surface, slow down and increase your step frequency; quicker, lighter steps generate less peak force per footfall.

    • Choose shoes with flexible, thin soles and minimal tread noise.
    • Shorten your stride so the foot lands under your center of mass.
    • Roll from heel to toe with relaxed knees.
    • Prefer softer surfaces when possible; adjust pace on hard ones.

    If joint pain appears when you change your gait, check with a doctor or physical therapist before continuing.

    Walk Confidently: Posture Cues, Gaze Direction, and Pace Control

    Confidence in walking starts with a stable base. Stand tall with your feet about hip-width apart and imagine a string gently pulling the crown of your head toward the ceiling. Let your shoulders drop away from your ears and engage your core just enough to support your lower back without stiffening. This alignment reduces unnecessary tension and projects presence. Many people find that practicing this posture while waiting for the kettle to boil or standing in a checkout line builds the habit so it feels automatic on the move.

    Your gaze directs your path and your mindset. Keep your chin parallel to the ground and look toward the horizon rather than down at your feet or your phone. Scanning the environment 10 to 15 feet ahead gives you time to navigate obstacles smoothly. If you need to check a message, stop completely, handle it, then reset your posture before moving again. This pause prevents the slumped, hurried look that comes from walking while distracted.

    Pace control signals intention. Aim for a rhythm that feels purposeful but not rushed — roughly the speed you would use crossing a street before the light changes. Let your arms swing naturally from the shoulders, opposing your legs. If you notice yourself speeding up when stressed, deliberately slow your next ten steps and exhale fully. A metronome app set to a comfortable beats-per-minute can help you internalize a steady cadence during practice walks.

    • Roll through each step from heel to toe rather than landing flat-footed.
    • Keep hands relaxed, not clenched, to avoid radiating tension upward.
    • Breathe in for three steps, out for three steps to calm the nervous system.

    If you have balance concerns, joint pain, or dizziness, check with a doctor before making significant changes to your gait.

    Walk with Feminine Expression: Hip Mobility, Arm Swing, and Rhythm Choices

    Feminine walking expression often comes from subtle coordination between the hips, arms, and rhythm rather than any single exaggerated movement. Start with hip mobility. Tight hip flexors and glutes restrict the natural figure‑eight motion of the pelvis. A simple daily routine — standing hip circles, a kneeling lunge with a gentle side lean, and a supine knee‑to‑chest hold — can free that range in a few minutes. Do these after a walk when the tissues are warm; if you feel pinching in the front of the hip, shorten the stance or skip the deep lunge and check with a physical therapist if discomfort persists.

    Arm swing shapes the overall silhouette. Let the arms hang loose, elbows bent roughly ninety degrees, and allow a relaxed front‑to‑back swing that counters the leg motion. Avoid crossing the midline or clamping the elbows to the ribs. If shoulders creep up, shake the arms out at a stoplight and reset. Many people find that holding a light object — a water bottle or phone — in one hand naturally encourages a more fluid, asymmetrical swing without forcing it.

    Rhythm choices tie it together. A slightly shorter, quicker cadence tends to read as lighter and more graceful than long, loping strides. Try matching steps to a playlist around 110–120 beats per minute, then let the music fade and keep the tempo internally. If the pace feels rushed, lengthen the stride by an inch and slow the count; if it feels sluggish, quicken the turnover. Experiment on different surfaces — carpet, pavement, grass — to feel how ground feedback changes the rhythm. Small adjustments, repeated daily, build a walk that feels both efficient and expressive.

    Putting It Together

    Start Monday by wearing your tracker without changing anything. Note the average by Sunday night. Pick a daily target 500 to 1,000 steps above that number. Choose two anchor habits from earlier sections — parking farther away, a five-minute kitchen lap while coffee brews, a hallway walk after each bathroom break — and do only those for the first three days. Add one micro-walk on day four: a ten-minute loop after lunch or before dinner. Keep footwear consistent so quiet-stride practice stays familiar. On day five, layer in the posture cue you liked best — chin level, shoulders relaxed, eyes forward — during every walk longer than two minutes. Day six, experiment with a slightly wider arm swing or softer hip motion on one short walk to see what feels natural. Day seven, review the tracker. If you hit the target four of seven days, raise it by another 500 steps next week. If not, keep the target and swap one anchor habit for a different one. Adjust only one variable at a time. Check with a doctor before increasing activity if you have health concerns.

    More from the blog

    From FitLife Solutions

    Our book Vegetarian Protein Recipes: Complete Meals for Every Day goes further, as a digital eBook (PDF and EPUB) you can read on any device.

    Browse all our practical health and fitness guides at fitlifesolutions.site.

    New practical health guides and articles on WhatsApp: follow our channel.

    About the author

    Ahumuza Mark is the founder of FitLife Solutions in Luwero, Uganda. He publishes practical, plain-language guides on everyday health, fitness and habits, and approves every article before it goes online. He is not a doctor: our articles are general information, so please read our Health Disclaimer and talk to a health professional about your own situation. Questions or corrections? Contact us.

    This article is for general information only and is not a substitute for professional medical advice. Talk to your doctor or another qualified health professional before changing your diet, exercise or health routine, especially if you have a medical condition or take medication.

  • How to Manage Sugar Cravings With Everyday Habits

    How to Manage Sugar Cravings With Everyday Habits

    You reach for something sweet at 3 p.m., after dinner, or whenever stress hits, and it feels automatic rather than enjoyable. This article is for anyone who wants to understand those urges and respond with choices that actually stick, without relying on willpower alone or cutting out every treat forever.

    After reading, you will be able to:

    • Recognize the common physical and emotional triggers that drive the desire for sugar
    • Build meals and snacks that keep blood sugar steadier throughout the day
    • Use hydration, sleep, and stress tools to lower the baseline intensity of cravings
    • Swap high-sugar foods for satisfying alternatives that do not spike and crash your energy
    • Create an evening routine that quiets the late-night pull toward dessert
    • Set up your kitchen and shopping habits so the easier choice is the one that serves you

    These are practical, everyday adjustments. If you have a medical condition or take medication that affects blood sugar, check with your doctor before making significant dietary changes.

    Why Your Body Signals for Sugar and What It Actually Needs

    A craving for something sweet often feels like a simple desire for pleasure, but it is frequently a biological signal that something else is missing. When blood glucose drops after a meal high in refined carbohydrates, the brain pushes for the fastest energy source available: sugar. That urge can also mask dehydration, since thirst signals are often misread as hunger. In other cases, the body is asking for specific nutrients — magnesium, chromium, or B vitamins — that play roles in energy metabolism and neurotransmitter balance. Chronic stress amplifies the drive by raising cortisol, which increases appetite for quick fuel. Poor sleep disrupts ghrelin and leptin, the hormones that regulate hunger and fullness, making sweet foods feel disproportionately rewarding.

    Many people find it helpful to pause and run a quick internal checklist before reaching for a treat:

    • Drink a glass of water and wait ten minutes; the urge often fades if thirst was the driver.
    • Ask whether the last meal included adequate protein, fiber, and healthy fat to stabilize glucose.
    • Consider whether stress, boredom, or fatigue is the real trigger rather than physical hunger.
    • Note if cravings follow a predictable pattern, such as mid-afternoon or late evening, which points to a rhythm issue rather than a nutrient gap.

    If intense cravings persist despite balanced meals, hydration, and rest, it may be worth discussing blood work with a doctor to rule out deficiencies or insulin resistance. Understanding the signal lets you address the root cause instead of repeatedly silencing it with sugar.

    Balancing Blood Sugar With Regular Protein-Rich Meals

    Eating at regular intervals with a solid protein source at each meal helps keep blood sugar steady, which in turn quiets the loud demands for something sweet. When meals are skipped or built mostly around refined carbs, glucose rises quickly and then drops just as fast. That crash is often what your brain interprets as an urgent need for sugar. Protein slows digestion, blunts the spike, and stretches the time before hunger returns.

    Aim to eat within an hour of waking and then every four to five hours after that. Breakfast might be Greek yogurt with nuts and berries, eggs with sautéed greens, or a smoothie blended with protein powder, chia seeds, and a handful of spinach. Lunch and dinner follow the same pattern: a palm-sized portion of chicken, fish, tofu, beans, or lentils paired with fiber-rich vegetables and a modest serving of whole grains or starchy veg. Snacks work best when they pair protein with fiber — think cottage cheese with cucumber, a hard-boiled egg with an apple, or hummus with carrot sticks.

    • Keep hard-boiled eggs, roasted chickpeas, or single-serve nut packets visible in the fridge or pantry so they’re the easiest grab.
    • Prep a batch of grilled chicken, baked tofu, or cooked lentils on Sunday to drop into meals all week.
    • If you’re vegetarian or vegan, combine legumes with grains or seeds across the day to cover essential amino acids.

    If a craving still hits 30 minutes after a balanced meal, drink a glass of water and wait ten minutes; thirst often masks as hunger. Many people find that consistent protein timing reduces the intensity of sweet urges within a week or two. If you have kidney concerns or other medical conditions, check with your doctor before significantly increasing protein intake.

    Hydration and Sleep Habits That Reduce Sweet Urges

    Even mild dehydration can feel like hunger or a specific urge for something sweet. Many people find that drinking a glass of water first thing in the morning and then sipping steadily throughout the day takes the edge off afternoon cravings. A practical rhythm is a full glass upon waking, one with each meal, and one between meals. If plain water feels boring, add a slice of cucumber, a few berries, or a sprig of mint without adding sugar. Herbal teas — especially peppermint, rooibos, or cinnamon — can satisfy the desire for a "treat" flavor without affecting blood glucose. Keep a visible bottle or mug on your desk or counter as a visual cue; out of sight often means out of mind.

    Sleep deprivation disrupts the hormones that regulate appetite, typically raising ghrelin (hunger) and lowering leptin (fullness). This biological shift makes high-sugar, high-fat foods significantly more appealing the next day. Aim for a consistent bedtime and wake time, even on weekends. An hour before bed, dim the lights and put screens away or use a blue-light filter. A cool, dark room and a short wind-down routine — reading, gentle stretching, a warm shower — signal to your body that it is time to rest. If you wake in the night, avoid checking the time, which can spike cortisol and make it harder to fall back asleep.

    • Drink 16–20 ounces of water within 30 minutes of waking.
    • Set a phone reminder for a mid-morning and mid-afternoon water break.
    • Choose herbal tea over a sweetened latte for the 3 p.m. slump.
    • Stop caffeine by early afternoon to protect sleep quality.
    • Keep the bedroom for sleep and intimacy only; no work or scrolling.

    If you have a medical condition that restricts fluid intake or affects sleep, check with your doctor before making major changes to hydration or sleep schedules.

    Smart Food Swaps That Satisfy Without the Sugar Spike

    When a sweet urge hits, the goal is not to white-knuckle through it but to meet the craving with something that steadies blood sugar instead of spiking it. A good swap keeps the texture or flavor you want while adding protein, fiber, or healthy fat to slow absorption.

    If you reach for candy, try a square of 70 percent dark chocolate with a few almonds. The fat from the nuts blunts the glucose rise, and the richer chocolate satisfies with less sugar. For a cookie habit, spread a tablespoon of peanut butter on a rice cake and top with thin banana slices; you get crunch, creaminess, and natural sweetness without the refined flour bomb. When ice cream calls, blend frozen berries with half a frozen banana and a splash of unsweetened soy milk — thick, cold, and naturally sweet. Many people find that a cup of plain Greek yogurt stirred with cinnamon and a drizzle of tahini hits the same dessert note while delivering 15-plus grams of protein.

    • Swap soda for sparkling water with a squeeze of lime and a dash of bitters (non-alcoholic).
    • Replace sweetened granola with toasted oats, pumpkin seeds, and a pinch of salt.
    • Trade jam on toast for smashed raspberries mixed with chia seeds.
    • Choose a date stuffed with walnut halves instead of a caramel.

    If you overdo a swap — say, three dates become ten — don’t spiral. Drink a large glass of water, move your body for five minutes, and make the next meal protein-forward. If cravings feel unmanageable daily, consider checking with a doctor or dietitian to rule out nutrient gaps or blood sugar dysregulation.

    Managing Stress and Emotional Triggers Without Dessert

    Stress and emotions often drive the urge for something sweet more than physical hunger does. When cortisol rises, the brain looks for a quick energy source, and sugar fits the bill. The habit forms because the relief feels immediate, even if it lasts only minutes. Breaking that loop starts with noticing the difference between a craving that builds slowly and one that hits suddenly after a difficult email, argument, or long day.

    Pause for thirty seconds before you reach for a treat. Ask yourself what you are actually feeling — bored, anxious, lonely, tired — and name it. That small gap weakens the automatic response. Keep a short list of non-food ways to shift your state so you don’t have to improvise in the moment:

    • Step outside for five minutes of fresh air and slow breathing
    • Write three lines in a notebook about what’s bothering you
    • Drink a glass of cold water or herbal tea
    • Stretch or do ten bodyweight squats
    • Text a friend or play a favorite song

    If you still want something sweet after trying one of these, have a planned portion — a square of dark chocolate, a few berries, a spoonful of nut butter — and eat it slowly without distraction. This keeps you in control rather than reacting on autopilot.

    When the pattern feels stuck or the urge feels compulsive, consider talking with a therapist or a registered dietitian who works with emotional eating. They can help you map triggers and build replacement behaviors that fit your life. Many people find that consistent sleep, regular meals, and a brief daily walk lower the baseline stress that fuels the cravings in the first place.

    A Practical Evening Routine to Stop Nighttime Cravings

    Nighttime cravings often show up when the day winds down and willpower runs low. A consistent evening routine can interrupt the autopilot walk to the kitchen. Start by setting a firm "kitchen closed" time, ideally two to three hours before bed. After that point, brush your teeth or rinse with a strong mint mouthwash; the clean-mouth signal helps many people decide eating is done for the day.

    If hunger feels genuine, keep a pre-portioned option ready: a small Greek yogurt with a few berries, a tablespoon of nut butter on a celery stick, or a hard-boiled egg. Put it on a plate, sit at the table, and eat without screens. This pause lets you check whether you are physically hungry or just bored, anxious, or tired.

    Build a wind-down ritual that replaces the dopamine hit of sweets. Try: – A caffeine-free herbal tea such as chamomile, rooibos, or peppermint, sipped slowly. – Five minutes of gentle stretching or breathing exercises to lower cortisol. – Reading a physical book or listening to a calm podcast instead of scrolling, since blue light and stimulating content can spike cravings.

    If you slip and eat something sweet, avoid the "ruined evening" spiral. Drink a glass of water, note what triggered the urge, and return to your wind-down steps. One choice does not erase the routine. If nighttime hunger persists despite balanced daytime meals, consider discussing it with a healthcare provider to rule out blood-sugar regulation issues or medication effects.

    Building a Sustainable Low-Sugar Environment at Home

    Start by auditing what sits on your counters, in your fridge, and at eye level in the pantry. If the first thing you see is a cookie jar or a box of granola bars, that becomes the default choice when hunger or boredom hits. Move those items to a high shelf or an opaque container in the back. Replace the visible spots with a bowl of washed fruit, a jar of raw nuts, or pre-portioned cheese and whole-grain crackers. The goal is not to ban treats but to add a small pause between impulse and action.

    Next, set up a "prep once, eat all week" habit. Spend twenty minutes on Sunday washing berries, slicing cucumbers, boiling eggs, and portioning hummus into small containers. When a craving strikes at 3 p.m., you can grab a ready-made snack instead of deciding what to make. Keep a pitcher of water with lemon or cucumber slices front and center in the fridge so it competes visually with juice or soda.

    • Store baking supplies (chocolate chips, sprinkles, frosting) in a separate bin on a high shelf rather than mixed with everyday cooking ingredients.
    • Keep a small "treat drawer" for planned desserts — one or two single-serve items you genuinely enjoy — so you don't feel deprived and then overdo it later.
    • Use clear containers for healthy staples (oats, lentils, roasted chickpeas) and opaque ones for sweets.
    • If other household members want different foods, ask them to keep their snacks in a designated cupboard you don't open daily.

    Finally, build a simple checkout rule: nothing goes into the cart that isn't on your list. Shop after a meal, not when hungry, and stick to the perimeter aisles first. If a craving-driven purchase slips in, don't scold yourself — just note it and adjust the environment next week. Many people find that reducing visual cues and decision fatigue does more than willpower alone. If you have a health condition affected by diet, check with your doctor before making major changes.

    Putting It Together

    Start with one small anchor habit you can repeat daily. Many people find that eating a protein-rich breakfast within an hour of waking sets a steadier tone for the day. Pair it with a full glass of water before coffee. Keep lunch and dinner on a loose schedule — roughly every four to five hours — so hunger doesn’t ambush you. If afternoons are your danger zone, prep a satisfying swap the night before: Greek yogurt with berries, a handful of almonds with an apple, or hummus and veggie sticks. When a craving hits, pause for two minutes. Drink water. Breathe. Ask whether you’re hungry, tired, bored, or stressed. If you’re still hungry, eat the planned snack. If it’s emotional, try a five-minute walk, a text to a friend, or writing three lines in a notebook.

    • Set a consistent bedtime and dim lights 30 minutes before sleep.
    • Keep trigger foods off the counter and out of eye level.
    • Review each evening: what worked, what felt hard, what to adjust tomorrow.

    If cravings feel unmanageable or you suspect blood sugar issues, check with a doctor. Progress builds from repetition, not perfection.

    More from the blog

    From FitLife Solutions

    Browse all our practical health and fitness guides at fitlifesolutions.site.

    New practical health guides and articles on WhatsApp: follow our channel.

    About the author

    Ahumuza Mark is the founder of FitLife Solutions in Luwero, Uganda. He publishes practical, plain-language guides on everyday health, fitness and habits, and approves every article before it goes online. He is not a doctor: our articles are general information, so please read our Health Disclaimer and talk to a health professional about your own situation. Questions or corrections? Contact us.

    This article is for general information only and is not a substitute for professional medical advice. Talk to your doctor or another qualified health professional before changing your diet, exercise or health routine, especially if you have a medical condition or take medication.

  • How to Stop Eating Out of Boredom and Make Intentional Food Choices

    How to Stop Eating Out of Boredom and Make Intentional Food Choices

    You open the fridge, scan the shelves, close the door, and find yourself back there three minutes later. The hunger is not in your stomach; it is in the pause between tasks, the lull in a meeting, the hour before bed when your brain wants a dopamine hit instead of rest. This article is for anyone who uses food to fill time, soothe anxiety, or avoid a difficult task, and who wants a practical way to interrupt that loop without relying on willpower alone.

    After reading, you will be able to:

    • Distinguish physical hunger from the urge to eat driven by boredom, stress, or habit
    • Build a five-second pause ritual that creates space for a conscious choice
    • Stock and arrange your kitchen so the easiest option is a nourishing one
    • Choose a pre-workout snack that supports performance instead of mindless grazing
    • Navigate a restaurant menu with a simple framework that keeps your goals intact

    You do not need a perfect plan. You need a reliable process you can use in the moments that matter most.

    Decoding the Urge: Why You're Searching for Food When Not Hungry

    The urge to eat when you are not physically hungry often feels automatic, but it usually follows a predictable sequence: a trigger appears, a craving spikes, and you reach for food before noticing the gap between them. Boredom is one of the most common triggers because it creates a vacuum of stimulation. Your brain, seeking dopamine or a break from monotony, identifies eating as an accessible, reliable activity. It is not a character flaw; it is a learned loop where food becomes entertainment, comfort, or a way to transition between tasks.

    Start by naming the specific sensation you feel before opening the fridge. Is it a restless need to move? A foggy brain avoiding a difficult email? Loneliness masquerading as hunger? Many people find it helpful to run a quick internal check using the HALT framework: – Hungry: physical signs like a growling stomach or low energy – Angry or Anxious: tension in the jaw, racing thoughts – Lonely: a desire for connection or background noise – Tired: heavy eyelids, difficulty focusing

    If the answer is not physical hunger, the craving will often fade if you insert a deliberate pause. Try drinking a glass of water, stepping outside for two minutes, or stretching your arms overhead. These actions disrupt the dopamine prediction error that drives the automatic reach. If the urge persists after ten minutes, eat something nourishing without guilt. The goal is not perfect restraint but building awareness so the choice becomes conscious rather than reflexive.

    The 'Eat Out the Box' Trap: Replacing Processed Convenience with Real Nourishment

    The phrase "eating out of the box" captures a specific modern trap: reaching for a package because it requires zero decisions. A sleeve of crackers, a frozen entrée, or a granola bar fills the silence of a dull afternoon with crunch and salt, but the satisfaction vanishes fast. These foods are engineered to bypass fullness signals — low fiber, high flavor intensity, easy to overeat before your brain catches up. The result is often a vague discomfort, not nourishment, and the boredom remains.

    Swapping processed convenience for real food does not mean cooking from scratch every time. It means building a "real food convenience layer" so the easy choice is also a nourishing one. Wash and cut vegetables the moment you unpack groceries; store them at eye level in clear containers. Cook a double batch of grains or roasted vegetables on Sunday. Keep boiled eggs, individual nut packets, plain yogurt, and fruit where you see them first. When the urge hits, the path of least resistance leads to something your body can actually use.

    • Pre-portion cheese cubes with whole-grain crackers instead of opening a family-size box.
    • Blend a smoothie bag (greens, frozen fruit, seeds) and freeze; dump in liquid and blend in 30 seconds.
    • Stock canned beans, tuna, and pre-washed greens for a five-minute bowl with olive oil and lemon.

    If you slip and finish a box of something ultra-processed, treat it as data, not failure. Notice what preceded it — fatigue, a difficult task, screen time — and adjust the environment for next time. Many people find that simply removing the most tempting boxes from the house, or moving them to a high shelf in opaque containers, reduces mindless grazing without relying on willpower. If digestive issues or blood-sugar concerns arise, check with a doctor or registered dietitian before making major changes.

    Building a Pause Practice: Micro-Habits That Break the Boredom-Eating Cycle

    The urge to eat from boredom often moves faster than thought. A micro-habit inserts a deliberate gap between the impulse and the action, giving your brain a chance to catch up. Start with the "Three-Breath Reset." When you notice yourself drifting toward the kitchen, stop where you are. Plant your feet, exhale fully through your mouth, then inhale slowly through your nose for a count of four. Hold for two, exhale for six. Repeat three times. This physiological signal shifts you out of autopilot without requiring willpower.

    Next, add a physical "pattern interrupt" that changes your sensory input. Keep a glass water bottle or a textured stress stone on the counter — not in a drawer. Pick it up, feel the temperature or weight, and name three things you see in the room. This grounds you in the present moment and disrupts the dopamine-seeking loop.

    If the urge persists after the pause, use a pre-decided "redirect menu" posted inside a cabinet door. List five non-food actions that take under five minutes: stretch your arms overhead, text a friend, water a plant, write one sentence in a journal, or step outside for fresh air. Choose one and do it immediately. The goal is not to never eat but to make the choice conscious.

    When you slip — and you will — treat it as data, not failure. Note the time, the trigger, and which micro-habit you skipped. Many people find that reviewing these notes weekly reveals patterns they can adjust, such as moving the fruit bowl to eye level or setting a calendar reminder for the Three-Breath Reset during known low-energy hours.

    Designing Your Kitchen Environment for Intentional Choices

    The layout of your kitchen shapes decisions before you even realize you are making them. Start by editing what lives on the counter. Move the cookie jar, cereal boxes, and snack bags into a high cabinet or opaque container; place a bowl of washed fruit, a jar of raw nuts, or pre-cut vegetables at eye level instead. When the first thing you see requires zero prep, it becomes the default reach.

    Inside the fridge, use clear bins to group ready-to-eat components: boiled eggs, hummus, cheese sticks, roasted chickpeas, sliced cucumber. Label one bin "grab first" so the choice is visible when you open the door tired or distracted. Keep a pitcher of water with lemon or cucumber front and center; thirst often masquerades as hunger.

    Create a small "pause station" near the fridge — a notepad and pen or a magnetic whiteboard. Before you take anything, jot the time and a one-word note: bored, stressed, hungry, procrastinating. The ten-second act builds awareness without judgment.

    • Store trigger foods in the least accessible spot: top shelf, back of pantry, or a container that requires a step stool.
    • Pre-portion nuts, trail mix, or popcorn into single-serve bags so you decide the amount once, not every handful.
    • Keep a "meal starter" shelf with canned beans, tuna, whole-grain tortillas, and frozen veg so a real meal is as fast as a boxed one.
    • Rotate seasonal produce weekly; variety reduces the pull of novelty snacks.

    If you share the kitchen, agree on a "communal treat drawer" separate from daily fuel. You still enjoy favorites, but they live in a deliberate place, not the path of least resistance.

    If you want this in more depth, our book Freezer Recipes: Healthy Make-Ahead Meals for Busy Weeks covers it step by step.

    Strategic Pre-Workout Nutrition: Fueling Performance Instead of Filling Time

    Eating before a workout often becomes a default activity when you have a gap in your schedule, not because your body needs fuel. If you finished lunch two hours ago and feel restless at 4 p.m., a banana or protein bar can feel productive, but it may just be a way to occupy your hands. Before you eat, ask: when did I last eat, and does my stomach feel hollow or tight? If the answer is "recently" and "neither," you are likely solving boredom, not hunger.

    For sessions under 60 minutes at moderate intensity, many people perform well with nothing extra if they ate a balanced meal within the last three to four hours. If that window is longer, or the work is hard intervals or heavy lifting, a small carb-focused snack 30 to 60 minutes beforehand can help maintain output. Think half a bagel with a thin smear of peanut butter, a small applesauce pouch, or a handful of pretzels with a few ounces of water. Keep fat and fiber low to avoid gut discomfort.

    Hydration often masquerades as hunger. Drink 8 to 12 ounces of water first, wait ten minutes, then reassess. If you still feel low energy, eat the planned snack. If the urge fades, you were likely thirsty or bored.

    • Time your last real meal: aim for three to four hours pre-workout.
    • Choose simple carbs, low fat, low fiber if you need a top-up.
    • Drink water first; pause before you chew.
    • Skip the snack entirely if you ate recently and feel fine.

    If you have blood sugar concerns or digestive issues, check with a doctor or dietitian to tailor timing and portions.

    Mastering Restaurant Menus: A Framework for Confident Dining Out

    Dining out doesn't have to derail your intention to eat mindfully. Before you arrive, take two minutes to look at the menu online. Pick one or two dishes that look satisfying and generally align with how you want to feel afterward. This prevents the rushed, hungry scramble at the table where the loudest craving usually wins.

    When you sit down, order a glass of water first. Thirst often masquerades as hunger, and sipping water gives your nervous system a moment to settle. Scan the menu for keywords that signal preparation methods: grilled, roasted, steamed, baked, or raw. These typically use less added fat and sodium than crispy, breaded, smothered, or creamy options. Ask for sauces and dressings on the side so you control the amount.

    Use a simple plate framework: aim for half vegetables, a quarter protein, and a quarter starch. If the entrée arrives with a mountain of fries and a sprinkle of greens, ask to double the vegetable side and halve the starch. Many restaurants accommodate this without charge.

    • Put your fork down between bites and check in: am I still enjoying this, or just finishing it because it's there?
    • Box up half the meal before you start if portions are large; this turns one dinner into two.
    • Share a dessert or order a coffee if you want to linger without overeating.

    If you overdo it, the next meal is simply a fresh chance to choose differently. No compensation needed.

    Creating Your Personalized Decision Matrix for Every Eating Occasion

    A decision matrix turns vague intentions into a repeatable process you can use in any setting. Start by drawing a simple grid on paper or in a notes app with four columns: Situation, Physical Cue, Emotional Cue, and Go-To Action. Fill in the rows for the eating occasions that trip you up most often — mid-afternoon at your desk, late-night scrolling, the drive-thru after a long shift, the appetizer basket at a restaurant.

    For each row, define the physical cue honestly: stomach growling, energy dip, mouth watering at a smell. Then name the emotional cue: boredom, anxiety, celebration, social pressure. Your Go-To Action must be specific and doable in under two minutes. Examples:

    • Desk slump + boredom → stand, drink a full glass of water, set a timer for ten minutes before deciding if you need a snack.
    • Late-night TV + anxiety → brush teeth, log the feeling in one sentence, choose a non-food wind-down like stretching or a podcast.
    • Drive-thru urge + fatigue → pull over, eat the pre-portioned nuts and fruit you keep in the glove box, then reassess.
    • Bread basket + social pressure → place one piece on your plate, push the basket away, order a vegetable-based starter.

    When the matrix fails — and it will — treat the slip as data, not defeat. Note which cue was misidentified or which action felt unrealistic. Adjust that single row next week. Many people find that reviewing the matrix every Sunday keeps it aligned with changing schedules and stress levels. If you have a medical condition that affects hunger cues or blood sugar, check with your doctor before relying on self-guided rules.

    Putting It Together

    Start by picking just one meal or snack window where boredom eating shows up most often. For many people, that’s the hour after dinner or the mid-afternoon slump at a desk. Keep a small notebook or a note on your phone for seven days. Each time you reach for food, jot down the time, what you’re feeling, and what you chose. You’re not grading yourself; you’re collecting data.

    • Day 1–2: Observe only. No rules, just notes.
    • Day 3: Add the 90-second pause before that target window. Drink a glass of water, stretch, or step outside.
    • Day 4–5: Swap one default snack for a pre-portioned alternative you actually like — nuts, yogurt, fruit with peanut butter.
    • Day 6: Use the decision matrix once for a real choice: hungry, bored, tired, or something else?
    • Day 7: Review your notes. Look for patterns, not perfection.

    If a day goes sideways, note what triggered it and move on. The goal is awareness, not a flawless week. Adjust one thing for week two based on what you learned. If you have a medical condition or take medication that affects appetite or blood sugar, check with your doctor before changing eating patterns.

    More from the blog

    From FitLife Solutions

    Our book Freezer Recipes: Healthy Make-Ahead Meals for Busy Weeks goes further, as a digital eBook (PDF and EPUB) you can read on any device.

    Browse all our practical health and fitness guides at fitlifesolutions.site.

    New practical health guides and articles on WhatsApp: follow our channel.

    About the author

    Ahumuza Mark is the founder of FitLife Solutions in Luwero, Uganda. He publishes practical, plain-language guides on everyday health, fitness and habits, and approves every article before it goes online. He is not a doctor: our articles are general information, so please read our Health Disclaimer and talk to a health professional about your own situation. Questions or corrections? Contact us.

    This article is for general information only and is not a substitute for professional medical advice. Talk to your doctor or another qualified health professional before changing your diet, exercise or health routine, especially if you have a medical condition or take medication.

  • How to Strength Train at Home With and Without Equipment

    How to Strength Train at Home With and Without Equipment

    You want to get stronger without a gym membership, a commute, or a room full of machines. This guide is for beginners building their first routine, travelers keeping momentum on the road, and experienced lifters adapting to a garage or living room setup. It covers bodyweight progressions, household item hacks, and programming with basic gear like bands or a single pair of dumbbells.

    By the end, you will be able to:

    • Select the right movement variations for your current strength level
    • Structure a balanced weekly plan that hits every major pattern
    • Apply progressive overload using reps, tempo, leverage, and load
    • Adjust the same framework for pure strength or muscle growth goals
    • Troubleshoot common plateaus and joint niggles without guessing

    Clear principles beat perfect equipment. If you have medical conditions or past injuries, check with a doctor before starting a new program.

    Foundational Principles: How to Strength Train Effectively

    Effective strength training rests on a few non-negotiable habits that work whether you are in a garage gym or a living room. First, prioritize compound movements — squats, hinges, pushes, pulls, and carries — because they train multiple muscle groups and joints simultaneously. These patterns build the coordination and systemic strength that carry over to daily life. Second, control the eccentric (lowering) phase of every rep. Taking two to three seconds to lower the weight or your body builds more strength and resilience than dropping quickly. Third, use a full range of motion that your joints allow without pain. Partial reps have a place, but full motion develops strength in the stretched position where injuries often happen.

    • Move with intent: accelerate the concentric (lifting) phase, pause briefly if the exercise allows, and lower deliberately.
    • Rest long enough to maintain form on the next set. Two to three minutes for heavy compound work, sixty to ninety seconds for accessory moves.
    • Brace your core before each set: inhale into the belly, create 360-degree pressure, and hold it through the rep.
    • Stop a set when technique breaks down, not when you simply feel tired. Technical failure is the signal; muscular failure is optional and riskier.

    Consistency beats intensity. Three solid sessions per week sustained for months outperforms five perfect weeks followed by a month off. Track the basics — exercise, sets, reps, load, and how hard the last set felt on a 1 to 10 scale. If you have a history of joint issues, cardiovascular conditions, or are new to structured exercise, check with a doctor before adding load or volume.

    Beginner Blueprint: Starting Strength Training at Home

    Starting strength training at home works best when you keep the first few weeks simple and repeatable. Pick three non‑consecutive days — for example Monday, Wednesday, Friday — and block out 30 minutes. Wear clothes that let you move freely, clear a space about the size of a yoga mat, and keep a water bottle nearby. If you have any joint issues, past injuries, or medical conditions, check with a doctor before you begin.

    A beginner session needs only four movement patterns: a squat, a push, a hinge, and a carry or core hold. Do two sets of 8–12 reps for each, resting 60–90 seconds between sets. Move slowly enough to feel the muscles working, not just the joints. If a rep feels shaky or painful, stop the set, rest longer, or drop to an easier version.

    • Bodyweight squat to a chair or box: sit back until you touch, then stand.
    • Elevated push‑up: hands on a kitchen counter, then a sturdy table, then the floor.
    • Glute bridge: lie on your back, drive through heels, squeeze at the top.
    • Dead bug or bird‑dog: keep the low back pressed to the floor while moving opposite limbs.

    Track each workout in a notebook or phone note: date, exercise, sets, reps, and how hard it felt on a 1–10 scale. When you can finish all reps with good form at a 7 or 8 effort, make the next session slightly harder — add a rep, slow the tempo, or lower the push‑up surface. Many people find that consistency beats intensity in the first month; aim to show up, not to max out.

    Bodyweight Mastery: Strength Training Without Equipment

    Bodyweight training removes every barrier between you and a stronger body. You always have the floor, a wall, and gravity. The key is manipulating leverage and tempo so the work stays challenging as you improve. Start with the big movement patterns: a squat variation, a hinge, a push, a pull, and a carry or core brace. If a standard push-up is too hard, elevate your hands on a kitchen counter; as it gets easier, lower the surface to a sturdy chair, then the floor, then elevate your feet. For pulling without a bar, use a sturdy table edge for inverted rows or grab a doorframe for face pulls and rows — just verify the structure is solid. Single-leg work like rear-foot-elevated split squats or step-ups onto a low stool loads the legs heavily without external weight. Slow the eccentric phase to three seconds and add a one-second pause at the bottom; this increases difficulty without adding reps.

    • Squat pattern: air squat → tempo air squat → split squat → rear-foot-elevated split squat → pistol progression (doorframe assist)
    • Hinge: glute bridge → single-leg glute bridge → slider leg curl (towel on hard floor) → single-leg Romanian deadlift (wall for balance)
    • Push: wall push-up → incline push-up → floor push-up → feet-elevated push-up → archer push-up
    • Pull: doorframe row → table inverted row → single-arm doorframe row → towel row (anchor towel over door)
    • Core/carry: dead bug → bird dog → plank → side plank → suitcase carry (heavy backpack or water jugs)

    If wrists hurt on push-ups, use push-up handles or dumbbells to keep wrists neutral, or do knuckle push-ups on a mat. If knees bother you during squats, limit depth to a pain-free range, sit to a chair, or shift more weight to the heels. Shoulders cranky on overhead work? Skip vertical pressing and emphasize horizontal pushes and rows. Progress by adding a rep, slowing the tempo, reducing rest, or moving to the next variation — not all at once. Many people find two to three full-body sessions per week sustainable. Check with a doctor if you have joint issues, recent surgery, or cardiovascular concerns before starting.

    Home Gym Essentials: Strength Training With Minimal Equipment

    A few well-chosen tools can expand your exercise library dramatically without taking over your living space. The most versatile starting point is a pair of adjustable dumbbells or two to three fixed pairs covering a light, medium, and heavy range. If budget or space is tight, a single kettlebell between 8 kg and 16 kg handles goblet squats, swings, presses, and rows effectively. A doorframe pull-up bar adds the vertical pulling pattern that bodyweight work often misses; choose a model that mounts with leverage rather than screws if you rent. Long resistance bands (41-inch loops) assist pull-ups, add load to push-ups and squats, and enable face pulls or band pull-aparts for shoulder health. A set of mini bands targets glutes and hips during warm-ups or finishers. Suspension straps anchor to the same door or bar and scale rows, push-ups, and single-leg work by adjusting body angle. For floor comfort and wrist support, a firm yoga mat and a pair of parallettes or sturdy push-up handles round out the kit.

    • Adjustable dumbbells or 2–3 fixed pairs
    • One kettlebell (8–16 kg)
    • Doorframe pull-up bar (leverage mount)
    • 41-inch resistance bands (light, medium, heavy)
    • Mini bands for hip work
    • Suspension trainer
    • Yoga mat and push-up handles

    Start with the pull-up bar and one band; many people find this covers 80 percent of their needs for months. Add load only when bodyweight variations stop challenging you in the 5–12 rep range. Check that doorframes and anchor points are solid before loading them, and clear a 6-by-6-foot area so you can move safely. If you have any joint issues or medical conditions, check with a doctor before adding external resistance.

    If you want this in more depth, our book Chair Workouts: Simple Seated Exercises for Strength and Mobility covers it step by step.

    Gym vs. Home: Adapting Your Strength Training Environment

    The main difference between a gym and your living room is the resistance curve. Machines and cable stacks provide consistent tension through a full range of motion. Bands, dumbbells, and bodyweight do not. A band is light at the bottom of a row and heavy at the top; a dumbbell chest press loses tension at lockout. To adapt, change how you load the movement. Slow down the eccentric phase to three seconds. Add a pause in the stretched position. Use a backpack for rows or split squats to keep tension where the band drops off. If an exercise feels too easy at the top, shorten the range to the hardest half and accumulate volume there.

    Gyms also dictate exercise selection through equipment availability. At home, you select movements based on what you own and the space you have. This is a constraint, but it simplifies decision-making. Pick one push, one pull, one squat, one hinge, and one carry variation you can load progressively. Rotate them only when progress stalls. You do not need a perfect substitute for every machine; you need a heavy enough stimulus on the fundamental patterns.

    Environment shapes consistency. A commute creates a mental switch; at home, the transition is instant. Many people find it helps to ritualize the start: change clothes, set a timer, put the phone in another room. Treat the living room like a facility you respect. If space is tight, use furniture sliders or a towel on hardwood for hamstring curls and ab rollouts. A doorway works for band anchors. A sturdy chair handles step-ups and dips.

    • Match the resistance profile: slow eccentrics, paused reps, partials in the hard zone
    • Limit the menu: one loaded variation per pattern, progress it weekly
    • Build a start ritual: clothes, timer, phone away
    • Use what the room gives you: doors, chairs, floors, walls

    Strength vs. Hypertrophy: Programming for Your Specific Goal

    The rep range you choose does not change the exercises — it changes how you load and progress them. For strength, the priority is moving heavier loads for fewer reps. Aim for 3 to 6 reps per set across 3 to 5 sets, resting 2 to 3 minutes between sets so each effort feels sharp. At home this means finding the hardest bodyweight variation you can control (such as archer push-ups or Bulgarian split squats) or loading a backpack, holding dumbbells, or using thick bands to hit that intensity. The goal is neural adaptation: teaching your nervous system to recruit more muscle fibers at once.

    For hypertrophy, the driver is mechanical tension accumulated through volume. Work in the 8 to 15 rep range for 3 to 4 sets with 60 to 90 seconds rest. You can use the same movements — push-ups, rows, lunges, Romanian deadlifts — but choose a difficulty that brings you within 1 to 2 reps of failure on the last set. Slow eccentrics (3 seconds down) and a full stretch under load help when external weight is limited.

    Many people find a mixed approach works well: lead each session with one main strength lift in the lower rep range, then follow with 2 to 3 hypertrophy accessories. Example: weighted goblet squats for 4 x 5, then bodyweight split squats for 3 x 12 and band pull-aparts for 3 x 15.

    • Strength focus: lower reps, heavier load, longer rest, prioritize intensity
    • Hypertrophy focus: moderate reps, moderate load, shorter rest, prioritize volume and control
    • Combined: 1 heavy compound, then 2 to 3 higher-rep accessories

    If joints ache, reduce range of motion or switch to a joint-friendlier variation. If progress stalls for two weeks, add a rep, a set, or a slightly harder variation. Check with a doctor if you have cardiovascular or orthopedic concerns before training near failure.

    Progressive Overload at Home: Tracking and Advancing Without Machines

    Progressive overload is the engine that keeps strength gains moving, and at home it just requires a reliable way to make each week slightly harder than the last. Start by picking one measurable metric per exercise: total reps across sets, rest time between sets, tempo (for example, a three-second lowering phase), or range of motion (such as elevating your feet for push-ups). Write it down in a notebook or a simple spreadsheet — date, exercise, sets, reps, and any load used. That log becomes your decision-making tool.

    When an exercise feels smooth for all prescribed sets, apply the smallest sensible jump. If you hit three sets of twelve bodyweight squats with good control, next session try three sets of thirteen, or keep reps the same and slow the descent to three seconds. With bands or dumbbells, move to the next band thickness or add 1–2 kg per dumbbell. If you only have one band, shorten the anchor point or double it up to increase tension. For household items, fill a backpack with books and weigh it on a bathroom scale so you know the exact load.

    • Track one primary lift per movement pattern (push, pull, squat, hinge, carry) each week.
    • Use a "rep window" like 8–12; when you hit the top for all sets, increase difficulty next session.
    • If form breaks down or joints ache, drop back to the previous level for a week before progressing again.
    • Deload every 4–6 weeks by cutting volume roughly in half while keeping intensity.

    Many people find that a consistent, written log prevents the common trap of repeating the same workout for months. If pain persists beyond normal muscle soreness, check with a doctor or physical therapist before pushing further.

    Putting It Together

    Start with three non-consecutive training days this week, such as Monday, Wednesday, and Friday. Each session follows the same full-body template: a two-minute warm-up of marching in place, arm circles, and bodyweight good mornings, then three sets of 8 to 12 reps for a squat variation, a push variation, a hinge or lunge variation, and a row or pull variation. Rest 60 to 90 seconds between sets. Choose the hardest version of each movement you can perform with control for all reps — bodyweight squats or goblet squats with a backpack, elevated push-ups or floor push-ups, glute bridges or single-leg hip thrusts, and doorframe rows or dumbbell rows. Finish with two sets of a dead bug or plank variation for 20 to 40 seconds.

    • Monday: test your chosen variations, note reps and difficulty
    • Wednesday: repeat, aiming for one extra rep on the last set of each move
    • Friday: repeat, adding a pause at the bottom of squats and push-ups if form holds

    Track the numbers in a notebook or phone. If a joint aches beyond muscle fatigue, swap to an easier regression next session. Many people find two weeks of this baseline reveals where to progress. Check with a doctor before starting if you have existing injuries or medical conditions.

    More from the blog

    From FitLife Solutions

    Our book Chair Workouts: Simple Seated Exercises for Strength and Mobility goes further, as a digital eBook (PDF and EPUB) you can read on any device.

    Browse all our practical health and fitness guides at fitlifesolutions.site.

    New practical health guides and articles on WhatsApp: follow our channel.

    About the author

    Ahumuza Mark is the founder of FitLife Solutions in Luwero, Uganda. He publishes practical, plain-language guides on everyday health, fitness and habits, and approves every article before it goes online. He is not a doctor: our articles are general information, so please read our Health Disclaimer and talk to a health professional about your own situation. Questions or corrections? Contact us.

    This article is for general information only and is not a substitute for professional medical advice. Talk to your doctor or another qualified health professional before changing your diet, exercise or health routine, especially if you have a medical condition or take medication.