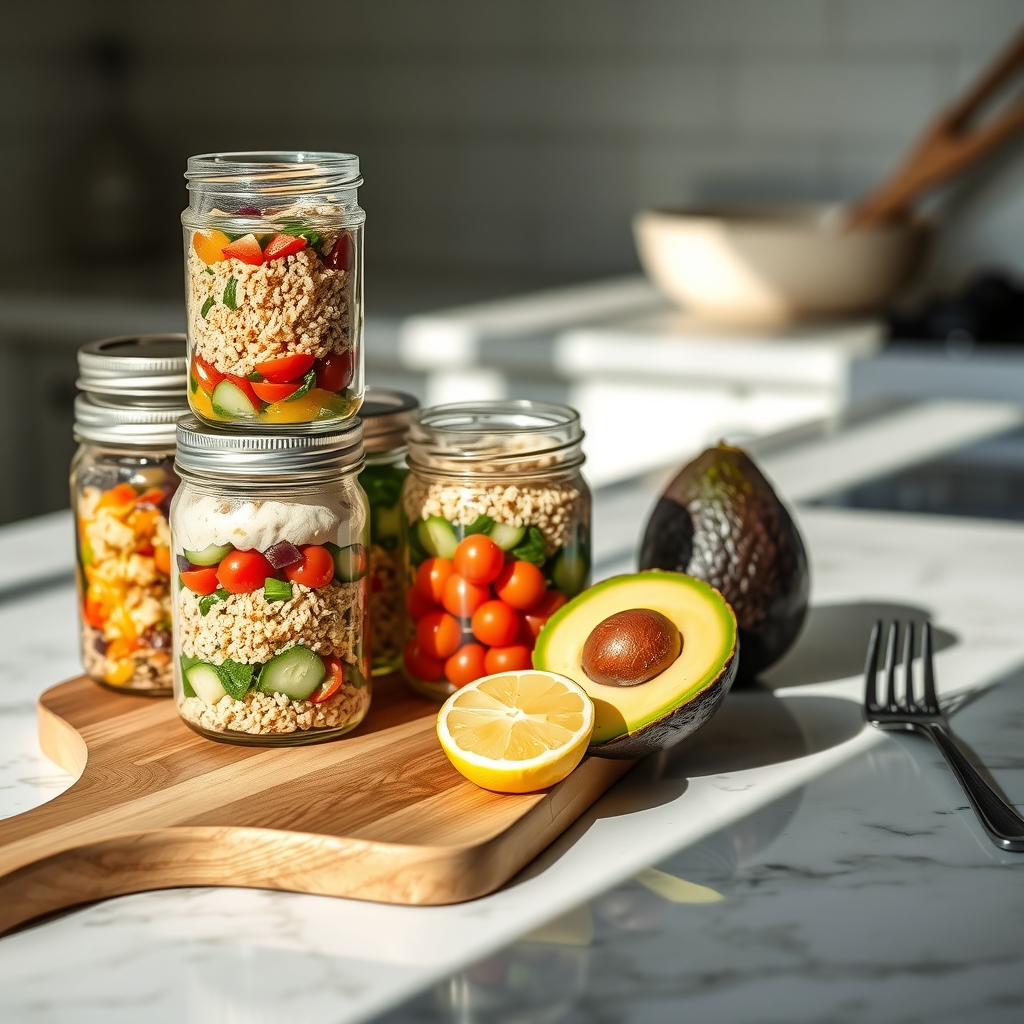
You open your bag at noon and the meal inside is exactly as you packed it: cool, crisp, and ready to eat. No hunting for a communal microwave, no waiting in line, no rubbery reheated texture. This guide is for anyone who works on a job site, travels in a van, studies in a library with a strict no-appliance policy, or simply wants to reclaim the 20 minutes a day spent queuing for heat. It also solves the grocery puzzle for people avoiding rice, chicken, or subscription boxes, and for those managing a tight fridge or no fridge at all.
After reading, you will be able to: – Build complete lunches and dinners from shelf-stable proteins, raw vegetables, and fruit that taste better after a few hours in a container – Choose produce that stays safe and appealing without refrigeration for a full workday – Assemble meals in the morning using acid-based dressings that soften raw ingredients by noon – Pack a week of food using only insulated bags, frozen water bottles, and stackable containers – Shop once at bulk bins, ethnic markets, or seasonal gluts without a recurring fee or special equipment
No-Cook Protein Foundations: Canned Fish, Legumes, and Shelf-Stable Dairy
Building a week of cold lunches starts with protein that requires zero heat and zero refrigeration until opened. Canned fish, shelf-stable legumes, and certain dairy products deliver complete nutrition without a stove, a microwave, or a subscription service. The key is selecting varieties packed in water, olive oil, or brine rather than heavy sauces that turn grainy when cold.
Choosing and Using Canned Fish
Sardines, mackerel, and skipjack tuna hold texture better than albacore after days in a container. Drain the liquid well, then flake the fish directly into your meal jar with a fork. If the flavor feels too aggressive, stir in a spoonful of Greek yogurt or a squeeze of lemon the night before; the acid softens the edges. For anyone avoiding fish, canned chicken works the same way — look for chunks in water with no added broth.
Legumes That Travel Well
Firm beans keep their shape. Chickpeas, black beans, and cannellini survive a week in acid-based dressings without turning mushy; kidney beans and lentils often split. Rinse them under cold water until the foam stops, then spin dry in a salad spinner or pat thoroughly with towels. Excess moisture is the enemy of texture. Toss the dried beans with oil and salt immediately — they absorb flavor overnight.
Shelf-Stable Dairy Options
- Individually sealed waxed cheese rounds (Babybel style) or aged cheddar sticks stay safe at room temperature for a full workday.
- Shelf-stable UHT milk boxes or single-serve powdered milk packets rehydrate overnight oats without a fridge.
- Powdered whey or collagen stirs into dressings for a protein boost without changing texture.
Grain-Free Carbohydrate Bases: Root Vegetables, Fruit, and Raw Oats
Root vegetables, fruit, and raw oats form the backbone of grain-free, no-heat meal prep because they deliver substantial energy without a stove. Sweet potatoes, carrots, beets, and parsnips can be peeled, grated, or spiralized raw; their natural sugars concentrate when massaged with salt and acid, softening texture in twenty minutes. Apples, pears, mango, and berries add quick glucose and moisture, while bananas mash into a binder for oat-based mixtures. Rolled or quick oats require only liquid — water, nut milk, or juice — and time to hydrate into a chewy base similar to overnight oats but sturdy enough for savory applications. All three categories travel well at room temperature for a workday.
Prep Methods That Keep Texture Intact
Grate firm roots on the large holes of a box grater or use a julienne peeler for noodle-like strands; toss immediately with lemon juice or vinegar to prevent oxidation. For oats, use a one-to-one ratio of oats to liquid by volume, stir in a pinch of salt and a spoonful of fat (tahini, olive oil, nut butter), then let sit at least four hours or overnight. Fruit should be cut no more than a few hours before eating unless submerged in citrus juice. If a batch turns too wet, stir in chia seeds or ground flax to absorb excess moisture. If too dry, drizzle additional oil or citrus juice and let rest ten minutes. These adjustments keep meals palatable without reheating.
Fridge-Free Produce Selection and Acid-Based Preservation Techniques
When you cannot rely on a refrigerator, your produce strategy shifts from "what keeps longest" to "what survives handling and improves with acid." Choose vegetables with low water content and high structural density: cabbage, carrots, radishes, fennel, celery root, and thick-skinned cucumbers. For fruit, select firm apples, citrus, green mangoes, and underripe pears. Avoid leafy greens, tomatoes, berries, and stone fruit; they degrade into mush or mold within hours at room temperature. Wash everything thoroughly in cool water with a splash of vinegar, dry completely, and store whole. Cut surfaces invite spoilage.
Acid as Preservation
A 1:1 ratio of 5% vinegar (apple cider, white wine, or rice) to water creates a brine that lowers pH enough to slow bacterial growth on dense vegetables for two to three days at cool room temperature. Submerge matchstick carrots, thinly sliced cabbage, or radish coins in jars with a pinch of salt and aromatics like mustard seed, garlic, or dill. The salt draws out water, the acid penetrates, and the texture firms rather than softens. For fruit, toss apple or pear matchsticks in straight lemon or lime juice; the antioxidant effect prevents browning and the acid brightens flavor. Drained pickles and acid-tossed fruit become ready-to-eat components that add crunch and cut through rich proteins and fats.
- Pack brine-pickled vegetables in small screw-top jars; keep the produce submerged.
- Carry a lemon wedge to freshen cut fruit or dressed salads just before eating.
- If a jar smells yeasty, fizzy, or distinctly alcoholic, discard it.
- When ambient temperature exceeds 75°F, consume acidified produce within 24 hours.
Cold-Assembly Meal Formulas: Balancing Texture, Fat, and Acid Without Heat
A cold meal lives or dies by contrast. Without the unifying warmth of a stove, you need deliberate layers: something chewy, something crisp, something rich, and something bright to wake the palate. Start with a sturdy base — soaked oats, shredded root vegetables, or a dense bread — that won't turn to mush after twelve hours in a bag. Add a protein that holds its shape: flaked mackerel, rinsed chickpeas, or cubed firm tofu pressed dry. Then build the bridge with fat and acid. A spoonful of tahini thinned with lemon juice, a drizzle of olive oil hit with vinegar, or a smear of miso whisked into yogurt coats the dry ingredients and carries flavor into every bite. Finish with texture: toasted seeds, broken crackers, thinly sliced fennel, or a handful of herbs treated like a salad green, not a garnish.
The Three-Component Rule
Every container needs only three decision points to stay interesting all week. Pick one base, one protein-fat bundle, and one acid-crunch finish. For example: soaked oats + sardines mashed with mayo and mustard + grated carrot tossed in cider vinegar and sunflower seeds. Or: rye crisps + white beans tossed in pesto + quick-pickled onions and parsley. Rotate the acid (lemon, lime, rice vinegar, sherry vinegar) and the fat (olive oil, sesame oil, nut butter, cheese) to shift the cuisine without new recipes. Salt each layer as you go; cold dulls salinity, so season slightly heavier than you would a hot dish. Taste after assembly, then again after an hour — the acid softens raw edges and the fat rounds sharp corners, creating a cohesive dish that never saw a pan.
If you want this in more depth, our book Healthy Lunchbox Recipes: Practical Meal Prep for Busy Adults covers it step by step.
Flavor-Forward Marinades and Dressings That Mellow Raw Ingredients Overnight
Acid and salt are the quiet workhorses of no-heat meal prep. A well-built dressing does more than add flavor; it softens dense vegetables, rounds out raw alliums, and binds disparate ingredients into something that tastes intentional rather than assembled. The key is giving it time. Most vinaigrettes and marinades need at least four hours in a sealed container to do their work, and many improve after twelve. Make your dressings on Sunday, portion them into small jars, and let the chemistry happen while you sleep.
Build a Base Ratio You Can Trust
Start with three parts fat to one part acid, then season aggressively with salt. Extra-virgin olive oil, toasted sesame oil, or a neutral oil like grapeseed each steer the profile in a different direction. For acid, reach for lemon juice, lime juice, sherry vinegar, rice vinegar, or apple cider vinegar. A teaspoon of Dijon or a smashed garlic clove per half-cup of dressing helps emulsify and adds depth. Whisk hard or shake in a lidded jar until thick and opaque. Taste on a piece of the vegetable you plan to dress — raw kale needs more salt and acid than cucumber — and adjust before you combine.
- Shallot-lemon vinaigrette: minced shallot, lemon juice, olive oil, pinch of sugar, black pepper. Excellent on shredded carrot, fennel, or canned chickpeas.
- Miso-ginger dressing: white miso, rice vinegar, sesame oil, grated ginger, splash of water to thin. Softens cabbage and daikon overnight.
- Herb-yogurt sauce: thick plain yogurt, chopped dill and parsley, garlic, lemon zest, olive oil. Clings to roasted root vegetables eaten cold or room-temp beans.
- Chili-lime oil: neutral oil, lime zest and juice, crushed red pepper, fish sauce or soy. Wakes up jicama, mango, and canned mackerel.
Pack dressing separately if you prefer crisp texture, or toss the night before for a softer, more integrated bite. If a salad looks wilted by day three, refresh with a squeeze of fresh citrus and a drizzle of new oil.
Portable Packing Systems for Temperature Control Without Refrigeration Access
Packing meals without refrigeration access means managing three variables: starting temperature, insulation layers, and time. Freeze a stainless steel water bottle or a dedicated ice brick overnight; place it at the bottom of an insulated lunch bag, then build the meal on top in a wide-mouth glass jar or a locking plastic container. A folded cotton napkin between the cold source and the food prevents frost burn on delicate greens. For longer commutes, nest the insulated bag inside a soft cooler sleeve lined with a reflective emergency blanket — this adds roughly two extra hours of safe temperature hold without adding bulk.
Layered Packing Order
- Bottom: frozen bottle or ice brick wrapped in napkin
- Middle: dense, moisture-resistant items (marinated beans, chopped root vegetables, hard cheese, cured meats)
- Top: fragile textures (herbs, sprouts, sliced fruit, toasted nuts)
- Lid pocket or side compartment: dressing in a tiny screw-top jar, utensils, dry seasoning blend
This order keeps condensation dripping onto sturdy ingredients instead of turning salad greens to mush. If the bag will sit in a hot car, add a second frozen bottle on top of the jar before sealing the cooler sleeve. Many people find that pre-chilling the empty containers in the freezer for ten minutes while assembling the meal extends the cold window noticeably. When a leak happens — usually a cracked dressing jar — keep a spare zip-top bag and a microfiber cloth in the outer pocket for immediate containment. If the ice brick thaws early, swap it for a gas-station bag of ice and repack; the meal stays safe as long as the core ingredients still feel refrigerator-cold to the touch.
Subscription-Free Ingredient Sourcing: Bulk Bins, Ethnic Markets, and Seasonal Gluts
Building a microwave-free meal prep routine gets expensive if you rely on pre-portioned pouches or specialty health-food aisles. The most reliable way to keep costs down is to shorten the supply chain between the harvest and your container. This means buying ingredients in their least processed form from sources that move high volume with low overhead.
Where to Shop and What to Buy
Bulk bins at independent grocers or co-ops let you take exactly the amount of raw nuts, seeds, dried beans, oats, or spices you need for the week. You avoid packaging markup and the stale product that sits in branded bags for months. Bring your own clean jars or cloth bags; weigh them empty first so the cashier can tare the scale. Ethnic markets — Latin American, Asian, Middle Eastern, African — often carry the same staples in larger bags for a fraction of the price. Look for 25-pound sacks of dried chickpeas, lentils, or black beans; 5-pound blocks of firm tofu (often shelf-stable until opened); tins of sardines, mackerel, or mussels; and jars of preserved lemons, capers, or roasted peppers that add instant flavor without cooking. Produce terminals or wholesale clubs that sell to the public are another lever. A case of slightly blemished apples, carrots, or cabbage costs little and stores for weeks in a cool corner.
- Walk the market 30 minutes before closing; vendors often discount rather than pack up.
- Split a case with a neighbor if storage space is tight.
- Ask the produce manager for "seconds" boxes — they rarely advertise them.
- Freeze extra citrus juice in ice-cube trays for dressings later.
When a seasonal glut hits — tomatoes in August, squash in October — buy heavy, prep once (slice, salt-drain, pack in vinegar or oil), and you have ready-to-eat components for months without a subscription fee.
Key Takeaways and Your First Week
The core of microwave-free meal prep rests on a few reliable habits. – Build every meal around a no-cook protein, a dense carbohydrate that eats well cold, and a fat source that carries flavor without heat. – Use acid and salt early; they soften raw vegetables and mellow canned legumes overnight so textures improve instead of degrading. – Pack insulation first, food second; a frozen water bottle and a thick towel often outperform a thin gel pack for an eight-hour stretch. – Source staples in bulk when possible, but buy produce in amounts you will actually assemble within three days.
Your First Week
Monday and Tuesday keep it simple: canned sardines, pre-peeled carrots, apple slices, and a jar of olive-oil-lemon dressing you shook together Sunday night. Wednesday introduces a soaked-oat base — rolled oats covered with water and a pinch of salt in a sealed container overnight — topped with chickpeas, chopped celery, and a spoonful of tahini thinned with vinegar. Thursday and Friday repeat the oat formula but swap the fruit and add a handful of nuts for crunch. Saturday is assembly day: drain and rinse three cans of beans, peel a batch of carrots, wash greens, and portion dressing into small lidded jars. Sunday stays light — leftovers combined into one big salad — while you restock for the next cycle. Adjust portions after day three based on hunger, not a calculator.
More from the blog
- Eating Healthy on a Budget Without Cooking: No-Heat Meals and Smart Buys
- When Meal Prep Doesn't Work and What to Do Instead
- How to Meal Prep for the Week Using Simple Pantry Staples
From FitLife Solutions
Our book Healthy Lunchbox Recipes: Practical Meal Prep for Busy Adults goes further, as a digital eBook (PDF and EPUB) you can read on any device.
Browse all our practical health and fitness guides at fitlifesolutions.site.
New practical health guides and articles on WhatsApp: follow our channel.
This article is for general information only and is not a substitute for professional medical advice. Talk to your doctor or another qualified health professional before changing your diet, exercise or health routine, especially if you have a medical condition or take medication.