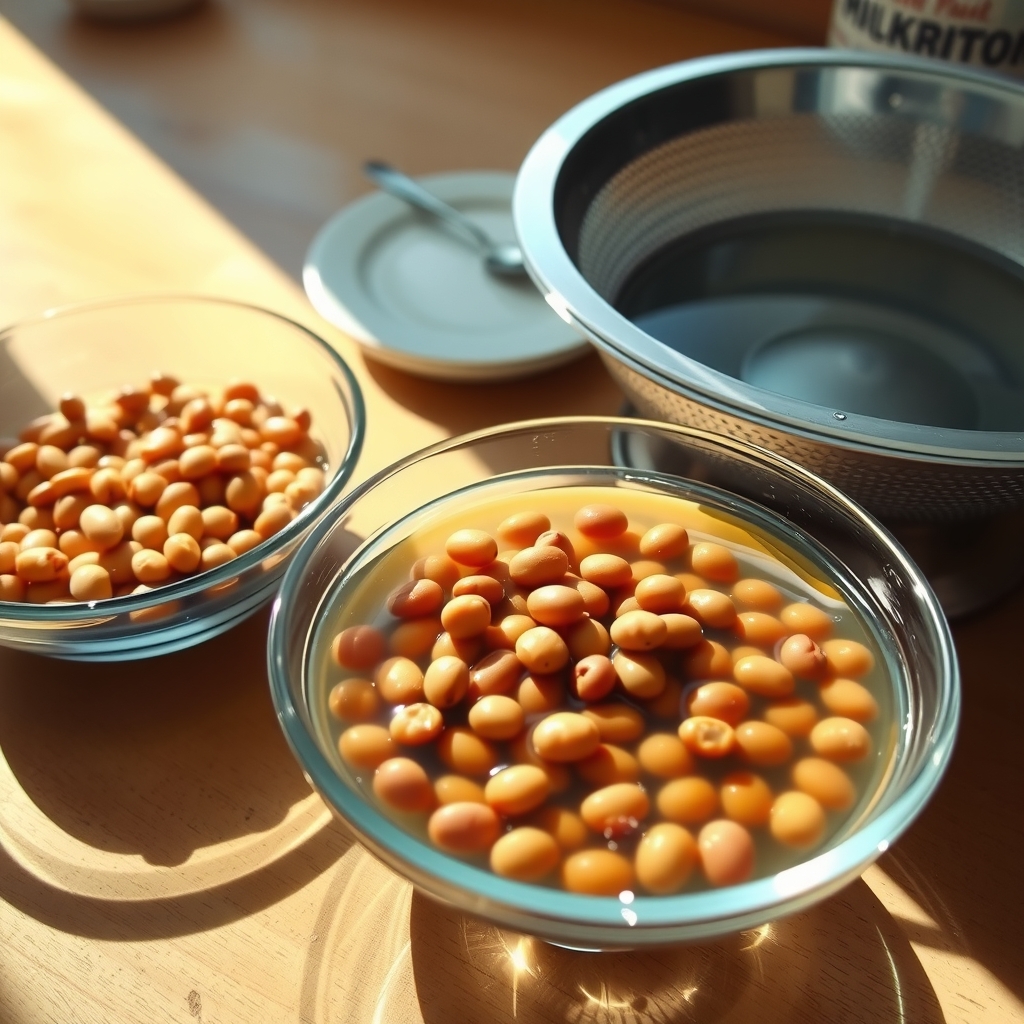
If you have ever stood over a pot of beans that refused to soften while others turned to mush, or dealt with uncomfortable bloating after a hearty chili, this guide is for you. It is written for home cooks who want reliable results from dried beans without the guesswork.
After reading, you will be able to choose a soaking method that fits your schedule, whether you are planning dinner tomorrow or need beans on the table in an hour. You will understand how a simple soak hydrates the seed coat evenly so the beans cook through at the same rate, keeping their shape and creamy interior intact. You will also learn why soaking helps reduce the complex sugars that often cause digestive trouble, making the final dish easier to enjoy.
- Pick the right soak: overnight, quick-soak, or skip it entirely
- Cook beans that are tender, intact, and consistent batch after batch
- Reduce the compounds that commonly lead to gas and bloating
- Save active cooking time and energy with a little upfront planning
The Science Behind Bean Soaking and Starch Hydration
When a dried bean hits water, the first thing happening is simple physics: the seed coat and the dense starch granules inside begin to absorb moisture. This process, called hydration, is what turns a hard, shriveled pellet into something that can actually soften with heat. Without that initial soak, the exterior of the bean cooks and turns mushy long before the center has absorbed enough water to become tender. The result is often a pot of beans with blown-out skins and chalky, undercooked cores.
Soaking jump-starts this hydration evenly, from the outside in. As water penetrates the seed coat, it swells the starch granules and begins to relax the rigid cell structure. This means when you eventually apply heat, the energy goes straight into softening tissue that is already pliable, rather than fighting to drive moisture into a dry center. Many people find this leads to a creamier, more uniform texture without the need for aggressive boiling that splits skins.
A few practical notes on the mechanics: – The seed coat acts as a gatekeeper; intact skins slow water entry, which is why older, drier beans take longer to hydrate fully. – Temperature matters. Cool water hydrates beans slowly and evenly; hot water speeds it up but can start cooking the outside before the inside is ready. – Salt in the soaking water (about a tablespoon per pound) can actually help by softening the pectin in the skins, reducing the chance of blowouts during the final cook.
If you skip the soak, you are essentially asking dry starch to hydrate and gelatinize simultaneously under heat, a race the exterior almost always wins.
How Soaking Reduces Cooking Time and Energy Use
Soaking gives water a head start on the job it must do anyway: hydrate every starch granule inside the bean until it swells and softens. When you put dry beans straight into a pot, the outer layers cook while the center is still hard, so you keep simmering longer. Pre-hydrated beans enter the heat already plump, which means the cooking liquid only needs to maintain temperature long enough to gelatinize starch — often cutting the active simmer by half or more.
Less time at a rolling boil translates directly to less fuel or electricity. On a stovetop you might save twenty to forty minutes of gas or electric draw; in a pressure cooker the cycle shortens by several minutes, which matters when you run multiple batches a week. The kitchen also stays cooler, a welcome side effect in summer.
A few practical habits keep the savings real: – Use plenty of water for soaking — at least three cups per cup of beans — so they hydrate evenly and don’t absorb cooking liquid later. – Drain the soak water and start with fresh liquid; this prevents the foam that can boil over and force you to lower the heat, extending the cook. – Keep the simmer gentle. A hard boil splits skins and wastes energy through excess evaporation. – Test doneness early. Soaked beans can go from perfect to mushy in five minutes, so start checking at the low end of the usual range.
If you forget to soak, the quick-soak method — boil two minutes, cover and rest one hour — still shaves significant time off the full cook compared to starting from dry.
Breaking Down Oligosaccharides for Better Digestibility
Dried beans contain oligosaccharides, complex sugars that human digestive enzymes cannot fully break down. When these sugars reach the large intestine intact, gut bacteria ferment them, producing gas that leads to bloating and discomfort for many people. Soaking beans before cooking helps reduce this issue by allowing water to penetrate the seed coat and leach some of these water‑soluble carbohydrates into the soaking liquid.
For the best effect, discard the soaking water and rinse the beans thoroughly before cooking in fresh water. This simple step removes a portion of the oligosaccharides that migrated out during the soak. A long, cold soak of eight to twelve hours tends to draw out more of these compounds than a rapid hot soak, though even a quick soak followed by draining offers some reduction. Adding a piece of kombu seaweed to the cooking pot is a traditional practice many cooks find helpful; the seaweed contains enzymes that may further assist in breaking down the remaining sugars during simmering.
Other habits that support easier digestion include cooking beans until they are completely tender, since undercooked starches and fibers are harder to process. Skimming and discarding any foam that rises during the first few minutes of boiling also removes some of the compounds that contribute to discomfort. If you are new to eating beans regularly, start with smaller portions a few times a week to let your gut microbiome adjust gradually. People with persistent digestive conditions should check with a doctor or dietitian before making large changes to their fiber intake.
Achieving Even Texture and Preventing Split Skins
When dried beans hit boiling water, the outside hydrates and softens long before the center does. That temperature gradient creates internal pressure, and the skin — being the least flexible part — often splits or peels away completely. Soaking gives the entire bean a head start on hydration so the interior and exterior cook at a more even pace. The result is beans that hold their shape, have creamy interiors, and look intact on the plate rather than turning into a ragged pile.
Split skins are not just cosmetic. When skins burst, starch escapes into the cooking liquid, thickening it faster and sometimes making the beans taste slightly floury. Whole skins keep the bean’s structure intact, which matters for salads, stews, and any dish where you want distinct pieces. Many people find that soaked beans also absorb seasoning more evenly because the interior is not racing to catch up.
A few practical habits help prevent splits: – Use plenty of water during soaking — at least three times the volume of beans — so they hydrate uniformly. – Add a pinch of salt to the soak water; it slightly toughens the skin, making it more elastic and less prone to tearing. – Avoid a rolling boil once cooking starts. A gentle simmer keeps the beans moving just enough without battering the softened skins. – If you are cooking older beans that have been in the pantry a year or more, extend the soak by a few hours. Very dry beans benefit from the extra time to rehydrate fully before heat hits them.
If you want this in more depth, our book Pantry Staples Cooking: Simple Meals from Everyday Ingredients covers it step by step.
Comparing Soaking Methods: Overnight, Quick Soak, and No-Soak
The overnight method remains the standard for a reason. Cover the beans with three inches of cold water, add a tablespoon of salt per quart if you like seasoned beans, and let them sit at room temperature for eight to twelve hours. Drain and rinse before cooking. This long, gentle hydration produces the most uniformly tender skins and creamy interiors, and it does the best job of leaching out the oligosaccharides that cause gas. If you forget to start them the night before, the quick-soak method works well. Place beans in a pot, cover with water, bring to a rolling boil for two minutes, then remove from heat, cover, and let stand for one hour. Drain, rinse, and cook as usual. The heat jump-starts hydration, but some delicate varieties like black beans or navy beans may split more than with the cold method.
– Overnight soak: best texture, most even cooking, greatest reduction in gas-producing sugars. – Quick soak: ready in about ninety minutes total; good for same-day meals; slightly higher risk of split skins. – No-soak: skip straight to cooking; add twenty to forty minutes simmer time; beans hold shape well for salads but may cook unevenly and cause more digestive discomfort for sensitive people.
If you choose no-soak, use a heavy pot, keep the liquid at a bare simmer, and check frequently after the first hour. Adding a strip of kombu or a pinch of baking soda to the cooking water can help soften skins without pre-soaking. For any method, discard the soaking liquid and rinse the beans — this simple step removes a significant portion of the compounds that cause bloating.
Impact of Soaking on Nutrient Retention and Antinutrients
Soaking does more than soften beans; it changes their nutritional profile in ways that matter for everyday cooking. Dry beans contain antinutrients such as phytic acid, lectins, and tannins that can bind minerals like iron, zinc, and calcium, making them harder for your body to absorb. As beans sit in water, a portion of these compounds leaches out into the soaking liquid. Discarding that liquid and rinsing the beans before cooking reduces the antinutrient load, which may improve mineral availability from the finished dish.
Heat finishes the job. Lectins, which can cause digestive upset if beans are undercooked, are largely destroyed during the boiling phase. Soaking simply gives you a head start by shortening the time needed at high heat, helping preserve heat-sensitive vitamins like folate and thiamine that degrade with prolonged cooking. You do lose some water-soluble nutrients — mainly B vitamins and a few minerals — into the soak water, but the trade-off is usually favorable because the beans cook faster and more evenly.
A few practical habits keep nutrition on your side:
- Use plenty of water for soaking (about three cups per cup of beans) so antinutrients dilute effectively.
- Always discard the soaking water and give the beans a quick rinse.
- Bring soaked beans to a full boil for at least ten minutes before lowering to a simmer; this step is essential for kidney beans and wise for all varieties.
- Save the cooking liquid for soups or stews — it holds flavor and some nutrients that migrated out during cooking.
If you have a condition that requires careful mineral management, check with a doctor or dietitian before making big changes to how you prepare legumes. For most home cooks, the soak-rinse-boil routine delivers a pot of beans that is easier to digest and nutritionally solid.
Practical Tips for Soaking Different Bean Varieties
Small beans such as lentils, split peas, and black-eyed peas absorb water quickly and usually do not need a long soak. A thirty-minute rest in cold water is often enough to help them cook evenly, though many people skip soaking entirely for these varieties. Medium beans like black beans, pinto beans, and navy beans benefit from the standard overnight soak or the quick-soak method; plan for at least four hours in cold water or one hour after a brief boil. Large, dense beans such as kidney beans, cannellini, and chickpeas need the most time. An overnight soak of eight to twelve hours works well, and chickpeas often improve with a full twenty-four hours in the refrigerator, especially if you change the water once.
- Lentils, split peas, black-eyed peas: optional, 30 minutes if desired
- Black beans, pinto beans, navy beans: 4 to 12 hours cold soak or 1 hour quick soak
- Kidney beans, cannellini, Great Northern: 8 to 12 hours cold soak
- Chickpeas: 12 to 24 hours cold soak, change water halfway if possible
Older beans take longer to hydrate no matter the variety. If your beans have been in the pantry for more than a year, extend the soak by a few hours and expect a longer cooking time. Hard water can also slow softening; adding a pinch of baking soda to the soak water may help, but use sparingly to avoid a soapy taste. Always discard the soak liquid and rinse the beans before cooking. Salt can be added to the soak water for seasoning and to help skins stay intact, roughly one teaspoon per quart of water. If you forget to soak large beans, the quick-soak method is a reliable backup: cover with water, boil two minutes, remove from heat, cover, and let sit one hour before draining and cooking.
Putting It Together
Start with the overnight method for a pound of whatever bean you cook most often. Cover them with three inches of cold water, add a tablespoon of salt, and leave the bowl on the counter before bed. In the morning, drain, rinse, and simmer in fresh water with aromatics until tender. Taste one at the 45-minute mark; older beans can take twice as long. If you forget to start them the night before, use the quick soak: boil for two minutes, cover, wait an hour, then drain and cook as usual. Keep a notebook or phone note with the bean type, soak method, and cook time so you can replicate what worked.
- Pick one bean variety this week and stick with it
- Soak Sunday night, cook Monday, portion for three meals
- Freeze extra cooked beans in their liquid in two-cup containers
- Use the cooking liquid in soups or rice instead of broth
- Note the texture and digestibility each day
Many people find that a simple routine removes the guesswork. If you have a history of digestive issues, check with a doctor before making beans a daily staple.
More from the blog
- How to Pack Nutritious Work Lunches Without a Microwave, Fridge, or Cooking
- How to Design a Kitchen Layout That Makes Healthy Cooking Easier
- How to Eat Healthy on a Budget Using Simple Strategies
From FitLife Solutions
Our book Pantry Staples Cooking: Simple Meals from Everyday Ingredients goes further, as a digital eBook (PDF and EPUB) you can read on any device.
Browse all our practical health and fitness guides at fitlifesolutions.site.
New practical health guides and articles on WhatsApp: follow our channel.
This article is for general information only and is not a substitute for professional medical advice. Talk to your doctor or another qualified health professional before changing your diet, exercise or health routine, especially if you have a medical condition or take medication.