Blog

  • How to Drink More Water Throughout the Day

    How to Drink More Water Throughout the Day

    Most people know they should drink more water, yet the gap between intention and action stays wide. This article is for anyone who starts the day with good intentions, fills a bottle, then reaches dinner realizing it is still half full. It is also for the person who relies on coffee until noon, wonders why energy dips at three, or feels hungry an hour after lunch only to discover thirst was the real signal.

    After reading, you will be able to:

    • Calculate a personal daily water target that fits your body and routine
    • Set up friction-free cues so sipping becomes automatic rather than a chore
    • Front-load hydration in the morning to support steady energy through the afternoon
    • Add natural flavor without sugar so water actually tastes good
    • Use a tracking method that takes seconds and survives busy days

    No willpower marathons required. If you have a medical condition that affects fluid balance, check with your doctor before making big changes.

    Why Your Body Needs Consistent Hydration

    Water keeps every system running, but most people only notice it when they feel thirsty. By then, mild dehydration has already started to slow things down. Your brain, muscles, joints, and digestion all rely on a steady supply of fluid to work smoothly. Even a small shortfall can make you feel foggy, sluggish, or irritable without an obvious cause.

    Consistent hydration supports:

    • Temperature regulation through sweat and circulation
    • Nutrient transport and waste removal via blood and lymph
    • Joint lubrication and cushioning for the brain and spinal cord
    • Digestive regularity and saliva production
    • Skin elasticity and barrier function

    When you sip steadily instead of chugging at night, your body absorbs and uses the water more efficiently. Large volumes at once often pass through quickly, leaving cells under-supplied. A steady rhythm also helps maintain blood volume, which keeps energy stable and headaches at bay.

    Many people find that spacing intake across the day reduces afternoon crashes and improves focus. If you take medication, have a kidney condition, or follow a fluid-restricted plan, check with your doctor before increasing your target. Otherwise, aim for pale-yellow urine and a rhythm of small sips every hour. That simple pattern does more for daily function than any single large glass.

    Simple Math: Calculating Your Personal Daily Water Target

    A common starting point is the 8×8 rule — eight 8‑ounce glasses a day — but that number was never meant to be precise for everyone. A more personalized baseline uses body weight: take your weight in pounds, divide by two, and aim for that many ounces of total fluid each day. For example, someone who weighs 160 pounds would target roughly 80 ounces. If you prefer metric, multiply your weight in kilograms by 30 to 35 milliliters. These formulas give a reasonable floor for sedentary days in a temperate climate.

    Activity, heat, altitude, and certain health conditions shift the target upward. Add about 12 to 16 ounces for every 30 minutes of moderate exercise, and more if you are sweating heavily. Pregnant or nursing people, anyone taking diuretics, and those with kidney stones or other medical concerns should ask a clinician for a specific number rather than relying on a formula.

    Treat the calculated number as a daily budget, not a single gulp goal. Spread it across waking hours: a glass upon waking, sips with each meal, a bottle during work blocks, and a top‑off in the early evening. If you consistently finish far below the target, increase by 8 ounces per week until urine runs pale yellow most of the day. If you hit the number but still feel thirsty or notice dark urine, add another 8 ounces and reassess. Adjustments are normal; the aim is a practical range you can maintain without force.

    The Metabolic Link: How Water Supports Weight Management

    Drinking water before meals is one of the simplest ways to support appetite regulation. When you consume 16 to 20 ounces about 20 to 30 minutes before eating, the stomach stretches slightly and sends fullness signals to the brain sooner. Many people find they naturally eat less at that meal without feeling deprived. Try keeping a glass or bottle on the counter while you prep food so the habit attaches to an existing routine.

    Mild dehydration can mimic hunger cues. If you feel a snack craving between meals, drink a full glass of water first and wait ten minutes. Often the urge fades or shrinks, which helps you distinguish true hunger from thirst. This pause also gives you a moment to decide whether you actually want food or just a break.

    Replacing one sugary drink or high-calorie coffee beverage with plain or infused water each day cuts a meaningful number of liquid calories without requiring a diet overhaul. Over weeks, that swap alone can shift the energy balance enough to support gradual weight management.

    Water also helps the body metabolize stored fat and carbohydrates efficiently. Even slight dehydration slows the enzymatic reactions involved in lipolysis, the process of breaking down fat for fuel. Staying consistently hydrated keeps those pathways running smoothly, especially during and after exercise.

    • Drink a glass before every meal and snack
    • Swap one caloric beverage daily for water
    • Use thirst check-ins to avoid mindless eating
    • Hydrate steadily around workouts to support recovery

    If you have kidney, heart, or electrolyte concerns, check with your doctor before significantly increasing fluid intake.

    Morning Momentum: Front-Loading Hydration Before Noon

    Starting the day with water is the single highest-leverage habit for hitting your daily target. After seven or eight hours without fluid, even mild dehydration can blunt focus and make the morning feel heavier than it needs to be. The goal isn’t to chug a liter at once; it’s to create a gentle cascade that carries you toward noon without effort.

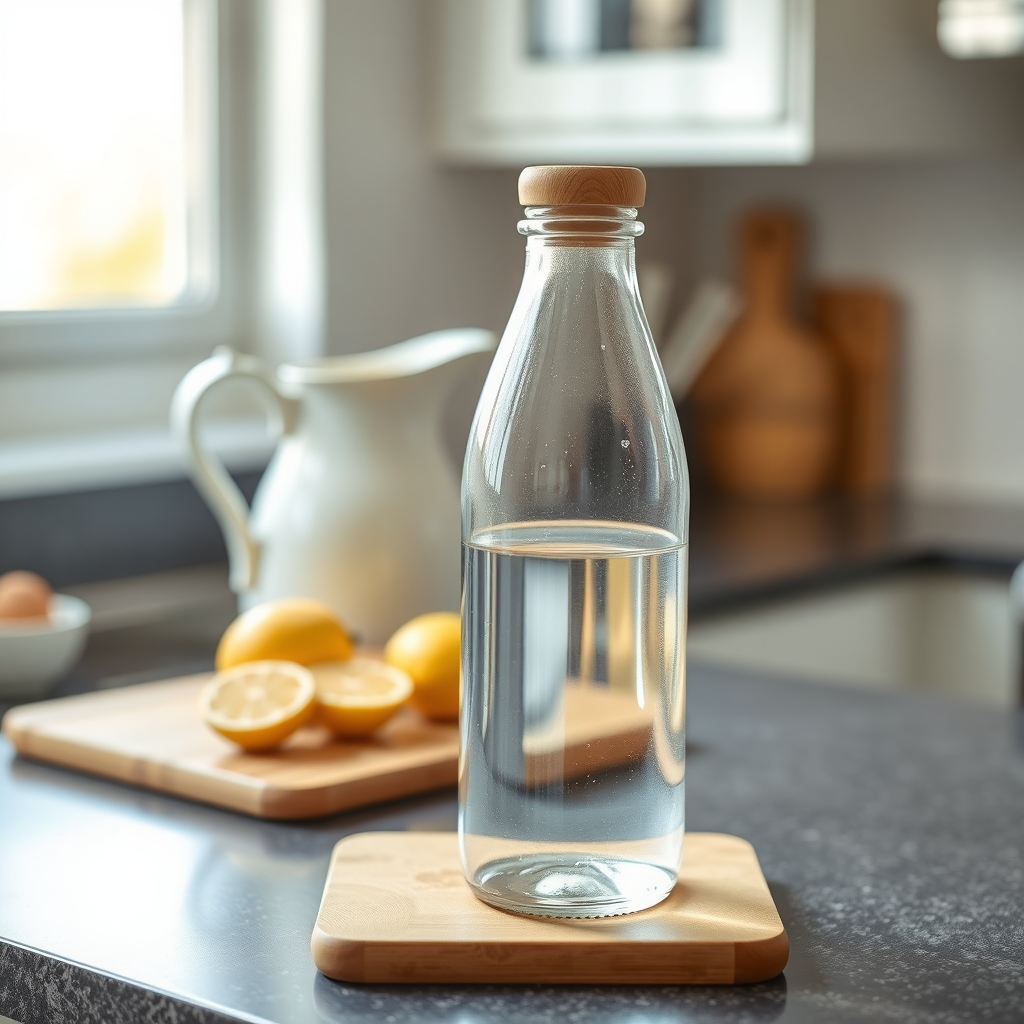
    Place a glass or bottle on your nightstand before bed. When the alarm sounds, drink half of it before your feet hit the floor. Keep the rest on the bathroom counter so you finish it while brushing your teeth. This two-step anchor — wake up, sip; brush teeth, finish — removes the decision point entirely.

    Pair the next serving with your morning beverage ritual. While coffee brews or tea steeps, down another eight to twelve ounces. The warm drink becomes the reward, not the hydration itself. If you exercise early, sip four to six ounces every fifteen minutes during the session, then finish a full bottle within thirty minutes of finishing.

    A simple checkpoint helps the habit stick:

    • Nightstand glass: empty before standing up
    • Bathroom bottle: empty before leaving the bathroom
    • Pre-coffee water: empty before first sip of caffeine
    • Post-workout bottle: empty within thirty minutes

    If you miss one anchor, don’t try to “catch up” all at once. Just hit the next cue. Many people find that front-loading two thirds of their target by lunch makes the afternoon feel automatic rather than a chore. Those with medical conditions that restrict fluid intake should check with a doctor before increasing morning volume.

    If you want this in more depth, our book Vegetarian Protein Recipes: Complete Meals for Every Day covers it step by step.

    Friction-Free Habits: Environmental Cues That Trigger Sipping

    Keep a filled glass or bottle on your nightstand so the first thing you see in the morning is water. Place a second vessel on the kitchen counter while coffee brews; the visual cue pairs hydration with an existing ritual. At your desk, position the bottle at the corner nearest your dominant hand — no reaching, no hunting. In the car, stash a spill-proof tumbler in the cup holder before you buckle up. Each location removes the micro-decision of "go get water" and replaces it with a grab-and-sip motion.

    Anchor sips to transitions you already perform. Drink three swallows every time you stand up from a meeting, walk past the water cooler, or finish a bathroom break. When you open your laptop, take a sip before the first email. When you close a browser tab, sip again. These tiny pairings turn idle moments into hydration checkpoints without adding a new task to your list.

    Use container size as a silent pace-setter. A 32-ounce bottle means you only need to refill twice to hit a common daily target; a 16-ounce glass means four refills. Choose the size that matches how often you’re willing to get up. If you hate refilling, go larger. If you like frequent stretch breaks, go smaller.

    • Nightstand glass → morning auto-pilot
    • Counter bottle → coffee-pair cue
    • Desk corner → dominant-hand reach
    • Car tumbler → commute companion
    • Transition sips → stand, walk, open, close

    If a spot stops working — bottle gets buried under papers, nightstand glass collects dust — move it. The best cue is the one you actually notice today.

    Flavor Without Sugar: Making Water Crave-Worthy Naturally

    Plain water works for many people, but flavor fatigue is real. If a little taste keeps you reaching for the bottle instead of soda or juice, that is a win. Start with ingredients you already have. Thin slices of cucumber add a clean, vegetal note without sweetness. A handful of frozen berries — raspberries, blueberries, strawberries — chills the water and releases color and aroma as they thaw. Citrus wheels (lemon, lime, orange, grapefruit) bring brightness; leave the peel on for more oils, remove it if you find the bitterness off-putting. Fresh herbs change the profile entirely: mint is classic, basil pairs surprisingly well with strawberry or cucumber, rosemary adds a piney depth that works with citrus, and thyme leans savory.

    • Cucumber + mint + lime
    • Strawberry + basil
    • Orange + rosemary
    • Blueberry + thyme
    • Grapefruit + rosemary

    Prep a pitcher or large jar the night before so flavors infuse while you sleep. Use a fork to gently muddle herbs against the side of the container — just enough to release oils, not shred leaves. If you prefer single-serve bottles, drop ingredients straight in and refill once or twice before swapping fresh. For a warm option, steep a cinnamon stick and a few apple slices in hot water, then cool or sip warm.

    Watch for two pitfalls. Citrus acids can bother sensitive teeth or reflux; a straw helps, and rinsing with plain water afterward reduces contact. Fruit-infused water left at room temperature beyond four hours can grow bacteria — keep it cold and discard after 24 hours. If you have kidney issues or take medications affected by potassium or fluid intake, check with your doctor before loading up on high-potassium add-ins like large amounts of citrus or coconut water.

    Tracking That Sticks: Low-Effort Systems for Busy Days

    The simplest tracking method is the one you’ll actually keep using. If an app feels like homework, skip it. A rubber band moved up your bottle each time you refill gives a visual tally with zero friction. Hair ties on your wrist work the same way — shift one to the other wrist per bottle finished. For a paper option, draw eight small circles on a sticky note by your monitor and cross one off per glass; the satisfaction of completing the row is surprisingly motivating.

    Digital natives may prefer a widget that shows intake on the lock screen so you see progress without opening anything. Set it to log a standard amount — say 500 ml — with one tap. If you use a smart bottle that glows, treat the light as a gentle nudge rather than a demand; dismiss it if you’re in flow and catch up at the next natural break.

    When tracking slips, don’t scrap the system. Reset at the next meal or transition point — after lunch, when you sit at your desk, before your evening walk. A missed morning doesn’t cancel the afternoon. Many people find a weekly glance at the pattern more useful than daily perfection; it shows whether you consistently hit your target by dinner or need to front-load earlier.

    If you have a medical condition that affects fluid needs — kidney issues, heart failure, certain medications — check with your doctor before chasing a specific number. For everyone else, pick the lowest-effort tracker you’ll touch today and let the streak build quietly.

    Putting It Together

    Start Monday by picking one reusable bottle you actually like and placing it where you brush your teeth. Fill it before bed so it’s waiting on the counter. Drink half before coffee, the other half while you check messages. That’s your anchor habit — no tracking app required yet.

    Tuesday through Thursday, add one cue per day. Move a second bottle to your desk or bag strap. Set a quiet phone alarm labeled "sip" for mid-morning and mid-afternoon. If you miss one, don’t double up — just hit the next cue. Thursday evening, glance at how many times you refilled. That’s your baseline.

    Friday, introduce a flavor twist: cucumber slices, a sprig of mint, or a splash of unsweetened cranberry. Keep it in a pitcher in the fridge so it’s visible when you open the door. Saturday, pair water with every meal and snack — one glass before, one during. Sunday, review what felt easy and what felt forced. Swap out the friction points for next week.

    • Keep the bottle you reach for without thinking
    • Drop the cue you ignored three days in a row
    • Adjust flavor or temperature until it stops feeling like a chore
    • Check with your doctor if you have kidney, heart, or electrolyte concerns before increasing intake significantly

    More from the blog

    From FitLife Solutions

    Our book Vegetarian Protein Recipes: Complete Meals for Every Day goes further, as a digital eBook (PDF and EPUB) you can read on any device.

    Browse all our practical health and fitness guides at fitlifesolutions.site.

    New practical health guides and articles on WhatsApp: follow our channel.

    About the author

    Ahumuza Mark is the founder of FitLife Solutions in Luwero, Uganda. He publishes practical, plain-language guides on everyday health, fitness and habits, and approves every article before it goes online. He is not a doctor: our articles are general information, so please read our Health Disclaimer and talk to a health professional about your own situation. Questions or corrections? Contact us.

    This article is for general information only and is not a substitute for professional medical advice. Talk to your doctor or another qualified health professional before changing your diet, exercise or health routine, especially if you have a medical condition or take medication.
  • How to Reduce Portion Sizes Without Feeling Hungry

    How to Reduce Portion Sizes Without Feeling Hungry

    Most people who want to eat less find themselves staring at a half-empty plate feeling deprived, or cleaning a large plate purely out of habit. This section is for anyone who has tried cutting back only to battle cravings an hour later, or who suspects their "normal" serving size has quietly doubled over the years. It is also for people who do not want to weigh every gram of food or count calories to feel satisfied.

    After reading this article, you will be able to:

    • Estimate appropriate serving sizes using your hand and common kitchen items instead of a scale
    • Build a plate that triggers fullness signals through protein, fiber, and volume
    • Arrange food visually so a smaller portion looks complete
    • Pre-portion snacks and meals to remove the decision-making that leads to overeating
    • Slow down eating just enough for your body to register fullness
    • Adjust portions up or down based on your actual activity level that day
    • Navigate the first few weeks of smaller servings without white-knuckling hunger

    These are practical tools you can start using at your very next meal. If you have a medical condition that affects nutrition needs, check with your doctor before making significant changes.

    Visual Portion Guides Using Everyday Objects

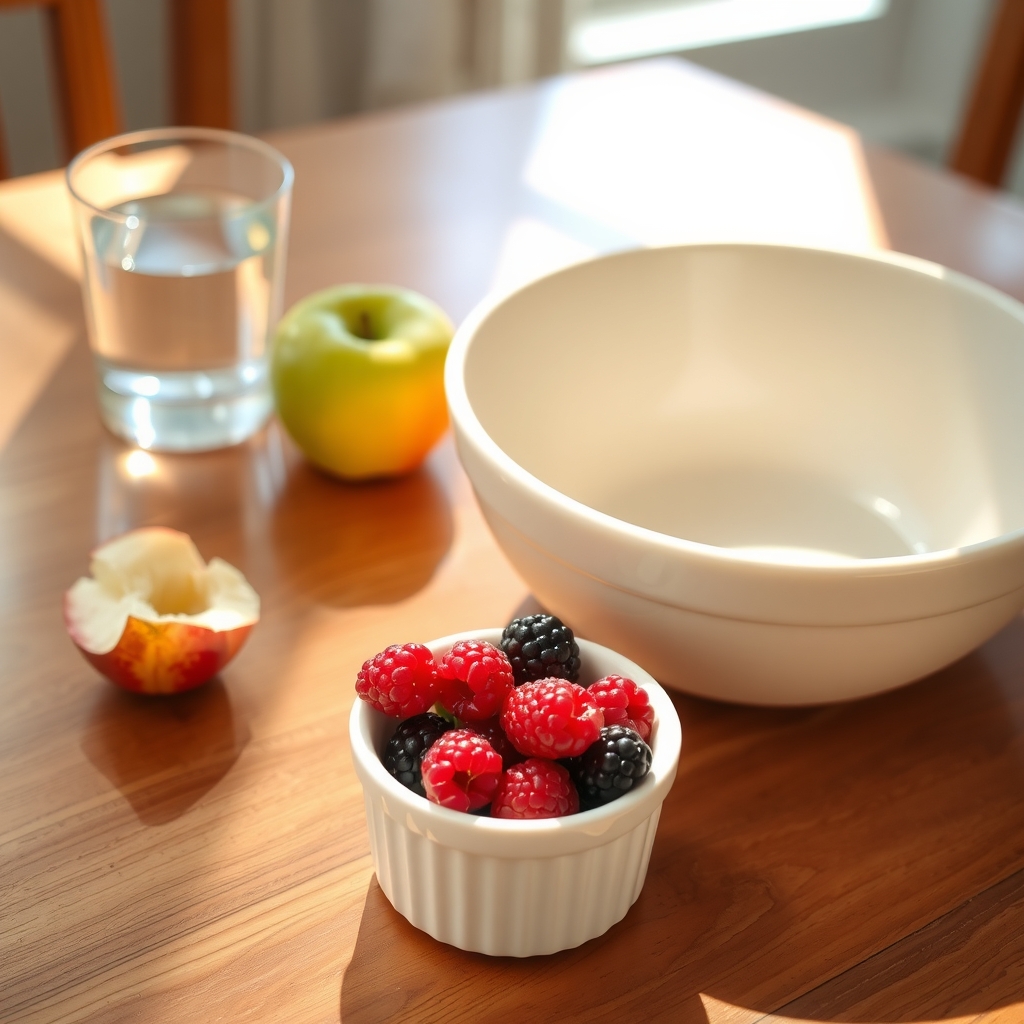
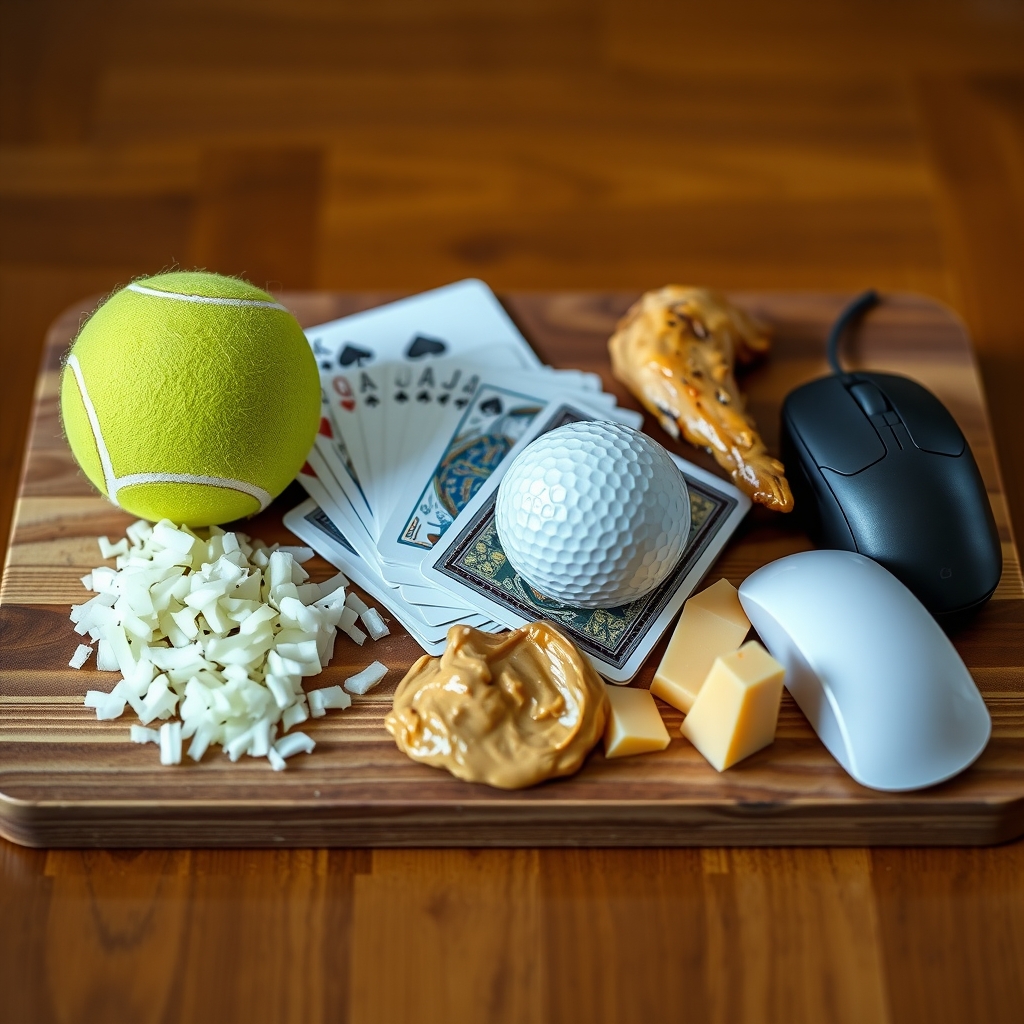
    A deck of cards is about the size of a cooked serving of meat, fish, or tofu — roughly three ounces. A tennis ball matches a half-cup of cooked rice, pasta, or beans. Your thumb from tip to first knuckle equals a tablespoon of peanut butter, oil, or salad dressing; the whole thumb is closer to two tablespoons. A closed fist approximates one cup of raw leafy greens or a medium piece of whole fruit. The palm of your hand, not including fingers, works for a standard protein portion at a main meal. A cupped hand holds about a half-cup of nuts, granola, or dried fruit. The tip of your index finger is roughly a teaspoon of butter, honey, or jam. A computer mouse is similar in volume to a medium baked potato or a standard slice of bread.

    • Meat, fish, tofu: deck of cards (3 oz)
    • Cooked grains, beans: tennis ball (½ cup)
    • Nut butter, oils: thumb tip to first knuckle (1 tbsp)
    • Leafy greens, whole fruit: closed fist (1 cup)
    • Nuts, granola: cupped hand (½ cup)
    • Butter, jam: fingertip (1 tsp)
    • Baked potato, bread slice: computer mouse

    These references are portable and require no scale. Many people find them faster than measuring cups once they practice a few times. Hand sizes vary, so treat them as starting guides and adjust based on hunger, fullness, and energy needs. If you have a medical condition that requires precise intake, check with a doctor or registered dietitian before relying on visual estimates alone.

    The Protein-Fiber-Volume Formula for Satiety

    Building meals around protein, fiber, and volume creates a natural brake on overeating because each component tackles hunger through a different pathway. Protein slows digestion and lowers the hunger hormone ghrelin; fiber adds bulk and feeds gut bacteria that signal fullness; volume — mostly water-rich vegetables and fruit — stretches the stomach without adding many calories. When you combine all three on one plate, you get a meal that feels large and satisfying but stays moderate in energy.

    A simple way to assemble this is to start with a palm-sized portion of protein such as chicken, tofu, beans, or Greek yogurt. Add at least two cupped handfuls of non-starchy vegetables — broccoli, spinach, peppers, zucchini — for volume and fiber. Include a fist-sized portion of a fiber-rich carbohydrate like oats, quinoa, sweet potato, or berries. Finish with a thumb-sized amount of fat from olive oil, nuts, seeds, or avocado to aid nutrient absorption and flavor.

    • Protein first: put it on the plate before anything else so it anchors the portion.
    • Vegetables second: fill half the plate with color and crunch.
    • Smart carbs third: choose intact grains or whole fruit over refined flour.
    • Fat last: drizzle or sprinkle a measured amount.

    If you still feel hungry 20 minutes after eating, add another vegetable serving or a few extra bites of protein before reaching for more starch. Many people find their baseline portions shrink naturally within a week or two as satiety signals recalibrate. If you have a medical condition that affects protein or fiber needs, check with your doctor before making large changes.

    Pre-Portioning Strategies That Prevent Overeating

    One of the most effective ways to avoid accidental overeating is deciding the portion before the food hits the plate. When you serve family-style from large bowls or cook straight from the pot, visual cues disappear and you rely on appetite alone, which often overshoots actual need. Start by portioning proteins, grains, and fats in the kitchen using the visual guides from the previous section — a palm of protein, a cupped hand of carbs, a thumb of fats — then bring only the plated meal to the table. Keep serving dishes off the table entirely; if seconds are genuinely wanted, the walk back to the kitchen creates a natural pause to check hunger.

    For snacks and bulk foods, pre-portion into single-serve containers or zip-top bags immediately after grocery shopping. A large bag of nuts or trail mix becomes ten 1-ounce packs; a block of cheese becomes pre-sliced portions. This removes the need for willpower during a craving. Many people find that measuring once with a food scale or measuring cups, then storing in labeled containers, saves mental energy all week.

    When cooking batch meals, divide the finished dish into equal containers before eating the first bite. If a recipe yields four servings, physically separate it into four containers. This prevents the "just a little more" creep that turns one portion into one and a half.

    If you overshoot — perhaps you plated too much rice or grabbed an extra handful of nuts — don't scrape it back into the serving bowl if it's touched your plate. Instead, set the excess aside for tomorrow's lunch or a snack. This avoids waste while reinforcing the boundary you set. Over time, your eye calibrates and the need for measuring drops, but the habit of deciding first stays useful.

    Plate Geometry and the Delboeuf Illusion Effect

    The size of your plate changes how much food looks like "enough." This is called the Delboeuf illusion: the same portion appears larger on a small plate and smaller on a large one. Many people find they serve themselves significantly more when using a 12-inch dinner plate compared to a 9-inch salad plate, even when they intend to eat the same amount.

    Switch to 9- or 10-inch plates for main meals. If your cabinet only holds oversized dishes, use the inner rim as a visual boundary — keep food inside the decorative border rather than filling to the outer edge. Bowls work the same way; a wide, shallow cereal bowl encourages a larger pour than a deeper, narrower one.

    Color contrast matters too. A white plate on a white tablecloth makes portions harder to judge. Use a placemat or tablecloth that contrasts with your dishes so the plate’s edge is clearly defined. For the food itself, high contrast helps: pasta with red sauce on a white plate is easier to assess than fettuccine Alfredo on the same background.

    • Serve vegetables and salad on the larger plates; use smaller ones for calorie-dense mains and starches
    • Keep serving bowls off the table; plate food in the kitchen using the right-sized dish
    • When dining out, ask for a to-go box at the start and set aside half the meal before eating

    These visual cues work best alongside the protein-fiber-volume approach covered earlier. If you have a history of disordered eating or specific medical nutrition needs, check with a doctor or registered dietitian before restructuring your plate habits.

    If you want this in more depth, our book Breathing Exercises for Calm: Practical Techniques to Reduce Stress and Improve Focus covers it step by step.

    Pacing Techniques That Let Fullness Signals Catch Up

    It takes roughly twenty minutes for your stomach to signal your brain that you have had enough. If you finish a meal in five, you will likely eat past comfortable fullness before the message arrives. Slowing down is the simplest way to let that signal catch up without relying on willpower.

    Start by putting your utensil down between every bite. Pick it up only after you have swallowed. This single habit forces a natural pause and breaks the autopilot rhythm of hand-to-mouth motion. Chew each mouthful until the texture is gone — usually twenty to thirty chews — which also aids digestion and gives your taste buds time to register satisfaction. Sip water between bites rather than gulping at the end; the liquid adds volume and creates another natural speed bump.

    Remove distractions. Eating while scrolling, working, or watching TV disconnects you from internal cues. Many people find they eat twenty percent less when they simply face a blank wall or look out a window. If you live with others, make conversation the pace-setter: talk, listen, then eat a bite.

    Use a timer the first few weeks. Set it for twenty minutes and stretch your meal to match. If you finish early, sit with the empty plate for the remaining time before deciding on seconds. Often the urge passes.

    • Put fork down between bites
    • Chew until texture disappears
    • Sip water regularly
    • Eat screen-free
    • Set a twenty-minute meal timer

    If you consistently feel stuffed twenty minutes after meals, you are still eating too fast. Back off the pace another notch. If you have a medical condition that affects digestion or satiety signals, check with your doctor before making drastic changes to eating speed.

    Adjusting Portions for Activity Level and Body Needs

    Your baseline portion size works well for a sedentary day, but it will leave you under-fueled when you move more. Start by adding a cupped handful of carbohydrate — rice, potato, oats, fruit — to the meal immediately before or after your longest bout of activity. If you strength-train, add an extra palm of protein at the next meal. On rest days, keep the plate as built in the earlier sections: half non-starchy vegetables, one palm of protein, one cupped hand of carbs, one thumb of fat.

    Listen to recovery signals. Waking up ravenous, struggling to hit usual weights, or feeling irritable mid-afternoon often means yesterday’s portions were too small for the work you did. Conversely, if you feel sluggish, bloated, or notice weight creeping up without a change in training, trim the added carbohydrate or fat thumb first; leave protein and vegetables untouched.

    • Sedentary day: baseline plate only.
    • Moderate activity (brisk walk, easy bike, yoga): +1 cupped hand carbs at one meal.
    • Hard training (intervals, heavy lifting, >90 min sport): +1 cupped hand carbs pre- and post-session, +1 palm protein at next meal.
    • Two-a-day sessions: repeat the hard-training additions at both meals surrounding workouts.

    Body size shifts the absolute amounts. A larger hand means a larger portion; a smaller hand means less. That built-in scaling keeps the method personal without counting. If you have a medical condition that affects energy needs — thyroid issues, diabetes, pregnancy, recovery from illness — check with your doctor or a registered dietitian before making large adjustments. Small, weekly tweaks based on hunger, energy, and performance keep portions aligned with real life.

    Managing Hunger Cues During the Adaptation Period

    The first two weeks of smaller portions often bring a spike in hunger that feels urgent but is largely habitual. Your stomach and hunger hormones are recalibrating to a new volume baseline, and the brain may misinterpret the absence of overfullness as emptiness. Many people find it useful to label the sensation: "This is adjustment hunger, not emergency hunger." Pause for sixty seconds, drink a glass of water, and ask whether you feel physical signs like stomach growling or low energy, or simply the urge to keep eating.

    If the hunger is physical, add a low-calorie volume booster rather than returning to the old portion. A cup of broth-based soup, a side of steamed greens, or an extra serving of the protein already on your plate can close the gap without derailing the new pattern. Keep a small stash of ready-to-eat vegetables — baby carrots, snap peas, cherry tomatoes — for moments when the urge to snack feels automatic.

    • Brush your teeth or rinse with mint mouthwash after the meal; the flavor shift signals "eating is done."
    • Set a kitchen timer for twenty minutes after you finish; if hunger persists, eat a planned mini-snack such as a hard-boiled egg or a few almonds.
    • Track sleep and stress; both amplify appetite hormones and make adaptation feel harder.

    If intense hunger, dizziness, or irritability lasts beyond a few days, check with a doctor to rule out medical causes or medication effects. Most people notice the urgency fades as the body learns that the new portion reliably delivers enough fuel.

    Putting It Together

    Start by picking three meals this week where you will use the smaller plate and the protein-fiber-volume formula. Keep the other meals exactly as they are so the change feels manageable rather than restrictive. Before each of those three meals, portion the protein and carbs in the kitchen using your hand or a measuring cup, then fill at least half the plate with vegetables or salad. Put the serving bowls away before you sit down.

    Eat those meals without screens. Put your fork down between bites and check in halfway through to see if you are still physically hungry. If you finish the plate and still want more, wait ten minutes and drink a glass of water. Often the urge passes. If it does not, add a second helping of vegetables or a piece of fruit rather than more starch or fat.

    Track nothing more complicated than a checkmark on a calendar for each meal you followed the plan. At the end of the week, notice which days felt easiest and which felt like a struggle. Use that observation to choose three more meals for the following week. If hunger feels sharp, persistent, or comes with dizziness or irritability, check in with a healthcare provider to rule out other causes.

    More from the blog

    From FitLife Solutions

    Our book Breathing Exercises for Calm: Practical Techniques to Reduce Stress and Improve Focus goes further, as a digital eBook (PDF and EPUB) you can read on any device.

    Browse all our practical health and fitness guides at fitlifesolutions.site.

    New practical health guides and articles on WhatsApp: follow our channel.

    About the author

    Ahumuza Mark is the founder of FitLife Solutions in Luwero, Uganda. He publishes practical, plain-language guides on everyday health, fitness and habits, and approves every article before it goes online. He is not a doctor: our articles are general information, so please read our Health Disclaimer and talk to a health professional about your own situation. Questions or corrections? Contact us.

    This article is for general information only and is not a substitute for professional medical advice. Talk to your doctor or another qualified health professional before changing your diet, exercise or health routine, especially if you have a medical condition or take medication.
  • Starting the Gym Alone: A Beginner’s Guide to Your First Workouts

    Starting the Gym Alone: A Beginner’s Guide to Your First Workouts

    Walking into a gym for the first time without a trainer can feel like arriving in a foreign city without a map. This guide is for anyone who wants to start resistance training on their own terms — whether you are completely new to exercise, returning after a long break, or simply tired of waiting for a workout partner to show up. It assumes you have access to a typical commercial facility with machines, free weights, and cardio equipment, and that you can dedicate two to three sessions per week.

    By the end of this article you will be able to:

    • Tour any gym and identify the equipment zones that matter for a beginner
    • Perform a complete first workout using a simple machine circuit with proper warm-up and cool-down
    • Execute the five foundational movement patterns — squat, hinge, push, pull, and carry — with safe technique cues
    • Build a repeatable weekly routine, track your progress, and know when to increase the challenge
    • Apply standard gym etiquette and safety habits so you feel comfortable and respectful
    • Use practical mindset tools to reduce anxiety and stay consistent when motivation dips

    If you have any medical conditions or injuries, check with a healthcare professional before beginning a new exercise program.

    Pre-Gym Preparation: Research, Gear, and Mental Rehearsal

    Before you step through the doors, spend ten minutes on the gym’s website or app. Locate the floor plan and identify where the cardio machines, selectorized weight stack machines, free-weight area, and stretching mats live. Check the class schedule so you know when studios are locked or the floor gets crowded. Read the guest policy and cancellation terms if you haven’t signed up yet. Many people find it helpful to watch a walkthrough video on YouTube for that specific location; seeing the entrance, locker rooms, and water fountains ahead of time turns an unknown building into a familiar map.

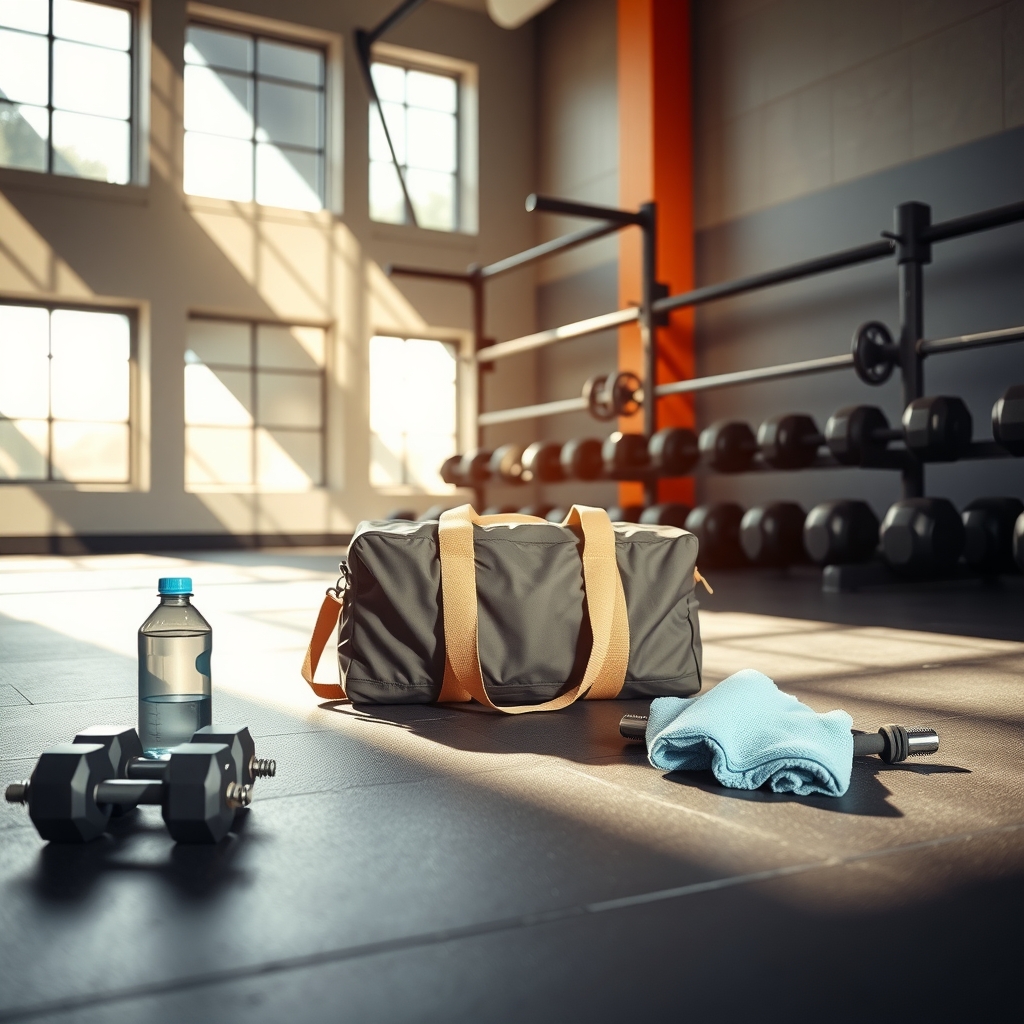
    Pack a small bag the night before. Include a lock for the lockers, a water bottle, a sweat towel, and headphones if you prefer your own audio. Wear clothes you have already moved in — shorts or leggings that don’t ride up, a shirt that handles sweat, and clean indoor trainers with a flat, stable sole. Leave jewelry, heavy cologne, and your phone on "do not disturb" in the locker. If you have a prior injury or medical condition, check with a doctor before your first session and note any movement restrictions on a card in your bag.

    The evening before, run a five-minute mental rehearsal. Close your eyes and picture the sequence: scanning your key tag, locking your bag, walking to the warm-up zone, performing five minutes of easy movement, then moving to the first machine on your plan. Visualize adjusting the seat, selecting a light weight, and completing a set with control. Imagine a moment of hesitation — someone using the machine you wanted — and see yourself calmly choosing the next exercise on your list. This walkthrough reduces the cognitive load on day one so you can focus on form instead of logistics.

    Decoding the Facility: Layout Tour, Equipment Zones, and Peak Hours

    Walking into a large gym for the first time can feel like entering a warehouse without a map. Before you touch a weight, spend your first five to ten minutes simply walking the perimeter. Most facilities follow a loose logic: cardio machines line the windows or front wall, selectorized resistance machines cluster in the middle by body part, and free weights — dumbbells, barbells, racks, and benches — occupy the back or a dedicated side room. Functional gear like sleds, battle ropes, and plyo boxes often sits in an open turf area. Identify where the water fountains, restrooms, and sanitizing stations are located so you never have to hunt for them mid-workout.

    If the gym offers a staff-led orientation, take it. If not, ask the front desk for a quiet time to peek at the layout without pressure. Many people find weekday mid-mornings (10 a.m.–12 p.m.) or early afternoons (1 p.m.–3 p.m.) are emptiest; evenings after 5 p.m. and Saturday mornings are typically peak. Visit once during your planned workout window to gauge real crowd levels. A crowded floor changes which exercises are practical — supersetting two machines may be impossible, while a single dumbbell bench press station might be open.

    Note equipment quirks: some cable columns have 1:2 ratios that halve the listed weight, certain Smith machines run on angled tracks, and plate-loaded machines may require you to load heavy plates from the floor. Spot the collars, clips, and variety of barbell types (standard 20 kg, women’s 15 kg, fixed curl bars). Knowing these details beforehand turns a confusing space into a toolkit you can navigate calmly.

    The First Session Blueprint: Warm-Up, Machine Circuit, and Cool-Down

    Start your first workout with a five-to-seven-minute warm-up to raise core temperature and lubricate joints. Walk briskly on the treadmill or pedal an upright bike at a conversational pace, then add dynamic movements: ten bodyweight squats, ten alternating reverse lunges, ten arm circles each direction, and ten shoulder rolls forward and back. Move smoothly; this is preparation, not fatigue.

    For the main circuit, select five machines that cover the major patterns: a leg press for the squat pattern, a seated row for the horizontal pull, a chest press for the horizontal push, a lat pulldown for the vertical pull, and a seated shoulder press for the vertical push. Machines lock the path of motion, which reduces the coordination demand while you learn the feel of each movement. Set the pins so you can complete twelve to fifteen controlled repetitions with the last two feeling challenging but not grinding. Perform each exercise for one set, rest sixty to ninety seconds, then move to the next machine. After the shoulder press, rest two minutes and repeat the circuit a second time if you feel capable; one round is perfectly acceptable for a debut session.

    Cool down with two to three minutes of easy walking or slow cycling, then hold static stretches for the chest, lats, quads, hamstrings, and hip flexors for twenty to thirty seconds each. Breathe deeply and note any joints that feel cranky. Write down the machine settings, seat positions, and weights used so you can replicate or adjust next time. If any sharp pain appears, stop that movement and consider checking with a doctor before the next visit.

    Foundational Movement Patterns: Squat, Hinge, Push, Pull, and Carry

    Most effective gym routines are built on five movement patterns that cover the way your body works in daily life. Learning one solid variation of each gives you a complete, balanced workout without needing dozens of different exercises.

    Squat pattern: trains the legs and glutes through knee and hip flexion. Start with a goblet squat holding a dumbbell or kettlebell at chest height. Feet shoulder-width, sit back and down until thighs are roughly parallel to the floor, chest up, knees tracking over toes. If depth is limited, squat to a box or bench to build confidence.

    Hinge pattern: targets the posterior chain — hamstrings, glutes, lower back. The Romanian deadlift with dumbbells is a beginner-friendly hinge. Stand tall, slight knee bend, push hips back while lowering weights along thighs until you feel a stretch in the hamstrings, then drive hips forward to stand. Keep the spine neutral throughout.

    Push pattern: works chest, shoulders, and triceps. A machine chest press or seated dumbbell press lets you focus on control. Press straight out or overhead, lower with a two-second tempo, stop before elbows lock out.

    Pull pattern: balances pushing by strengthening the upper back and biceps. A seated cable row or chest-supported machine row removes low-back demand. Pull handles toward lower ribs, squeeze shoulder blades together, return slowly.

    Carry pattern: builds grip, core stability, and work capacity. Pick up a moderately heavy dumbbell or kettlebell in each hand, stand tall, walk 30–40 meters with controlled steps and steady breathing. Farmer’s carries translate directly to carrying groceries or luggage.

    • Practice each pattern twice a week on non-consecutive days.
    • Use a weight that leaves 2–3 reps in reserve on the last set.
    • Film a set occasionally to check form.
    • If any movement causes sharp pain, stop and consult a qualified professional.

    If you want this in more depth, our book Chair Workouts: Simple Seated Exercises for Strength and Mobility covers it step by step.

    Building a Sustainable Solo Routine: Frequency, Progression, and Logging

    Start with a schedule you can actually keep. Two to three full-body sessions per week on non-consecutive days — such as Monday, Wednesday, Friday — gives your muscles time to recover while building the habit. If life gets busy, one solid workout is better than zero; just pick up where you left off next time. Keep each session around 45 to 60 minutes including warm-up and cool-down so it fits into a real day.

    Progress comes from small, repeatable increases. For machine and dumbbell exercises, add the smallest weight increment available — often 2.5 or 5 pounds — when you can complete all your target reps with good form on your last set for two sessions in a row. If weight jumps feel too large, add one rep per set instead, or slow down the lowering phase of each rep. For bodyweight moves like push-ups or planks, extend the hold time or move to a harder variation once the current one feels easy. Only change one variable at a time so you know what worked.

    Tracking turns guesswork into data. Use a notebook, phone note, or simple spreadsheet. Log the date, exercise, weight, sets, reps, and how hard the last set felt on a 1 to 10 scale. Note any aches, sleep quality, or schedule changes that might affect performance. Reviewing a month of entries shows patterns — like consistently feeling stronger on Wednesdays — that help you adjust frequency or intensity. Many people find that writing it down also increases accountability without needing an external coach.

    • Aim for 2 to 3 sessions weekly on non-consecutive days
    • Increase load or reps only when form stays solid
    • Change just one variable per exercise per week
    • Log weight, sets, reps, and perceived effort
    • Review monthly to spot trends and adjust

    Gym Etiquette and Safety Protocols for Independent Training

    Returning weights to their racks is the single most helpful habit you can build. Strip plates off barbells, re-rack dumbbells in ascending order, and return cable attachments to their hooks. If you are unsure where something belongs, place it neatly against the nearest upright rather than leaving it on the floor. Wipe down benches, seats, and handles with the provided spray and towels before you move to the next exercise. Keep your phone in your pocket or bag while occupying equipment; if you must log a set or change a song, step away so someone else can work in.

    Respect personal space. Leave at least an arm’s length between you and anyone lifting, and never walk directly in front of someone mid-set or staring at a mirror for form checks. Ask “How many sets do you have left?” if you want to use a machine someone is on, then wait off to the side. Use collars on every barbell load, even light ones, and set safety pins or arms in the rack at the correct height before you unrack a squat or bench press. If a lift feels unstable, set the weight down immediately rather than grinding through a rep you cannot control.

    • Re-rack all weights and attachments
    • Wipe equipment after use
    • Step away from machines between sets
    • Ask before working in
    • Use collars and safety pins every session
    • Stop a set if form breaks down

    If you feel dizzy, sharp pain, or unusual shortness of breath, stop training, sit down, and alert staff. Many people find it wise to check with a doctor before starting a new program, especially with existing conditions.

    Overcoming Gym Anxiety: Confidence Strategies for the Solo Beginner

    Walking into a weight room alone can trigger a spike of self-consciousness that feels physical — tight chest, scanning eyes, the urge to leave. That reaction is a normal stress response, not a sign you do not belong. Many people find it helpful to name the feeling silently: "This is anxiety," which creates a sliver of distance between you and the panic.

    Start with a concrete anchor. Before you enter, pick one micro-goal for the visit: "I will complete my warm-up and two machine exercises." Write it on your phone lock screen or a scrap of paper. When your mind spirals — "Everyone is watching," "I look weak" — return to that single objective. Action interrupts rumination.

    Use physical props as confidence scaffolding. Headphones playing a familiar playlist signal "do not disturb" and mask ambient noise. A printed workout log or app screen gives your hands and eyes a job so you are not standing still, which feels exposed. Rest intervals become purposeful data entry rather than awkward pauses.

    If the free-weight area feels overwhelming, stay in the machine zone for your first several sessions. Machines lock your path of motion, reducing the fear of "doing it wrong" in public. You can build strength and familiarity there before venturing out.

    • Arrive during off-peak hours (mid-morning or early afternoon) for lower density and more open equipment.
    • Wear clothes you have tested at home — squat, reach overhead, hinge — so fabric surprises do not add distraction.
    • Practice one "reset breath" between sets: inhale four counts, hold two, exhale six. It down-regulates the nervous system visibly.

    If anxiety escalates to dizziness, nausea, or a sense of unreality, step into the lobby or restroom, splash cold water on your wrists, and call a supportive friend or family member. You can always leave and try again tomorrow; the gym will still be there.

    Putting It Together

    You have the pieces. Now arrange them into a repeatable week. Pick three non-consecutive days — Monday, Wednesday, Friday works for many people — and treat each session like an appointment you keep with yourself. Block 45 to 60 minutes on your calendar, including travel and changing time.

    Session structure stays the same every time: five minutes of the warm-up you practiced, the machine circuit you logged last week (leg press, chest press, seated row, lat pulldown, shoulder press, plank), then the cool-down stretches. Keep the weight light enough that the last two reps feel challenging but controlled. Write down the seat settings and load for every exercise before you leave the gym.

    On the off days, go for a 20-minute walk or do mobility work at home. Sleep seven to nine hours. Eat a meal with protein and carbohydrates within a couple hours of training. If a machine is taken, swap to the nearest alternative — goblet squat for leg press, dumbbell bench for chest press — and note the substitution.

    Review your log Sunday evening. Adjust one thing for next week: add a set, increase load by the smallest plate, or fix a form cue. Progress comes from showing up, not perfection.

    More from the blog

    From FitLife Solutions

    Our book Chair Workouts: Simple Seated Exercises for Strength and Mobility goes further, as a digital eBook (PDF and EPUB) you can read on any device.

    Browse all our practical health and fitness guides at fitlifesolutions.site.

    New practical health guides and articles on WhatsApp: follow our channel.

    About the author

    Ahumuza Mark is the founder of FitLife Solutions in Luwero, Uganda. He publishes practical, plain-language guides on everyday health, fitness and habits, and approves every article before it goes online. He is not a doctor: our articles are general information, so please read our Health Disclaimer and talk to a health professional about your own situation. Questions or corrections? Contact us.

    This article is for general information only and is not a substitute for professional medical advice. Talk to your doctor or another qualified health professional before changing your diet, exercise or health routine, especially if you have a medical condition or take medication.

  • Healthy Breakfast Ideas Without Eggs

    Healthy Breakfast Ideas Without Eggs

    Whether you avoid eggs because of an allergy, a dietary preference, or simply because you ran out, mornings can feel limited when the standard scramble is off the table. This guide is for anyone who wants a satisfying, protein-focused start to the day using ingredients already sitting in the pantry, fridge, or freezer — no specialty powders or complicated techniques required.

    You will find meals that come together in minutes without turning on the stove, smoothies built to hit 20 grams of protein using whole foods, savory plates that swap grains for vegetables and legumes, and low-carb, high-fat options that keep energy steady. There are naturally sweetened porridges and chia puddings with zero added sugar, batch-prep jars for busy weeks, and global-inspired dishes that bring variety beyond the usual rotation.

    • Build balanced breakfasts without eggs, dairy, grains, or added sugar
    • Hit protein targets using beans, tofu, seeds, yogurt, or fish
    • Prep components once and eat all week
    • Adapt every recipe to what is seasonal, on sale, or already open

    If you have specific medical nutrition needs, check with a doctor or registered dietitian before making major changes.

    5 No-Cook Breakfast Bowls Ready in Under 5 Minutes

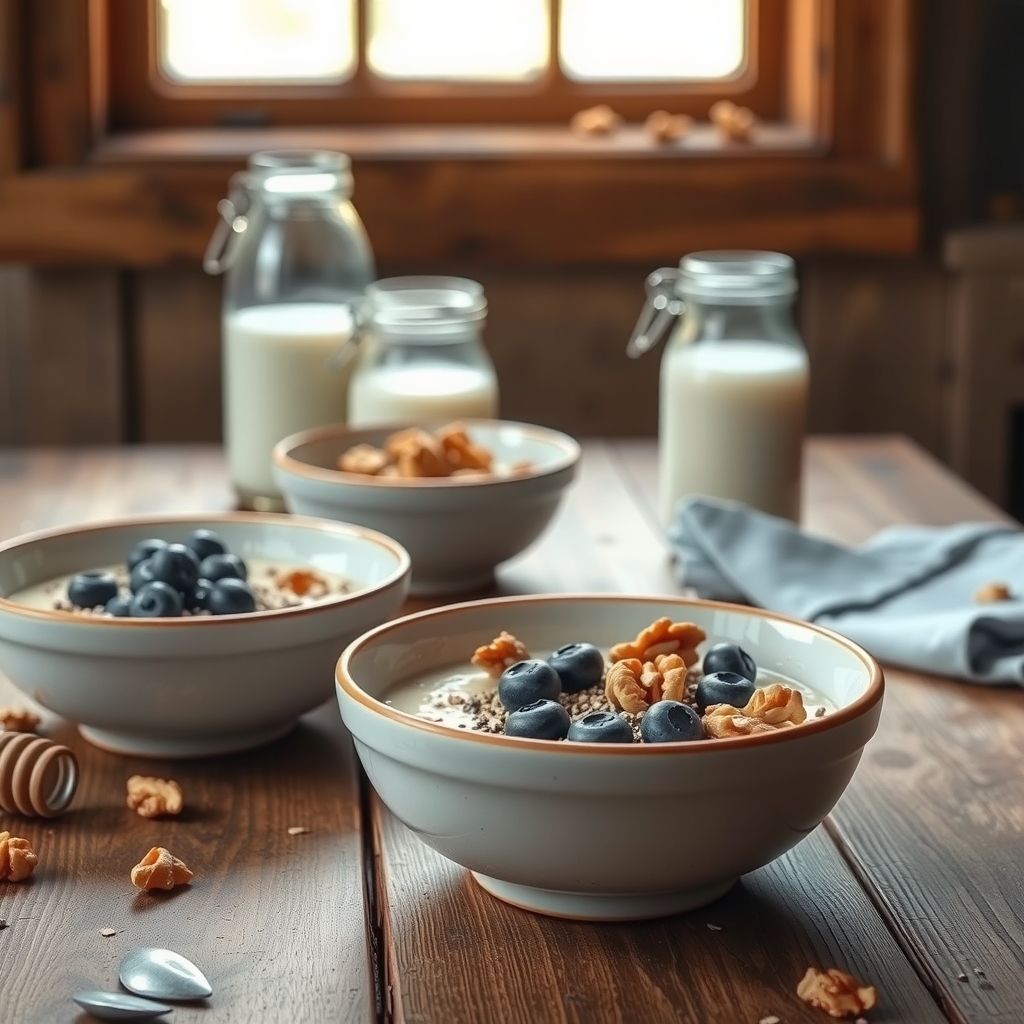
    Greek yogurt or unsweetened soy yogurt forms the quickest base — scoop three quarters of a cup into a bowl and you already have 15 to 20 grams of protein before adding anything else. Stir in a tablespoon of hemp hearts or chia seeds for extra staying power, then top with a handful of berries, a few pumpkin seeds, and a drizzle of nut butter. If the yogurt tastes too tart, mash half a ripe banana into it first; the natural sweetness balances the flavor without added sugar.

    Cottage cheese works the same way and often packs even more protein per cup. Spoon it into a bowl, season with black pepper and a pinch of flaky salt, then layer cucumber ribbons, cherry tomato halves, and a spoonful of canned white beans rinsed and drained. A splash of olive oil and lemon juice ties it together. For a sweeter version, swap the vegetables for diced peach, toasted almond slivers, and a sprinkle of cinnamon.

    Overnight oats technically need a few hours, but a "five-minute cheat" works when you use quick oats: combine half a cup oats, half a cup milk or soy milk, a tablespoon chia, and a dash of vanilla in a jar. Let it sit while you make coffee — the oats soften enough to eat. Stir in peanut butter and frozen wild blueberries that thaw into a jammy swirl.

    Leftover quinoa or farro from dinner becomes a savory bowl in seconds. Toss cold grains with canned lentils, arugula, avocado cubes, and a tahini-lemon dressing thinned with water. The grain absorbs the dressing as you eat.

    • Greek yogurt + hemp hearts + berries + nut butter
    • Cottage cheese + white beans + cucumber + tomato + olive oil
    • Quick oats + chia + soy milk + peanut butter + frozen berries
    • Cold quinoa + lentils + arugula + avocado + tahini dressing
    • Silken tofu cubes + edamame + shredded carrot + sesame-ginger drizzle

    If a bowl feels too wet, add more seeds or nuts to absorb moisture. If it needs salt, a pinch of miso paste blended into the dressing adds depth without a shaker. Many people find these combinations keep them full until lunch, but check with a doctor if you have specific protein or potassium restrictions.

    Dairy-Free & Egg-Free Smoothie Formulas With 20g+ Protein

    Building a smoothie that delivers 20 grams of protein without dairy or eggs starts with a simple ratio: one cup liquid, one cup frozen fruit or vegetable, two tablespoons fat source, and a protein anchor. Unsweetened soy milk or pea-protein milk gives 7 to 8 grams per cup and blends neutrally. If you prefer nut or oat milk, add a scoop of unflavored pea or pumpkin seed protein powder, which contributes 15 to 20 grams per serving and dissolves without grittiness when blended for a full minute.

    For the fat slot, two tablespoons of hemp hearts add 6 grams of protein plus omega-3s, while the same amount of almond butter adds 4 grams and creaminess. Chia seeds work too; soak them in the liquid for five minutes first so they gel and don’t clump. Frozen cauliflower rice or zucchini bulks the texture without flavor and keeps sugar low. A handful of spinach disappears visually but boosts minerals.

    Blend liquid and greens first, then add frozen fruit, protein powder, fat source, and a pinch of salt. If the motor strains, pause and stir with a spatula rather than adding more liquid — this keeps the texture thick enough to eat with a spoon. Many people find a wide-mouth jar and immersion blender easier to clean than a full pitcher.

    • Soy milk + frozen berries + hemp hearts + pea protein
    • Pea milk + mango + pumpkin seed butter + chia (pre-soaked)
    • Oat milk + cauliflower rice + almond butter + unflavored pumpkin seed protein

    If separation happens overnight, shake hard or re-blend for ten seconds. Check with a doctor if you have kidney concerns before using high daily protein powders.

    Grain-Free Savory Breakfast Plates Using Vegetables & Legumes

    Build a satisfying savory plate by starting with a warm vegetable base. Sauté diced onion, bell pepper, and zucchini in a tablespoon of olive oil until softened, then stir in a cup of canned black beans or chickpeas (rinsed well) and a handful of baby spinach until wilted. Season generously with cumin, smoked paprika, garlic powder, and a pinch of salt. This combination delivers fiber and plant protein without any grains. If the beans taste flat, finish with a squeeze of fresh lemon juice or a splash of apple cider vinegar to brighten the flavors.

    For a creamier element, mash half an avocado directly on the plate and stir it into the warm vegetables, or dollop a few spoonfuls of unsweetened coconut yogurt on the side. A sprinkle of nutritional yeast adds a cheesy, umami depth and a boost of B vitamins. If you tolerate dairy, a spoonful of cottage cheese or a crumble of feta works equally well. Many people find that adding a fermented element like sauerkraut or kimchi helps digestion and adds a tangy contrast to the earthy beans.

    • Use a cast-iron skillet for even heat and easy cleanup.
    • Pre-chop vegetables on Sunday; store in airtight containers for three-day speed.
    • If beans cause bloating, rinse them until the foam disappears and add a strip of kombu seaweed while reheating (remove before eating).
    • Swap spinach for kale or arugula; add them at the very end so they keep texture.
    • Top with pumpkin seeds or hemp hearts for crunch and extra minerals.

    When mornings are tight, reheat a batch of the bean-vegetable mix in the microwave for ninety seconds while you toast a slice of grain-free bread or slice cucumber ribbons for a fresh side. Check with a doctor if you have specific legume sensitivities or potassium restrictions.

    Low-Carb High-Fat Breakfasts Without Eggs or Bread

    Building a satisfying low-carb, high-fat breakfast without eggs or bread comes down to layering fats that keep you full and flavors that wake up the palate. Start with a base of creamy avocado — half a fruit sliced or smashed with salt, lemon, and a drizzle of olive oil. Add a generous spoonful of full-fat Greek yogurt, cottage cheese, or a thick coconut yogurt for tang and protein. Top with crushed macadamias, walnuts, or pili nuts for crunch and monounsaturated fats. A handful of olives, a few slices of smoked salmon, or a sprinkle of hemp hearts rounds out the plate with salt and texture.

    If you prefer something warm, sauté a cup of spinach or kale in ghee or coconut oil until wilted, then stir in a tablespoon of cream cheese or tahini until it forms a rich sauce. Slide onto a plate and crown with pumpkin seeds and a dash of smoked paprika. Another quick route: blend a "keto latte" with unsweetened almond milk, a teaspoon of MCT oil or coconut butter, a pinch of cinnamon, and a scoop of unflavored collagen or pea protein; sip alongside a small cheese board of aged cheddar, blue cheese, and cucumber spears.

    • Keep pre-portioned nut bags and single-serve olive packs in the pantry for zero-prep mornings.
    • If dairy disagrees with you, swap yogurt for silken tofu blended with lemon and herbs, or use extra avocado and nut butter.
    • When the meal feels too light, add a tablespoon of chia seeds soaked in water for five minutes; they expand and add fiber without spiking carbs.
    • If you’re new to high-fat eating, increase portions gradually — some people find a sudden jump causes digestive discomfort.

    Naturally Sweetened Porridges & Chia Puddings Zero Added Sugar

    Overnight oats and chia puddings are the easiest way to get a sweet, filling breakfast without any added sugar. The trick is layering naturally sweet ingredients so the flavor builds while the grains or seeds soften. Start with a base of rolled oats or chia seeds, cover with unsweetened plant milk or dairy milk, and stir in a mashed ripe banana or a few chopped dates. Let the mixture sit in the fridge for at least four hours, or overnight. The starches break down and the fruit sugars disperse, creating a creamy texture that tastes like dessert but keeps blood sugar steadier than a syrupy packet.

    For a warm porridge, simmer steel-cut oats, millet, or quinoa flakes in water or milk. Grate an apple or pear directly into the pot during the last five minutes; the fruit melts into the grains and releases enough sweetness that most people skip the honey entirely. A pinch of cinnamon, nutmeg, or cardamom amplifies the perception of sweetness without adding calories. If the porridge gets too thick, splash in extra liquid. If it turns out runny, stir in a tablespoon of ground flax or chia and let it sit off heat for two minutes.

    Chia pudding ratios matter: three tablespoons of seeds to one cup of liquid yields a spoonable set. Whisk vigorously at the start and again after ten minutes to prevent clumps. Flavor variations:

    • Mashed raspberries + cocoa nibs + vanilla extract
    • Stewed rhubarb with ginger + toasted almonds
    • Pumpkin puree + maple-spice blend (cinnamon, clove, allspice) + pecans

    Top with fresh berries, a dollop of yogurt, or a spoonful of nut butter right before eating. Jars keep five days in the fridge, making them ideal for batch prep.

    Batch-Prep Breakfast Jars for Grab-and-Go Mornings

    Batch-prep jars turn chaotic mornings into something you can manage while still half asleep. The key is building layers that hold texture overnight: dense, moist ingredients at the bottom, drier toppings at the top. Start with a wide-mouth pint jar. Spoon in two tablespoons of chia seeds, then pour three-quarters cup of unsweetened soy milk or pea-protein milk and stir well; this base sets into a thick pudding that delivers around ten grams of protein before you add anything else. Next, add a half cup of cooked quinoa or steel-cut oats cooled to room temperature — hot grains create condensation that makes everything soggy. Layer a third cup of cottage cheese or plain soy yogurt for another ten to twelve grams of protein, then a handful of frozen berries; they thaw slowly and keep the jar cool. Seal and refrigerate up to four days.

    • Chia + high-protein milk + quinoa + soy yogurt + berries
    • Hemp hearts + oat milk + buckwheat groats + silken tofu blended smooth + diced mango
    • Ground flax + almond milk + millet + kefir + sliced peach

    If the pudding feels too stiff, stir in a splash more milk before eating. If fruit leaks color into the yogurt, that’s harmless — just less pretty. For nut-free schools, swap almond milk for oat or soy and skip the nut butter drizzle. Jars travel upright in a lunch bag with an ice pack; many people find they stay safe and palatable for a four-hour commute. If you have specific blood-sugar or allergy concerns, check with a doctor or dietitian before relying on any single formula daily.

    Global-Inspired Egg-Free Breakfasts From Shakshuka Alternatives to Congee

    Global flavors solve the "what else is there?" problem fast. A North African shakshuka base — tomatoes, peppers, onion, cumin, smoked paprika simmered until thick — works beautifully without eggs. Stir in a can of white beans or chickpeas for protein, finish with a spoonful of tahini and chopped parsley, and scoop with roasted sweet potato wedges or seed crackers. The sauce keeps four days refrigerated and freezes for a month.

    For a Japanese-style savory bowl, warm leftover rice or quinoa with a splash of tamari, then top with quick-pickled cucumber (rice vinegar, pinch of salt, five minutes), steamed edamame, nori strips, sesame seeds, and a drizzle of tahini-thinned miso. Add fermented vegetables if you have them; they support digestion for many people.

    Mexican chilaquiles skip the fried tortillas by using baked corn tortilla triangles tossed in simmered salsa verde until just softened. Mix in black beans, diced avocado, radish, and a dollop of coconut yogurt or cashew crema. The crunch-soft contrast feels indulgent without heaviness.

    Indian besan chilla (chickpea flour crepes) come together in one bowl: whisk besan, water, turmeric, cumin, minced ginger, and chopped spinach into a pourable batter. Cook in a hot nonstick pan until set, flip once. Fill with spiced cauliflower-pea mash or herbed tofu scramble. Batter rests well overnight — stir before using.

    Chinese congee scales easily. Simmer one part rice to eight parts water or broth with ginger slices until creamy, thirty to forty minutes. Stir in shredded mushrooms, bok choy, and white pepper. Top with scallions, toasted sesame oil, and crispy shallots. Leftovers thicken; thin with hot liquid when reheating.

    Troubleshooting: if shakshuka sauce tastes flat, add lemon zest or a pinch of sumac at the end. Congee too thin? Mash a few grains against the pot. Chilla tearing? Batter likely too thin — whisk in a tablespoon more besan. Check with a doctor if you manage sodium or potassium closely.

    Putting It Together

    Start by picking two recipes from this article that fit your schedule and taste. Shop for those ingredients this weekend — canned beans, frozen berries, chia seeds, nuts, plant milk, and seasonal vegetables keep well and cover most bases. Spend twenty minutes on Sunday prepping one batch item: a jar of chia pudding, a container of roasted chickpeas, or a blended smoothie base frozen in portions. That single step removes the morning decision.

    Monday through Wednesday, rotate your two chosen breakfasts. Keep it simple — no need to vary daily. Notice how you feel by mid-morning: energy, hunger, digestion. Adjust portion sizes or swap a topping if something feels off. Thursday and Friday, introduce a third recipe using leftovers or pantry staples you already opened. Weekend mornings allow more time; try a warm grain-free plate or a global-inspired bowl.

    • Choose two recipes, shop once, prep one batch item Sunday
    • Rotate those two Monday–Wednesday, observe how you feel
    • Add a third option Thursday–Friday using open ingredients
    • Use weekends for variety or leftovers
    • Keep a small notebook or phone note for what worked

    If a recipe flops — too bland, too runny, not filling — tweak one thing next time: more salt, less liquid, extra nuts. Many people find consistency easier than perfection. Check with a doctor if you have specific dietary needs or health conditions before making major changes.

    More from the blog

    From FitLife Solutions

    Browse all our practical health and fitness guides at fitlifesolutions.site.

    New practical health guides and articles on WhatsApp: follow our channel.

    About the author

    Ahumuza Mark is the founder of FitLife Solutions in Luwero, Uganda. He publishes practical, plain-language guides on everyday health, fitness and habits, and approves every article before it goes online. He is not a doctor: our articles are general information, so please read our Health Disclaimer and talk to a health professional about your own situation. Questions or corrections? Contact us.

    This article is for general information only and is not a substitute for professional medical advice. Talk to your doctor or another qualified health professional before changing your diet, exercise or health routine, especially if you have a medical condition or take medication.
  • How to Build a Weekly Grocery List That Matches Your Meal Plan

    How to Build a Weekly Grocery List That Matches Your Meal Plan

    If you have ever stared at a fridge full of ingredients but nothing to eat, or tossed wilted produce you swore you would cook, this guide is for you. It is written for home cooks who want to spend less time wandering grocery aisles and less money on food that ends up in the trash. Whether you are feeding a family, cooking for one, or trying to stick to a specific way of eating, a structured list can make the week feel more manageable.

    By the end of this article, you will be able to:

    • Translate a weekly menu into a precise, organized shopping list
    • Shop once for the whole week without forgetting key items
    • Reduce impulse purchases by knowing exactly what you need
    • Cut down on food waste by buying quantities that match your recipes
    • Adapt your list when schedules shift or plans change

    The method works with any diet or budget because it starts with what you already have and builds from there.

    Audit Your Pantry and Fridge Before Planning

    Before you write down a single ingredient for the week ahead, spend ten minutes facing the reality of your kitchen. Open the refrigerator, pull out the crisper drawers, and scan the shelves. Check the freezer for forgotten proteins or frozen vegetables. Then move to the pantry: look at cans, jars, grains, spices, and oils. You are not organizing yet; you are taking inventory.

    Many people find that a quick visual sweep misses items pushed to the back. Pull things forward. Toss anything spoiled or past its prime. As you go, note what you have in usable amounts. A half-bag of spinach, three eggs, a nearly full jar of marinara, a can of chickpeas — these become your starting assets. Write them down on a notepad or your phone under a simple heading like "Already Have."

    • Proteins: chicken thighs (2), eggs (3), canned tuna (1)
    • Produce: spinach (half bag), carrots (4), onions (2), garlic
    • Pantry: rice (plenty), pasta (1 box), marinara (1 jar), chickpeas (1 can), olive oil, soy sauce
    • Dairy: cheddar (block), milk (half gallon), yogurt (2 singles)

    This step prevents buying duplicates and forces creativity. That half-bag of spinach might steer you toward a frittata or a quick sauté instead of a salad kit. The can of chickpeas could become a curry or a mash for sandwiches. When you plan meals around what you already own, you spend less, waste less, and shop with a shorter, sharper list.

    Map Meals to Specific Days Using a Weekly Calendar

    Once your pantry audit is complete, open a weekly calendar — paper, a phone app, or a simple spreadsheet — and assign each planned meal to a specific day. Start with dinners, since they usually require the most prep and ingredients, then fill in lunches, breakfasts, and snacks around them. Seeing the whole week at a glance helps you spot heavy cooking nights and balance them with simpler meals or leftovers.

    Consider your schedule when placing meals. A slow-cooker stew fits a late-meeting Tuesday, while a quick stir-fry works on a night you have more energy. If you know Thursday includes a work lunch out, plan a lighter dinner that day. Matching meals to real life reduces the temptation to order takeout because you’re too tired to cook what’s on the list.

    Write the recipe name or a brief description on each day. For example:

    • Monday: Sheet-pan chicken thighs, roasted broccoli, quinoa
    • Tuesday: Black bean chili (double batch), cornbread
    • Wednesday: Leftover chili stuffed sweet potatoes, side salad
    • Thursday: Shrimp tacos, cabbage slaw, corn tortillas
    • Friday: Homemade pizza, mixed greens
    • Saturday: Breakfast-for-dinner: veggie frittata, toast, fruit
    • Sunday: Roast salmon, rice pilaf, steamed green beans

    Leave one or two slots open for flexibility — a night for leftovers, a spontaneous invite, or simply a break from cooking. This buffer keeps the plan realistic and prevents food from languishing in the fridge.

    As you map, note any prep that can happen ahead: chop vegetables Sunday, marinate proteins the morning of, cook grains in batches. These small notes turn the calendar into a mini action plan, making the week feel manageable before you even write the shopping list.

    Group Recipes by Shared Ingredients to Reduce Waste

    When you lay out your weekly meals side by side, patterns start to appear. You might notice that three different recipes call for onions, two need fresh cilantro, and four rely on canned beans. Instead of treating each dish as an isolated shopping trip, group those recipes by the ingredients they share. This simple step helps you buy one larger bunch of cilantro or a single bag of onions that covers every meal, rather than purchasing small amounts repeatedly and watching the extras wilt in the crisper drawer.

    Start by writing each ingredient from every recipe on a master list, then tally how many times each one appears. You’ll quickly see which items deserve a bulk purchase and which are one-offs. For example, if tacos on Tuesday and chili on Friday both use ground beef, you can buy a single package, portion it out, and freeze half until needed. The same logic works for produce: a bag of carrots can supply snacks, a stir-fry, and a soup base without any going soft.

    • Scan every recipe for overlapping vegetables, proteins, grains, herbs, and pantry staples.
    • Combine quantities so you purchase the exact total amount needed across all meals.
    • Note any ingredients that appear in only one dish and ask whether a substitute you already use could work instead.
    • Plan prep steps that serve multiple meals, like dicing all onions at once or cooking a big batch of rice for two different dinners.

    This approach not only trims your grocery bill but also streamlines kitchen time. Many people find they waste less because every item has a clear purpose and a scheduled day to be used. If you have specific dietary restrictions or health conditions, check with a doctor or registered dietitian to ensure ingredient substitutions still meet your needs.

    Calculate Exact Quantities for Each Ingredient Across Meals

    Once you have grouped recipes by shared ingredients, the next step is to total the amounts needed across the entire week so you buy exactly what will be used. Start with a clean sheet or a spreadsheet column for each ingredient. Go through every recipe on your calendar and write down the quantity called for — two cups of diced onion, one pound of chicken thighs, a quarter cup of soy sauce — then add those numbers together. If three meals each need one onion, you need three onions, not a five-pound bag that will sit in the crisper. For items sold in variable sizes like produce or bulk bins, note the weight or volume so you can grab the right amount at the store.

    Pay attention to unit conversions. A recipe might list "one bunch of cilantro" while another says "half a cup chopped." Many people find it helpful to convert everything to a common measure — cups, ounces, or grams — before summing. Keep a small conversion cheat sheet handy: one medium onion yields about one cup diced, one pound of boneless chicken gives roughly three cups cooked, and so on. This prevents overbuying herbs, greens, or proteins that spoil quickly.

    • List each ingredient once with its total weekly quantity
    • Note preferred form (diced, shredded, whole) to speed prep
    • Flag items that come in fixed packages (cans, blocks) so you can plan leftovers or adjust recipes

    After totals are set, cross-check against what you already have from your pantry audit. Subtract on-hand amounts so the final list shows only what you need to purchase. This precision reduces waste, keeps the budget on track, and means you walk the aisles with a clear, actionable list.

    If you want this in more depth, our book Healthy Lunchbox Recipes: Practical Meal Prep for Busy Adults covers it step by step.

    Organize Your List by Store Layout for Efficient Shopping

    Once you have your consolidated ingredient quantities, the next step is to arrange the list so it mirrors how you actually move through the store. Many people find that shopping without a spatial plan leads to backtracking, missed items, and extra time in aisles that encourage impulse purchases. Start by picturing the layout of your primary grocery store. Most follow a predictable flow: produce near the entrance, then bakery, meat and seafood, dairy, center aisles for pantry staples, and finally frozen foods and checkout.

    Rewrite your master list into zones that match this sequence. Create headers such as Produce, Meat & Seafood, Dairy & Eggs, Pantry & Canned Goods, Frozen, and Household or Miscellaneous. Under each header, list every ingredient that belongs there, keeping the quantities you calculated earlier. If you shop at multiple stores — perhaps a warehouse club for bulk items and a local market for produce — make a separate zoned list for each trip.

    A few practical habits help this system run smoothly:

    • Keep a running "master map" note on your phone or paper with your store’s aisle order; update it when the store resets.
    • Place items you grab every week — milk, eggs, bread — at the top of their zone so they’re impossible to miss.
    • Add non-food essentials like toilet paper or dish soap to the final zone so you collect them just before checkout.

    When your list follows the store’s geography, you move efficiently, reduce the chance of forgetting something, and spend less time wandering past tempting displays. This small organizational step often makes the entire shopping trip feel calmer and more controlled.

    Build in Flex Slots for Leftovers, Snacks, and Unexpected Changes

    Life rarely follows a meal plan exactly, and a rigid list often leads to extra trips or wasted food. Building in flex slots gives your grocery plan room to breathe without derailing your budget or intentions. Start by designating one or two meals as "flex nights" — simple templates like stir-fry, frittata, grain bowl, or pasta that absorb whatever vegetables, proteins, or leftovers need using up. These meals become your pressure valve when plans shift or you’re too tired to cook something elaborate.

    Next, add a small buffer for snacks and breakfast variety. A handful of seasonal fruit, a tub of yogurt, nuts, or hummus and crackers covers midday hunger without locking you into specific recipes. Many people find that keeping snack ingredients loose — "fruit for the week" rather than "six apples and four bananas" — lets them buy what looks best and costs less that day.

    Finally, leave one or two lines on your list intentionally blank or labeled "household needs" for the inevitable forgotten item: dish soap, aluminum foil, a birthday card, or an extra onion because the recipe underestimated. This prevents impulse grabs at the checkout and keeps the list functional rather than aspirational.

    • Choose 1–2 flex meal templates that use pantry staples and whatever produce remains
    • Write snack categories, not specific counts, to shop sales and quality
    • Reserve space for non-food essentials and last-minute additions

    A list with built-in flexibility stays useful all week, not just on shopping day.

    Review and Adjust the List Against Budget and Dietary Goals

    Before you head to the store, take a few minutes to compare your organized list against the two guardrails that matter most: your budget and your dietary needs. Start by estimating the cost of each category. If you shop at the same store regularly, you likely know the approximate price of staples like chicken thighs, rice, or seasonal produce. Add those up mentally or jot rough totals next to each grouped section. If the running tally creeps past your weekly limit, look for easy swaps. A bulk bag of carrots often costs less per pound than pre-cut sticks. Store-brand canned beans or frozen vegetables can save money without sacrificing nutrition. Consider scaling back a pricier protein for one meal and stretching it with lentils or eggs in another.

    Next, scan the list through the lens of your household’s eating goals. If someone is watching sodium, check labels on broths, sauces, and deli items — many people find low-sodium versions taste just as good once herbs and acid are added. For gluten-free needs, verify that oats, soy sauce, and spice blends are certified. If you’re aiming for more fiber, make sure whole grains, legumes, and a variety of produce appear across multiple days. This is also the moment to confirm portions align with actual appetites; buying three bunches of kale sounds virtuous but creates waste if only one gets eaten.

    A quick final pass can catch mismatches: – Swap a premium cut for a budget-friendly alternative in a slow-cooked dish – Replace a snack item with something already in the pantry – Adjust produce quantities to match realistic prep time

    This review takes five minutes but often saves both money and frustration. If you have specific medical nutrition needs, check with a doctor or registered dietitian before making major changes.

    Putting It Together

    Start by setting aside twenty minutes on Sunday with your calendar, recipes, and a blank sheet of paper. Write each day across the top and slot in dinner first, then lunch and breakfast using the meals you selected. Next to each meal, list the ingredients you still need after your pantry audit. Consolidate those items into a master list grouped by store section: produce, meat and seafood, dairy, pantry, frozen. Circle anything that appears in multiple recipes so you can see the total quantity at a glance.

    Before you leave the house, add your flex slots: a bag of salad greens for quick sides, eggs for backup protein, fruit for snacks, and one easy meal component like tortillas or pasta that can absorb leftovers. Check the list against your budget ceiling and any dietary needs, swapping a premium cut for a cheaper alternative if the total looks high.

    At the store, stick to the order on your paper. Cross items off as they go in the cart. When you get home, wash and prep the produce that will spoil fastest, then store everything with the earliest-use items in front. After the first week, note what you threw out, what you ran out of, and which meals felt rushed. Adjust the quantities and flex slots for week two based on those observations.

    More from the blog

    From FitLife Solutions

    Our book Healthy Lunchbox Recipes: Practical Meal Prep for Busy Adults goes further, as a digital eBook (PDF and EPUB) you can read on any device.

    Browse all our practical health and fitness guides at fitlifesolutions.site.

    New practical health guides and articles on WhatsApp: follow our channel.

    About the author

    Ahumuza Mark is the founder of FitLife Solutions in Luwero, Uganda. He publishes practical, plain-language guides on everyday health, fitness and habits, and approves every article before it goes online. He is not a doctor: our articles are general information, so please read our Health Disclaimer and talk to a health professional about your own situation. Questions or corrections? Contact us.

    This article is for general information only and is not a substitute for professional medical advice. Talk to your doctor or another qualified health professional before changing your diet, exercise or health routine, especially if you have a medical condition or take medication.
  • How to Estimate Portion Sizes Using Your Hand

    How to Estimate Portion Sizes Using Your Hand

    You stand in front of a plate of food and wonder if it is too much, too little, or just right. This guide is for anyone who wants a practical way to answer that question without carrying a food scale, downloading a tracking app, or memorizing gram counts. It works whether you are cooking at home, ordering takeout, or navigating a buffet line.

    After reading, you will be able to:

    • Estimate a serving of protein, carbohydrates, vegetables, and fat using only your hand
    • Build a balanced plate for weight maintenance or weight loss without counting calories
    • Adjust portions up or down based on your hunger, activity level, and goals
    • Apply the method to common tricky foods like spaghetti, rice, nut butter, and cheese

    Your hand travels with you everywhere. It scales to your body size naturally, so bigger people get bigger portions and smaller people get smaller ones. Many people find this approach easier to stick with than strict measuring because it is fast, flexible, and discreet. If you have a medical condition that requires precise nutrient control, check with your doctor or a registered dietitian before relying on hand estimates alone.

    Why Hand Portioning Works Better Than Counting Calories

    Calorie counting looks precise on paper, but in daily life it often creates more friction than clarity. Food labels can be off by a significant margin, restaurant meals rarely come with nutrition facts, and the effort of logging every bite drives many people to quit within weeks. Hand portioning sidesteps those problems because your hand is always with you, it scales to your body size, and it turns estimation into a quick visual habit instead of a math problem.

    A larger person naturally has a larger palm and fist, so the portions adjust automatically without any calculation. The method also keeps the focus on food quality — protein, vegetables, carbs, fats — rather than reducing every meal to a number. Many people find they eat more mindfully when they simply compare the food on their plate to their own hand.

    • No app, scale, or notebook required
    • Works at home, at a friend’s house, or while traveling
    • Adjusts as your body composition changes over time
    • Encourages balanced plates instead of hitting arbitrary targets

    If you have a medical condition that requires exact nutrient tracking — such as diabetes managed with insulin or a specific kidney diet — check with your doctor or a registered dietitian before relying solely on hand estimates. For most everyone else, this approach may reduce the mental load of eating well and make consistent portions feel doable rather than like a second job.

    Your Palm Equals Protein: Meat, Fish, and Plant-Based Servings

    Use your open palm — fingers together, thumb tucked in — as the reference for a single protein serving at a meal. The area and thickness of that flat hand roughly matches a cooked portion of meat, fish, tofu, tempeh, or a scoop of beans or lentils. For most adults this lands around three to four ounces of cooked animal protein or about half a cup of dense plant protein, which is a practical starting point for lunch or dinner.

    Lay a chicken breast, salmon fillet, or pork chop against your palm. If it extends past the edges or is much thicker than your hand, cut or save the excess for another meal. For ground meat or stir-fry strips, scoop a mound that covers your palm without spilling over. With tofu or tempeh, a block the size of your palm works well. For cooked beans, lentils, or chickpeas, a level palm-sized scoop (about a half cup) is the target.

    • Chicken, turkey, lean beef, pork: one palm-sized piece, thickness of your hand
    • Fish fillets (salmon, cod, tilapia): one palm-sized piece
    • Eggs: two whole eggs fill a palm (whites only, three to four)
    • Tofu, tempeh: one palm-sized slab
    • Cooked beans, lentils, chickpeas: one level palm scoop
    • Greek yogurt, cottage cheese: one palm-sized dollop (roughly three-quarters cup)

    If you’re very active, healing from injury, or over sixty, you may need one and a half to two palms per meal. If you’re smaller-framed or sedentary, three-quarters of a palm may be enough. Adjust by listening to hunger and fullness cues across the week. People with kidney conditions should check with a doctor before increasing protein portions.

    Your Fist Measures Carbs: Rice, Pasta, and Starchy Vegetables

    Your fist gives you a quick, portable way to gauge carbohydrate servings without a scale. Make a relaxed fist — that volume roughly equals one serving of cooked grains, pasta, or starchy vegetables such as potatoes, corn, or winter squash. For most adults, this amount lands around half a cup to three-quarters of a cup cooked, which fits neatly onto a plate alongside protein and vegetables.

    When you are dishing up rice, quinoa, or couscous, scoop the cooked grain into your fist. If it overflows, you have more than one serving; if it sits well below the rim, you have less. The same principle works for pasta shapes like penne, rotini, or elbows. For long noodles such as spaghetti, gather the cooked strands into a loose bundle and compare the bundle’s bulk to your fist — this takes practice, so start by measuring once with a cup to calibrate your eye.

    Starchy vegetables follow the same rule. A baked sweet potato or a portion of mashed potatoes that matches your fist is one serving. Corn kernels or peas can be scooped directly into your cupped fist for a quick check.

    Adjust up or down based on activity level, hunger, and goals: – Very active days or larger frames: one and a half to two fists – Light activity or weight-loss focus: three-quarters of a fist – Unsure: start with one fist, eat slowly, and reassess fullness after ten minutes

    If you consistently feel sluggish or overly hungry, shift the portion by half a fist and observe for a week. Many people find this visual cue easier to sustain than weighing every meal. As always, check with a healthcare professional if you have specific dietary needs or medical conditions.

    Your Cupped Hand Holds Fruit and Snack Portions

    Your cupped hand works well for fruit and many snack foods because the natural bowl shape matches how these items settle. For whole fruit like apples, oranges, or peaches, one piece roughly the size of your fist fits the guideline, but berries, grapes, and cut melon are easier to scoop. A single cupped handful of berries or grapes is a typical serving. For dried fruit, which shrinks and concentrates sugar, use a level cupped hand — about the volume of a golf ball — rather than a heaping one.

    Snack foods follow the same principle. A cupped hand of popcorn, pretzels, or chips gives you a visual stop point before you reach the bottom of the bag. Nuts and seeds are denser, so treat them closer to a fat portion: a level cupped hand, not overflowing. If you’re eating trail mix with chocolate or dried fruit, stick to one level cupped hand total.

    When the portion looks too small, add a protein or fat companion — a spoonful of Greek yogurt with berries, or a few almonds with an apple — to increase satiety without doubling the fruit or snack volume. If you find yourself taking three cupped handfuls of grapes at a sitting, pre-portion into small containers at the start of the week. For social settings where bowls are bottomless, serve yourself one cupped hand onto a plate, then step away from the bowl. Many people find this physical boundary easier than mental counting. If you have blood-sugar concerns, check with a doctor or dietitian about fruit timing and total daily carbohydrate targets.

    If you want this in more depth, our book Hand and Wrist Care for Desk Workers covers it step by step.

    Your Thumb Sizes Fats: Oils, Nut Butters, and Cheese

    Your thumb — from tip to base — gives you a quick reference for fats like oils, nut butters, seeds, cheese, and avocado. One thumb-sized portion equals roughly one tablespoon of oil or nut butter, a tablespoon of seeds, or an ounce of hard cheese. For most meals, aim for one to two thumb portions of added fat depending on your activity level and hunger.

    When cooking, use your thumb to gauge how much oil goes in the pan. A thumb’s worth coats a skillet for sautéing vegetables or searing protein without drowning the food. If you’re drizzling olive oil over a finished dish or salad, pour slowly and stop when you hit that visual marker. With nut butters, scoop a level thumb-sized dollop rather than heaping the spoon; the difference can be double the calories.

    Cheese is easy to overeat because it’s dense and tasty. Slice or grate a portion the length and thickness of your thumb — about the size of a standard domino. For softer cheeses like goat cheese or feta, use the same volume measure. Avocado works similarly: half a medium fruit is roughly two thumb portions.

    • Measure oil by pouring into a spoon first until you learn the look
    • Pre-portion nut butters into small containers if you tend to eat straight from the jar
    • Grate hard cheese over dishes instead of slicing; it spreads further visually
    • When eating out, ask for dressings and sauces on the side and add a thumb’s worth yourself

    If you accidentally go over, don’t stress. Fat adds satiety and flavor, and one heavy hand won’t derail your day. Just adjust the next meal slightly — maybe skip added oil at dinner if lunch was rich. Many people find tracking by hand builds better awareness than numbers alone. If you have specific health conditions like gallbladder issues or very high triglycerides, check with a doctor or dietitian for personalized fat targets.

    How to Portion Spaghetti and Long Pasta Without a Scale

    Long pasta is the hardest food to judge by eye because it nests and compresses. A fist-sized portion of cooked spaghetti is the target, but getting there from a dry bundle takes a simple physical gauge.

    Hold the dry spaghetti vertically against the opening of a standard soda bottle or a circle made by touching your thumb tip to your middle finger tip. That circle is roughly the diameter of a quarter. The amount of dry strands that fits through that opening equals one cooked fist — about one serving for most adults. If you are feeding two, double the bundle. For a heartier appetite or a main-dish pasta with light sauce, use a circle made by thumb to index finger; that yields about one and a half fists cooked.

    No bottle or flexible fingers? Use the "bundle method." Gather dry spaghetti into a cylinder about the diameter of a standard pencil. That single pencil-thick bundle cooks up to one fist. Lay it on the counter next to a ruler once; note the length (usually seven to eight inches). Next time, just eyeball that length against the side of the box.

    When the pasta is cooked, drain it and twirl it against the curve of your serving bowl. A single layer that fills the bottom of a wide soup bowl without stacking high is one fist. If it mounds above the rim, pull some out before saucing.

    Common mistakes: – Measuring cooked pasta with a fist but forgetting it expands two to two and a half times. – Using a dinner-plate diameter as a guide; that serves three to four people. – Adding oil to the water; it makes sauce slide off and tempts you to add more cheese.

    If you overshoot, bulk the plate with extra vegetables and a palm of protein so the pasta becomes a side rather than the base.

    Building Complete Weight-Loss Plates Using Only Your Hands

    Start by placing a palm-sized portion of protein on your plate — chicken, fish, tofu, eggs, or beans. Next to it, add a fist-sized serving of carbohydrates such as rice, pasta, quinoa, or roasted potatoes. Fill the remaining half of the plate with two fist-sized portions of non-starchy vegetables like broccoli, spinach, peppers, or a mixed salad. Finally, include a thumb-sized serving of fat: a drizzle of olive oil on the vegetables, a sprinkle of nuts, a few avocado slices, or a small pat of butter.

    • Protein: one palm (thickness and diameter of your hand)
    • Carbohydrates: one fist (front of your clenched hand)
    • Vegetables: two fists (loosely packed)
    • Fats: one thumb (tip to base)

    If you are eating a mixed dish like a stir-fry or casserole, visualize the components separately before they hit the pan. A palm of chicken, a fist of rice, two fists of veggies, and a thumb of oil still apply even when combined. For soups or stews, ladle a portion that visually matches those ratios in your bowl.

    Adjust up or down based on hunger, activity, and results. On training days you might add an extra fist of carbs or a second thumb of fat; on lighter days you might drop the carb serving and double the vegetables. Many people find this template flexible enough for restaurants, travel, and family meals without needing a scale. If you have specific medical conditions or dietary needs, check with a doctor or registered dietitian before making major changes.

    Putting It Together

    Start with just one meal a day for the first three days. Pick the meal where you usually overeat — often dinner — and build your plate using the hand portions you have practiced: a palm of protein, a fist of carbs, two fists of vegetables, and a thumb of fat. Eat slowly, put your fork down between bites, and stop when you feel satisfied, not stuffed. Notice how the portions look on your usual plates and bowls; this visual cue helps later when you are not measuring.

    On days four through seven, add a second meal using the same method. Keep breakfast simple if it is already working — a cupped hand of oats with a thumb of nut butter and a cupped hand of berries fits the template without extra effort. If you snack, use a cupped hand for fruit or nuts and a thumb for cheese or hummus. When a meal does not fit the pattern — pizza night, a restaurant portion — use your hand to estimate a reasonable amount, eat mindfully, and move on without guilt.

    • Pick one daily anchor meal to practice first.
    • Use the same plate or bowl each time to build visual memory.
    • Track hunger and fullness on a 1 to 10 scale for a few days.
    • Adjust portion numbers up or down based on activity, not the scale.
    • Check with your doctor before making big changes if you have medical conditions.

    More from the blog

    From FitLife Solutions

    Our book Hand and Wrist Care for Desk Workers goes further, as a digital eBook (PDF and EPUB) you can read on any device.

    Browse all our practical health and fitness guides at fitlifesolutions.site.

    New practical health guides and articles on WhatsApp: follow our channel.

    About the author

    Ahumuza Mark is the founder of FitLife Solutions in Luwero, Uganda. He publishes practical, plain-language guides on everyday health, fitness and habits, and approves every article before it goes online. He is not a doctor: our articles are general information, so please read our Health Disclaimer and talk to a health professional about your own situation. Questions or corrections? Contact us.

    This article is for general information only and is not a substitute for professional medical advice. Talk to your doctor or another qualified health professional before changing your diet, exercise or health routine, especially if you have a medical condition or take medication.
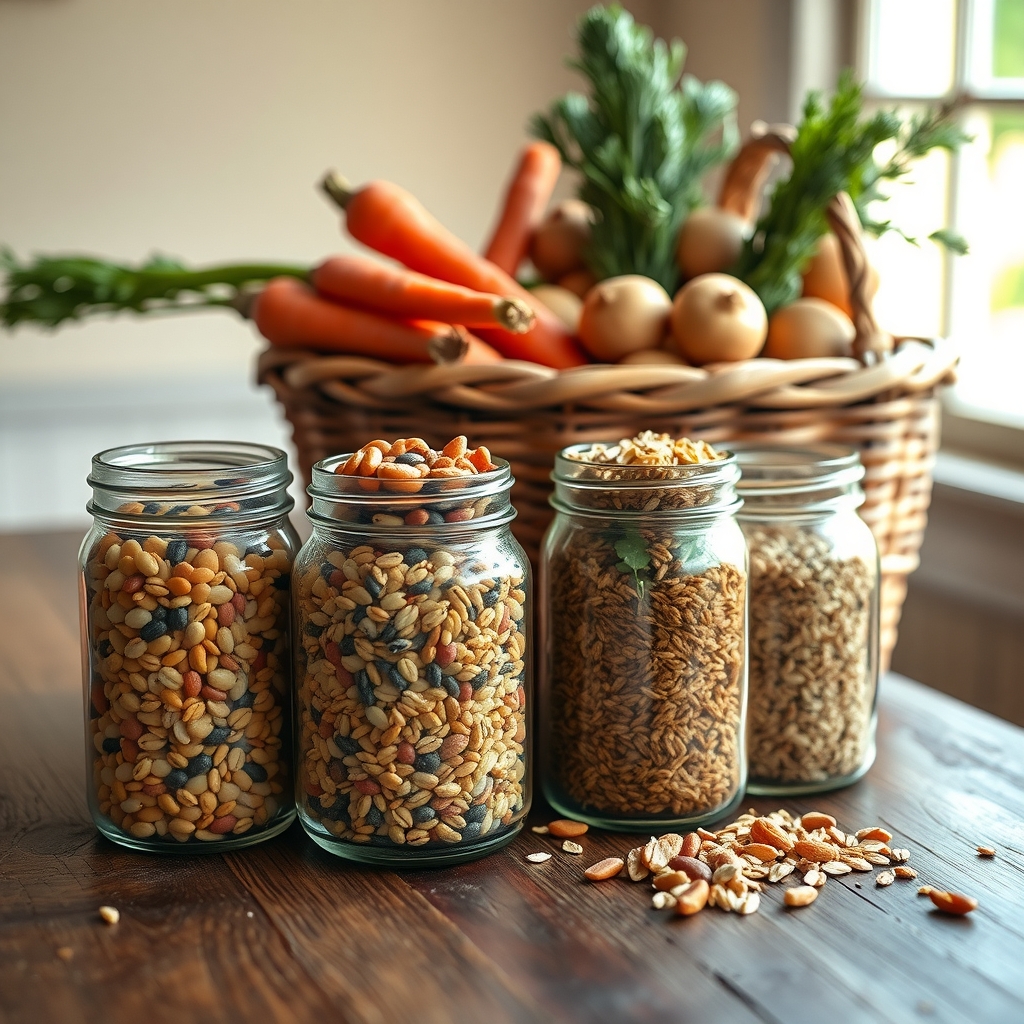
  • Why Soak Beans Before Cooking: Texture, Digestibility, and Time Savings Explained

    Why Soak Beans Before Cooking: Texture, Digestibility, and Time Savings Explained

    If you have ever stood over a pot of beans that refused to soften while others turned to mush, or dealt with uncomfortable bloating after a hearty chili, this guide is for you. It is written for home cooks who want reliable results from dried beans without the guesswork.

    After reading, you will be able to choose a soaking method that fits your schedule, whether you are planning dinner tomorrow or need beans on the table in an hour. You will understand how a simple soak hydrates the seed coat evenly so the beans cook through at the same rate, keeping their shape and creamy interior intact. You will also learn why soaking helps reduce the complex sugars that often cause digestive trouble, making the final dish easier to enjoy.

    • Pick the right soak: overnight, quick-soak, or skip it entirely
    • Cook beans that are tender, intact, and consistent batch after batch
    • Reduce the compounds that commonly lead to gas and bloating
    • Save active cooking time and energy with a little upfront planning

    The Science Behind Bean Soaking and Starch Hydration

    When a dried bean hits water, the first thing happening is simple physics: the seed coat and the dense starch granules inside begin to absorb moisture. This process, called hydration, is what turns a hard, shriveled pellet into something that can actually soften with heat. Without that initial soak, the exterior of the bean cooks and turns mushy long before the center has absorbed enough water to become tender. The result is often a pot of beans with blown-out skins and chalky, undercooked cores.

    Soaking jump-starts this hydration evenly, from the outside in. As water penetrates the seed coat, it swells the starch granules and begins to relax the rigid cell structure. This means when you eventually apply heat, the energy goes straight into softening tissue that is already pliable, rather than fighting to drive moisture into a dry center. Many people find this leads to a creamier, more uniform texture without the need for aggressive boiling that splits skins.

    A few practical notes on the mechanics: – The seed coat acts as a gatekeeper; intact skins slow water entry, which is why older, drier beans take longer to hydrate fully. – Temperature matters. Cool water hydrates beans slowly and evenly; hot water speeds it up but can start cooking the outside before the inside is ready. – Salt in the soaking water (about a tablespoon per pound) can actually help by softening the pectin in the skins, reducing the chance of blowouts during the final cook.

    If you skip the soak, you are essentially asking dry starch to hydrate and gelatinize simultaneously under heat, a race the exterior almost always wins.

    How Soaking Reduces Cooking Time and Energy Use

    Soaking gives water a head start on the job it must do anyway: hydrate every starch granule inside the bean until it swells and softens. When you put dry beans straight into a pot, the outer layers cook while the center is still hard, so you keep simmering longer. Pre-hydrated beans enter the heat already plump, which means the cooking liquid only needs to maintain temperature long enough to gelatinize starch — often cutting the active simmer by half or more.

    Less time at a rolling boil translates directly to less fuel or electricity. On a stovetop you might save twenty to forty minutes of gas or electric draw; in a pressure cooker the cycle shortens by several minutes, which matters when you run multiple batches a week. The kitchen also stays cooler, a welcome side effect in summer.

    A few practical habits keep the savings real: – Use plenty of water for soaking — at least three cups per cup of beans — so they hydrate evenly and don’t absorb cooking liquid later. – Drain the soak water and start with fresh liquid; this prevents the foam that can boil over and force you to lower the heat, extending the cook. – Keep the simmer gentle. A hard boil splits skins and wastes energy through excess evaporation. – Test doneness early. Soaked beans can go from perfect to mushy in five minutes, so start checking at the low end of the usual range.

    If you forget to soak, the quick-soak method — boil two minutes, cover and rest one hour — still shaves significant time off the full cook compared to starting from dry.

    Breaking Down Oligosaccharides for Better Digestibility

    Dried beans contain oligosaccharides, complex sugars that human digestive enzymes cannot fully break down. When these sugars reach the large intestine intact, gut bacteria ferment them, producing gas that leads to bloating and discomfort for many people. Soaking beans before cooking helps reduce this issue by allowing water to penetrate the seed coat and leach some of these water‑soluble carbohydrates into the soaking liquid.

    For the best effect, discard the soaking water and rinse the beans thoroughly before cooking in fresh water. This simple step removes a portion of the oligosaccharides that migrated out during the soak. A long, cold soak of eight to twelve hours tends to draw out more of these compounds than a rapid hot soak, though even a quick soak followed by draining offers some reduction. Adding a piece of kombu seaweed to the cooking pot is a traditional practice many cooks find helpful; the seaweed contains enzymes that may further assist in breaking down the remaining sugars during simmering.

    Other habits that support easier digestion include cooking beans until they are completely tender, since undercooked starches and fibers are harder to process. Skimming and discarding any foam that rises during the first few minutes of boiling also removes some of the compounds that contribute to discomfort. If you are new to eating beans regularly, start with smaller portions a few times a week to let your gut microbiome adjust gradually. People with persistent digestive conditions should check with a doctor or dietitian before making large changes to their fiber intake.

    Achieving Even Texture and Preventing Split Skins

    When dried beans hit boiling water, the outside hydrates and softens long before the center does. That temperature gradient creates internal pressure, and the skin — being the least flexible part — often splits or peels away completely. Soaking gives the entire bean a head start on hydration so the interior and exterior cook at a more even pace. The result is beans that hold their shape, have creamy interiors, and look intact on the plate rather than turning into a ragged pile.

    Split skins are not just cosmetic. When skins burst, starch escapes into the cooking liquid, thickening it faster and sometimes making the beans taste slightly floury. Whole skins keep the bean’s structure intact, which matters for salads, stews, and any dish where you want distinct pieces. Many people find that soaked beans also absorb seasoning more evenly because the interior is not racing to catch up.

    A few practical habits help prevent splits: – Use plenty of water during soaking — at least three times the volume of beans — so they hydrate uniformly. – Add a pinch of salt to the soak water; it slightly toughens the skin, making it more elastic and less prone to tearing. – Avoid a rolling boil once cooking starts. A gentle simmer keeps the beans moving just enough without battering the softened skins. – If you are cooking older beans that have been in the pantry a year or more, extend the soak by a few hours. Very dry beans benefit from the extra time to rehydrate fully before heat hits them.

    If you want this in more depth, our book Pantry Staples Cooking: Simple Meals from Everyday Ingredients covers it step by step.

    Comparing Soaking Methods: Overnight, Quick Soak, and No-Soak

    The overnight method remains the standard for a reason. Cover the beans with three inches of cold water, add a tablespoon of salt per quart if you like seasoned beans, and let them sit at room temperature for eight to twelve hours. Drain and rinse before cooking. This long, gentle hydration produces the most uniformly tender skins and creamy interiors, and it does the best job of leaching out the oligosaccharides that cause gas. If you forget to start them the night before, the quick-soak method works well. Place beans in a pot, cover with water, bring to a rolling boil for two minutes, then remove from heat, cover, and let stand for one hour. Drain, rinse, and cook as usual. The heat jump-starts hydration, but some delicate varieties like black beans or navy beans may split more than with the cold method.

    – Overnight soak: best texture, most even cooking, greatest reduction in gas-producing sugars. – Quick soak: ready in about ninety minutes total; good for same-day meals; slightly higher risk of split skins. – No-soak: skip straight to cooking; add twenty to forty minutes simmer time; beans hold shape well for salads but may cook unevenly and cause more digestive discomfort for sensitive people.

    If you choose no-soak, use a heavy pot, keep the liquid at a bare simmer, and check frequently after the first hour. Adding a strip of kombu or a pinch of baking soda to the cooking water can help soften skins without pre-soaking. For any method, discard the soaking liquid and rinse the beans — this simple step removes a significant portion of the compounds that cause bloating.

    Impact of Soaking on Nutrient Retention and Antinutrients

    Soaking does more than soften beans; it changes their nutritional profile in ways that matter for everyday cooking. Dry beans contain antinutrients such as phytic acid, lectins, and tannins that can bind minerals like iron, zinc, and calcium, making them harder for your body to absorb. As beans sit in water, a portion of these compounds leaches out into the soaking liquid. Discarding that liquid and rinsing the beans before cooking reduces the antinutrient load, which may improve mineral availability from the finished dish.

    Heat finishes the job. Lectins, which can cause digestive upset if beans are undercooked, are largely destroyed during the boiling phase. Soaking simply gives you a head start by shortening the time needed at high heat, helping preserve heat-sensitive vitamins like folate and thiamine that degrade with prolonged cooking. You do lose some water-soluble nutrients — mainly B vitamins and a few minerals — into the soak water, but the trade-off is usually favorable because the beans cook faster and more evenly.

    A few practical habits keep nutrition on your side:

    • Use plenty of water for soaking (about three cups per cup of beans) so antinutrients dilute effectively.
    • Always discard the soaking water and give the beans a quick rinse.
    • Bring soaked beans to a full boil for at least ten minutes before lowering to a simmer; this step is essential for kidney beans and wise for all varieties.
    • Save the cooking liquid for soups or stews — it holds flavor and some nutrients that migrated out during cooking.

    If you have a condition that requires careful mineral management, check with a doctor or dietitian before making big changes to how you prepare legumes. For most home cooks, the soak-rinse-boil routine delivers a pot of beans that is easier to digest and nutritionally solid.

    Practical Tips for Soaking Different Bean Varieties

    Small beans such as lentils, split peas, and black-eyed peas absorb water quickly and usually do not need a long soak. A thirty-minute rest in cold water is often enough to help them cook evenly, though many people skip soaking entirely for these varieties. Medium beans like black beans, pinto beans, and navy beans benefit from the standard overnight soak or the quick-soak method; plan for at least four hours in cold water or one hour after a brief boil. Large, dense beans such as kidney beans, cannellini, and chickpeas need the most time. An overnight soak of eight to twelve hours works well, and chickpeas often improve with a full twenty-four hours in the refrigerator, especially if you change the water once.

    • Lentils, split peas, black-eyed peas: optional, 30 minutes if desired
    • Black beans, pinto beans, navy beans: 4 to 12 hours cold soak or 1 hour quick soak
    • Kidney beans, cannellini, Great Northern: 8 to 12 hours cold soak
    • Chickpeas: 12 to 24 hours cold soak, change water halfway if possible

    Older beans take longer to hydrate no matter the variety. If your beans have been in the pantry for more than a year, extend the soak by a few hours and expect a longer cooking time. Hard water can also slow softening; adding a pinch of baking soda to the soak water may help, but use sparingly to avoid a soapy taste. Always discard the soak liquid and rinse the beans before cooking. Salt can be added to the soak water for seasoning and to help skins stay intact, roughly one teaspoon per quart of water. If you forget to soak large beans, the quick-soak method is a reliable backup: cover with water, boil two minutes, remove from heat, cover, and let sit one hour before draining and cooking.

    Putting It Together

    Start with the overnight method for a pound of whatever bean you cook most often. Cover them with three inches of cold water, add a tablespoon of salt, and leave the bowl on the counter before bed. In the morning, drain, rinse, and simmer in fresh water with aromatics until tender. Taste one at the 45-minute mark; older beans can take twice as long. If you forget to start them the night before, use the quick soak: boil for two minutes, cover, wait an hour, then drain and cook as usual. Keep a notebook or phone note with the bean type, soak method, and cook time so you can replicate what worked.

    • Pick one bean variety this week and stick with it
    • Soak Sunday night, cook Monday, portion for three meals
    • Freeze extra cooked beans in their liquid in two-cup containers
    • Use the cooking liquid in soups or rice instead of broth
    • Note the texture and digestibility each day

    Many people find that a simple routine removes the guesswork. If you have a history of digestive issues, check with a doctor before making beans a daily staple.

    More from the blog

    From FitLife Solutions

    Our book Pantry Staples Cooking: Simple Meals from Everyday Ingredients goes further, as a digital eBook (PDF and EPUB) you can read on any device.

    Browse all our practical health and fitness guides at fitlifesolutions.site.

    New practical health guides and articles on WhatsApp: follow our channel.

    About the author

    Ahumuza Mark is the founder of FitLife Solutions in Luwero, Uganda. He publishes practical, plain-language guides on everyday health, fitness and habits, and approves every article before it goes online. He is not a doctor: our articles are general information, so please read our Health Disclaimer and talk to a health professional about your own situation. Questions or corrections? Contact us.

    This article is for general information only and is not a substitute for professional medical advice. Talk to your doctor or another qualified health professional before changing your diet, exercise or health routine, especially if you have a medical condition or take medication.
  • How to Eat Healthy on a Budget Using Simple Strategies

    How to Eat Healthy on a Budget Using Simple Strategies

    Eating well when money is tight often feels like a choice between nutrition and the rent, but it does not have to be. This guide is for anyone who opens the fridge wondering how to make a decent meal without resorting to instant noodles or expensive takeout — whether you are a student stretching a loan, a parent feeding a family on a single income, or someone simply trying to lower grocery bills while eating real food. It covers practical steps that work in a UK supermarket, a Philippine wet market, or a US discount aisle.

    After reading, you will be able to:

    • Calculate a weekly food budget that reflects what you actually spend, not what you hope to spend
    • Plan meals around cheap staples like beans, oats, and seasonal vegetables so nothing goes to waste
    • Shop smarter by comparing unit prices, choosing store brands, and using loyalty schemes
    • Assemble healthy meals with little or no cooking when time and energy are low
    • Adjust portions and ingredients to support weight goals without buying specialty products

    These are habits you can start this week, using the kitchen and budget you already have.

    Audit Your Spending and Set a Realistic Weekly Food Budget

    Before you change a single grocery habit, you need a clear picture of where your money actually goes. For one week, track every food-related expense: the big weekly shop, the coffee on the way to work, the late-night delivery, the vending machine snacks. Use your banking app, a notes file, or a paper receipt jar — whatever you will actually stick with. Do not judge the numbers yet; just capture them.

    At the end of the week, sort the list into categories: groceries, takeout or restaurants, work or school lunches, drinks and snacks, and alcohol if applicable. Many people find that 30 to 40 percent of their food spend sits outside the main grocery trip. That is your leverage point.

    Next, set a realistic weekly grocery budget. A common starting framework many people find useful is the USDA "thrifty" or "low-cost" plan ranges for your household size, adjusted for your local prices. If you currently spend far above that, drop your target by 10 to 15 percent for the first month rather than slashing it in half. A budget you can actually hit builds momentum; an impossible one leads to a rebound splurge.

    Build in a small buffer of five to ten dollars for price spikes or a forgotten ingredient so you do not have to raid the emergency fund or put dinner on a credit card. Decide on a tracking method for the month ahead: a spreadsheet, a budgeting app envelope, or cash in a physical envelope. Pick the one with the lowest friction for you.

    If you overspend in week one, do not scrap the system. Review the receipts, spot the one or two decisions that pushed you over — usually an unplanned shop while hungry or a premium brand swap — and adjust for week two. The goal is a sustainable ceiling you can hit most weeks, not a perfect score every time.

    Master Low-Cost Meal Planning With Batch Cooking and Leftovers

    Start by picking two or three versatile proteins and a handful of vegetables that work across multiple cuisines. A pot of brown lentils, a tray of roasted carrots and onions, and a batch of brown rice can become burrito bowls on Monday, a stir-fry with soy sauce and frozen peas on Tuesday, and a hearty soup with canned tomatoes and stock on Wednesday. Cook the base ingredients in large quantities on a single afternoon, then portion them into containers so assembling a meal takes five minutes. Keep sauces and fresh toppings like herbs, lime, or yogurt separate until serving to prevent sogginess.

    Treat leftovers as planned ingredients rather than afterthoughts. Extra roasted vegetables blend into frittatas or pasta sauce. Cooked grains turn into fried rice with an egg and whatever vegetables are wilting in the crisper. Shredded chicken or tofu stretches across tacos, salads, and grain bowls. Designate one "clean-out-the-fridge" night each week where the goal is to combine odds and ends into a frittata, soup, or sheet-pan hash. This habit alone can save a full grocery trip every month.

    • Label containers with the date and contents using masking tape and a marker.
    • Freeze portions you will not eat within four days; most cooked beans, grains, and sauces freeze well.
    • Repurpose stale bread into breadcrumbs, croutons, or strata.
    • Save vegetable trimmings and bones in a freezer bag for homemade stock.

    If a batch tastes bland, adjust with acid (vinegar, citrus) or salt after reheating rather than during the big cook. If texture suffers — mushy rice, overcooked broccoli — fold the ingredient into a soup, casserole, or blended sauce where texture matters less. Many people find that building this rhythm takes two weeks; start with just one double-batch cook per weekend and expand from there.

    Build a Pantry of Cheap Nutrient-Dense Staples Like Beans and Oats

    A well-stocked pantry of inexpensive staples is the backbone of healthy budget eating. Start with dry beans and lentils; a one-pound bag costs little and yields six to eight cups cooked. Soak beans overnight to cut cooking time, or use a pressure cooker for unsoaked beans in about an hour. Cook a big batch, portion into containers, and freeze what you won't use in four days. Canned beans are fine when time is short — rinse them to remove excess sodium.

    Whole oats are another powerhouse. Buy plain rolled or steel-cut oats in bulk bins or large canisters; avoid flavored packets loaded with sugar. Oats work for breakfast, but also stretch meatloaf, bind veggie burgers, or thicken soups. Brown rice, barley, and whole-wheat pasta round out the grain shelf. Store grains in airtight containers to keep pests out and freshness in.

    Canned tomatoes, tomato paste, and low-sodium broth form the base for countless sauces and stews. Keep onions, garlic, potatoes, sweet potatoes, carrots, and cabbage on hand — they last weeks stored cool and dark. Frozen vegetables like spinach, peas, and mixed blends are flash-frozen at peak nutrition and often cheaper than fresh.

    For protein, stock canned tuna, sardines, and eggs (which keep three to five weeks refrigerated). Peanut butter, sunflower seeds, and peanuts add healthy fats and calories. Dried herbs, spices, vinegar, soy sauce, and hot sauce make simple ingredients taste different every night.

    • Dry beans and lentils (soak and batch-cook)
    • Whole oats, brown rice, barley, whole-wheat pasta
    • Canned tomatoes, tomato paste, low-sodium broth
    • Long-keeping produce: onions, garlic, potatoes, cabbage, carrots
    • Frozen vegetables: spinach, peas, mixed blends
    • Canned fish, eggs, peanut butter, seeds, nuts
    • Basic seasonings: dried herbs, spices, vinegar, soy sauce

    If a staple goes stale or infested, toss it and clean the shelf — don't risk foodborne illness. Many people find rotating stock using a "first in, first out" system prevents waste. Check with a doctor if you have specific dietary restrictions like sodium limits or legume intolerances.

    Shop Smart: Compare Unit Prices, Buy Generic, and Use Loyalty Apps

    Start at the shelf tag, not the front of the package. The unit price — usually printed in small type showing cost per ounce, pound, or 100 grams — lets you compare different sizes and brands on equal footing. A larger bag of rice or frozen vegetables often costs less per unit, but only if you will use it before it spoils. Calculate the price per serving for the meals you actually make; a cheaper cost per pound means nothing if half the bag goes stale.

    Store brands are formulated to match name-brand specs for basics like canned tomatoes, rolled oats, dried beans, and frozen fruit. Read the ingredient list: if the first three items are identical, the nutrition is nearly the same. Many people find the flavor difference negligible once the food is seasoned and cooked into a dish. Keep a small notebook or phone note of the few items where you genuinely prefer the name brand; buy generic for everything else.

    Loyalty apps and digital coupons work best when you clip offers before you shop and stick to your list. Set a reminder to check the app while you write your meal plan, not while standing in the aisle. Some stores load personalized discounts automatically after a few trips; others require manual selection each week. Stack a store coupon with a manufacturer coupon when the system allows it.

    • Compare unit prices on every packaged item, even sale tags.
    • Buy generic for pantry staples: beans, oats, rice, canned vegetables, spices.
    • Clip digital coupons only for items already on your list.
    • Shop the perimeter first for produce, then hit the center aisles with a strict list.
    • If a deal tempts you off-list, put it in the cart, walk two aisles, and decide if it fits this week’s meals.

    If you want this in more depth, our book Maintaining Cognitive Health: Practical Strategies for Brain Function and Memory Support covers it step by step.

    Healthy No-Cook and Minimal-Prep Meals for Busy Schedules

    When cooking feels impossible, you can still eat well with almost no heat. Start by keeping a few reliable no-cook proteins on hand: canned tuna, salmon, sardines, chicken, or beans (rinsed well); hard-boiled eggs prepared once for the week; rotisserie chicken pulled into containers; Greek yogurt or cottage cheese; and shelf-stable tofu or tempeh that only needs a quick microwave steam. Pair these with pre-washed greens, bagged shredded cabbage, baby carrots, cherry tomatoes, cucumber slices, or thawed frozen peas and corn. Healthy fats come from a handful of nuts or seeds, a spoonful of peanut butter, a quarter avocado, or a drizzle of olive oil and vinegar.

    Assemble meals in wide-mouth jars or divided containers so they stay fresh for days. A Mediterranean jar might layer hummus, chickpeas, diced cucumber, tomato, olives, feta, and parsley with lemon juice on top. A Mexican bowl combines black beans, corn, salsa, shredded cheese, and a dollop of yogurt over microwavable rice or quinoa pouches. For breakfast, soak rolled oats overnight with milk or a plant alternative, chia seeds, cinnamon, and frozen berries — grab and go in the morning.

    • Keep a "snack box" in the fridge: boiled eggs, cheese sticks, cut veggies, fruit, nut butter packets.
    • Use pre-cooked grain pouches (90 seconds in the microwave) as a warm base for cold toppings.
    • Rotisserie chicken + bagged salad kit + canned beans = three different lunches in five minutes.
    • When produce looks tired, blend it into a smoothie with yogurt and oats instead of tossing it.

    If you have a kettle or microwave, you can also "cook" couscous, instant rice, or quick oats with just hot water. Many people find this approach keeps them fed and nourished during exam weeks, night shifts, or caregiving stretches without resorting to drive-thru meals.

    Tailored Strategies for Students, UK Shoppers, and Philippine Markets

    If you are a student, focus on equipment-free meals and shared costs. A rice cooker or electric kettle handles oats, rice, steamed vegetables, and hard-boiled eggs without a stove. Split bulk purchases of chicken thighs, frozen vegetables, or large yogurt tubs with flatmates to lower the per-person price. Cook a big pot of chili or lentil stew on Sunday; portion it into containers for grab-and-go lunches that beat any meal deal. Keep peanut butter, canned tuna, and whole fruit in your bag for snacks between classes. If campus microwaves are busy, a wide-mouth thermos pre-filled with boiling water keeps leftovers hot until lunchtime.

    For UK shoppers, lean into the "reduced" aisle timing. Most supermarkets mark down short-dated items between 6 pm and 8 pm; freeze meat and bread immediately. Own-brand tinned tomatoes, kidney beans, and porridge oats often cost under 50p and match branded nutrition. Use the Too Good To Go app for bakery and grocery surprise bags at roughly one-third retail price. Loyalty cards like Tesco Clubcard or Nectar unlock member-only prices on frozen berries, mixed veg, and eggs. Batch-cook shepherd’s pie or curry using 20% fat mince stretched with lentils; the fat renders out during cooking, leaving flavor without extra cost.

    In Philippine markets, buy protein at the wet market early for the best price on tilapia, bangus, or pork shoulder. Ask vendors for "pang-gisa" cuts — trimmings ideal for soups and stir-fries. Stretch meat with sayote, upo, kalabasa, or kangkong, which stay cheap year-round. A kilo of local rice paired with monggo or ginisang sardinas feeds a family for days. Use a rice cooker’s steam tray for fish and veg while rice cooks below, saving gas. Patis and calamansi replace expensive sauces. If refrigeration is limited, cook only what you’ll eat today and rely on shelf-stable tuyo, eggs, and root crops like kamote.

    Align Budget Eating With Weight Loss Using Volume Foods and Protein

    Filling half your plate with low-calorie vegetables like cabbage, carrots, zucchini, spinach, or frozen mixed veg adds physical volume and fiber without adding much cost. Many people find this naturally reduces how much of the pricier items — meat, cheese, grains — they eat in a sitting. Roast a tray of seasonal vegetables with a little oil and salt, or stir handfuls of frozen spinach into soups, dals, and pasta sauces right at the end. A big bag of frozen vegetables is often cheaper per serving than fresh and keeps for months.

    Anchor each meal around a solid protein source to protect muscle and manage hunger. Eggs, canned tuna, chicken thighs, pork shoulder, tofu, tempeh, dried lentils, and split peas all deliver high protein per dollar. Cook a batch of lentils or beans on Sunday; portion them into containers with different spices — cumin-lime, tomato-garlic, curry powder — so the base stays cheap but the flavor rotates. If you eat meat, stretch 500 grams of mince with a cup of cooked lentils or grated carrot in bolognese, chili, or tacos; the dish still tastes meaty but costs less and adds fiber.

    Liquid calories from soda, juice, sweetened coffee, or alcohol add up fast in both money and energy. Switch to tap water, sparkling water with a squeeze of citrus, or unsweetened tea. If you snack, portion nuts, seeds, or cheese into small containers instead of eating from the bag; a 30-gram serving satisfies without the easy overpour.

    • Build meals: veg volume + protein anchor + modest carb + flavor (herbs, vinegar, chili, garlic).
    • Prep protein in batches; vary only the seasoning.
    • Drink water first when hunger hits; wait ten minutes before deciding to eat.
    • Track weight and how clothes fit weekly, not daily; adjust portions up or down by a spoonful at a time.
    • If you have health conditions or take medication, check with a doctor before making big changes to protein or fiber intake.

    Putting It Together

    Start Sunday by reviewing what you already have in the fridge, freezer, and cupboards. Write down three dinners you can make from those ingredients, then add two breakfasts and two lunches that use overlapping items — oats with peanut butter, eggs with frozen spinach, rice and beans with whatever vegetables are on hand. Shop once with a list built from those meals, sticking to generic brands and unit-price comparisons. When you get home, wash and chop sturdy vegetables, cook a big pot of beans or lentils, and portion snacks like nuts or yogurt into containers. Monday through Wednesday, follow the plan exactly. Thursday and Friday, remix leftovers into wraps, fried rice, or frittatas. Saturday, use odds and ends for a "clear the fridge" soup or stir-fry. Sunday, repeat the cycle.

    • Check inventory before listing meals
    • Cook one batch of beans or grains for the week
    • Prep vegetables once, use all week
    • Repurpose leftovers creatively midweek
    • Adjust portions if hunger or energy dips

    If a meal flops or schedules shift, swap in a no-cook fallback like canned fish on toast or hummus with raw vegetables. Many people find the rhythm settles after two weeks. Check with a doctor before making major dietary changes if you have health conditions.

    More from the blog

    From FitLife Solutions

    Our book Maintaining Cognitive Health: Practical Strategies for Brain Function and Memory Support goes further, as a digital eBook (PDF and EPUB) you can read on any device.

    Browse all our practical health and fitness guides at fitlifesolutions.site.

    New practical health guides and articles on WhatsApp: follow our channel.

    About the author

    Ahumuza Mark is the founder of FitLife Solutions in Luwero, Uganda. He publishes practical, plain-language guides on everyday health, fitness and habits, and approves every article before it goes online. He is not a doctor: our articles are general information, so please read our Health Disclaimer and talk to a health professional about your own situation. Questions or corrections? Contact us.

    This article is for general information only and is not a substitute for professional medical advice. Talk to your doctor or another qualified health professional before changing your diet, exercise or health routine, especially if you have a medical condition or take medication.
  • When Meal Prep Doesn’t Work and What to Do Instead

    When Meal Prep Doesn’t Work and What to Do Instead

    You spend Sunday chopping, portioning, and stacking containers, only to find yourself ordering takeout by Wednesday because the sight of that fifth chicken-and-rice box kills your appetite. If rigid meal prep has left you with wasted groceries, decision fatigue, and a fridge full of guilt, this article is for you. It is written for busy adults who need nourishment without a part-time job in food logistics.

    We will look at why the standard cook-once-eat-all-week model often backfires, from hidden time costs to the psychology of palate fatigue. You will learn how to spot the friction points in your current routine and replace them with a flexible component-prep framework that adapts to shifting schedules and actual cravings.

    After reading, you will be able to:

    • Identify which prep habits are costing you time and mental energy
    • Build a modular system of proteins, starches, and vegetables that mix into different meals
    • Adjust your strategy when work runs late, appetite changes, or leftovers lose appeal
    • Keep food waste down without eating the same thing on repeat

    The Hidden Costs: Time, Waste, and Decision Fatigue

    The Sunday ritual looks productive on paper: three hours, twenty containers, a color-coded spreadsheet. What the highlight reel skips is the hidden ledger. You spend forty minutes washing and chopping vegetables that wilt by Thursday. You buy bulk proteins because the per-pound price is lower, then toss half a package of freezer-burned chicken in March. The mental load is heavier than the grocery bags. By Wednesday you are negotiating with a container of mushy quinoa, deciding whether to force it down or order takeout and feel guilty. That negotiation is decision fatigue wearing a different outfit — you already made fifty choices at work; dinner shouldn't require a committee meeting.

    The waste shows up in three forms. Food waste: the bag of spinach that turns to sludge, the sauce that separates, the rice that hardens into a brick. Time waste: the hour you spend portioning snacks you never eat because the texture is off. Energy waste: the resentment that builds when your carefully planned Tuesday lunch feels like a punishment instead of fuel. Many people find they spend more cognitive bandwidth managing the system than they save by having meals ready.

    • Track what you actually throw out for two weeks; the pattern usually points to one or two ingredients you keep buying "just in case."
    • Limit active prep to ninety minutes max; beyond that, accuracy drops and shortcuts creep in.
    • Build in one "flex night" per week where the plan is deliberately empty — leftovers, eggs on toast, or a sandwich — so the system has a pressure valve.

    Why the Standard Approach Fails Real-Life Schedules

    The standard meal prep model assumes your week follows a predictable script. You shop Sunday, cook for three hours, portion into identical containers, and eat on schedule. Real life rarely cooperates. A Tuesday meeting runs late, a child gets sick, or you simply finish work too exhausted to reheat the chicken and rice you packed. When the plan breaks, the food often sits until it spoils, and you end up ordering takeout anyway — wasting both the prep effort and the money spent on groceries.

    Rigid batching also ignores how energy fluctuates. You might have bandwidth for a complex recipe on Sunday but need zero-cook meals by Thursday. Standard prep locks you into the same labor level all week. It also assumes your appetite stays constant. Eating the same portion of the same macro split five days straight ignores hunger cues that shift with sleep, stress, and activity. Many people find they overeat on low-activity days just to "finish the container" or under-eat on high-activity days because the portion was set on Sunday.

    Common friction points: – Fixed portions that don't match daily hunger – No buffer for schedule changes or social meals – All cooking front-loaded when energy is highest – No system for using up partial ingredients mid-week – Mental guilt when you deviate from the plan

    A flexible system builds in slack. It separates components so you can assemble different meals in minutes, swap portions based on actual hunger, and pivot when plans change without throwing out food or abandoning the effort entirely.

    The Psychology of Food Boredom and Palate Fatigue

    Eating the same reheated chicken, rice, and broccoli for five straight days sounds efficient on paper, but your brain and taste buds often rebel by Wednesday. This phenomenon, often called palate fatigue, is a survival mechanism, not a character flaw. When flavors and textures repeat without variation, dopamine response drops, meals stop feeling satisfying, and the urge to order takeout spikes — not because you lack discipline, but because your sensory system is begging for novelty.

    Many people find that boredom shows up first as mindless snacking after the "healthy" meal, then as resentment toward the containers staring back from the fridge. The fix isn't forcing yourself to finish the batch. It’s building in deliberate variation at the component level so the base ingredients stay the same but the eating experience shifts.

    • Cook a neutral protein (shredded chicken, lentils, ground turkey) and rotate sauces: chimichurri Monday, teriyaki Tuesday, harissa Wednesday, lemon-herb yogurt Thursday.
    • Prep two vegetable bases instead of one — roasted root vegetables and a raw slaw — then mix and match.
    • Keep texture contrast handy: toasted nuts, quick-pickled onions, crispy chickpeas, or a handful of fresh herbs added at serving time.
    • Designate one "wild card" dinner slot midweek for leftovers remixed into a wrap, frittata, or grain bowl with a fried egg.

    If you notice dread creeping in when you open a container, treat it as data. Swap the sauce, change the temperature (cold salad vs. hot bowl), or repurpose the protein into a soup. Flexibility protects the habit better than rigidity ever could.

    When Batch Cooking Sabotages Weight Loss Goals

    Batch cooking often promises portion control, but the reality can work against weight goals in subtle ways. When you cook five identical lunches on Sunday, you lock in calorie density and macro ratios before you know how hungry you will actually be on Wednesday. A 600-calorie container feels fine after a morning workout but excessive after a sedentary day of meetings, yet you eat it anyway because it’s already packed. That rigidity overrides fullness cues and trains you to finish the portion rather than stop when satisfied.

    Large-batch recipes also tend to rely on calorie-dense binders — oil, cheese, heavy sauces — to keep food palatable after days in the fridge. A stir-fry that tastes bright on day one often needs extra sodium or fat by day four to mask texture changes. Those additions add up quietly across the week.

    • Weigh or measure the protein and starch once, then keep vegetables separate so you can increase volume without adding calories when hunger is higher.
    • Pack sauces and dressings in small containers; add them at the table to control the final amount.
    • Build one “flex meal” slot into the week — a salad bar, omelet, or grain bowl — where you assemble fresh ingredients to match that day’s appetite.
    • If a pre-portioned meal feels too large, immediately move half to a second container before you start eating; the visual cue of a full plate stays intact while intake drops.

    These small adjustments keep the convenience of advance cooking while restoring the feedback loop that supports sustainable weight management.

    If you want this in more depth, our book Healthy Lunchbox Recipes: Practical Meal Prep for Busy Adults covers it step by step.

    What Reddit Communities Get Right About Flexible Systems

    Reddit threads about meal prep often reveal what polished guides leave out: the gap between a perfect Sunday cook-up and a chaotic Tuesday. Communities like r/MealPrepSunday and r/EatCheapAndHealthy consistently highlight that rigid menus collapse when work runs late, kids get sick, or appetite simply shifts. What users there get right is treating prep as a set of modular habits rather than a fixed menu.

    Many people find success with a "cook once, eat differently" mindset. Instead of portioning five identical containers, they batch neutral bases — rice, roasted vegetables, shredded chicken, beans — and keep sauces, dressings, and fresh toppings separate. A single tray of roasted broccoli and sweet potato becomes a grain bowl Monday, a frittata filling Tuesday, and a taco topping Wednesday. This reduces palate fatigue without adding cook time.

    • Prep proteins plain, season at reheating
    • Store wet and dry components in separate containers
    • Keep a "flavor kit" of three sauces that rotate weekly
    • Freeze single portions of cooked grains for quick thawing

    Another practical takeaway: plan for the "zero-energy" night. Redditors often suggest keeping two emergency meals that require zero chopping — frozen dumplings plus bagged slaw, or canned beans over microwave rice with a spoonful of pesto. It prevents the takeout spiral without demanding willpower.

    The most sustainable systems shared in these threads are the ones that assume life will interrupt. They build in slack, not perfection.

    Building a 'Component Prep' Framework That Adapts

    Instead of cooking five identical lunches on Sunday, prep building blocks that recombine in minutes. Start with two neutral bases — think brown rice, quinoa, roasted sweet potato cubes, or a big batch of lentils. Cook them plain with salt and a bay leaf so they pair with anything. While those simmer, roast two sheet pans of vegetables: one hearty (broccoli, cauliflower, carrots) and one quick-cooking (zucchini, peppers, cherry tomatoes). Toss each with oil, salt, and a different spice blend — cumin-chili on one, lemon-herb on the other — so the flavor profile shifts without extra work.

    Proteins stay flexible. Grill or bake chicken thighs, pan-sear tofu, and hard-boil a dozen eggs. Store each in its own container, unseasoned or lightly salted. Sauces do the heavy lifting: whisk together a tahini-lemon drizzle, a quick salsa verde, and a soy-ginger glaze. These three sauces turn the same rice-chicken-broccoli combo into three distinct meals.

    – Assemble just before eating: base + veg + protein + sauce + crunch (toasted nuts, seeds, or crispy chickpeas). – Keep a "rescue shelf" of canned beans, tuna, frozen edamame, and microwaveable grain pouches for days when components run low. – Prep fresh elements — washed greens, sliced cucumber, chopped herbs — in a single container so they’re ready to fold in.

    If a work lunch gets canceled, the components hold for another day. If you’re ravenous, double the protein and sauce. The system bends without breaking.

    Matching Your Prep Strategy to Your Actual Lifestyle

    If you work rotating shifts, your "Sunday prep" might need to happen on a Tuesday. If you travel two weeks a month, a fridge full of cooked chicken becomes a liability, not an asset. Start by auditing the next fourteen days as they actually look, not as you wish they looked. Mark every meal you will eat at home versus on the go, every night you get home after eight, and every morning you leave before six. That calendar dictates the strategy, not a template from a blog.

    • High-variability weeks: default to component prep. Wash and chop sturdy vegetables, cook a neutral grain, and portion a protein that reheats well. Assemble different meals in five minutes using sauces or dressings you keep on hand.
    • Low-variability weeks: batch two full recipes you genuinely enjoy and rotate them. This saves maximum time when your schedule is predictable.
    • Travel-heavy months: prep freezer-friendly components like burrito fillings, soup bases, or marinated proteins you can pull the night before. Skip fresh salads that wilt in three days.
    • Household with mixed preferences: build a "toppings bar" — roasted vegetables, grains, beans, proteins, and three distinct sauces. Everyone assembles their own bowl, taco, or wrap without extra cooking.

    When the week derails — sick kid, last-minute deadline, power outage — have a designated "emergency meal" that requires zero prep: canned beans with microwave rice and salsa, frozen dumplings with steamed bagged broccoli, or eggs scrambled with whatever cheese is left. Keep those ingredients stocked permanently. The goal is not a perfect system; it is a system that bends without breaking.

    Putting It Together

    Start Sunday by washing and storing greens, roasting two trays of vegetables with different spices, and cooking a single large pot of grains or beans. Grill or bake one protein that reheats well, such as chicken thighs or tofu, and portion it separately. Make one sauce or dressing you genuinely like. This takes about ninety minutes and gives you building blocks, not finished meals.

    Monday through Wednesday, assemble lunch in two minutes: greens, a scoop of grains, roasted vegetables, protein, and sauce. Keep dinner simple — tacos with leftover fillings, a quick stir-fry using prepped veg, or grain bowls with a fried egg. If plans change, components hold in the fridge for four to five days or freeze in portion bags.

    • Check inventory Thursday morning; roast one more vegetable tray or boil eggs if running low.
    • Use Friday for "kitchen sink" meals: frittatas, fried rice, or loaded potatoes that absorb odds and ends.
    • Saturday stays open — eat out, order in, or cook something fresh if you want.

    Adjust quantities next week based on what you actually ate. Many people find the system settles after two cycles. If you have specific health conditions, check with a doctor or dietitian before making major changes to your eating pattern.

    More from the blog

    From FitLife Solutions

    Our book Healthy Lunchbox Recipes: Practical Meal Prep for Busy Adults goes further, as a digital eBook (PDF and EPUB) you can read on any device.

    Browse all our practical health and fitness guides at fitlifesolutions.site.

    New practical health guides and articles on WhatsApp: follow our channel.

    About the author

    Ahumuza Mark is the founder of FitLife Solutions in Luwero, Uganda. He publishes practical, plain-language guides on everyday health, fitness and habits, and approves every article before it goes online. He is not a doctor: our articles are general information, so please read our Health Disclaimer and talk to a health professional about your own situation. Questions or corrections? Contact us.

    This article is for general information only and is not a substitute for professional medical advice. Talk to your doctor or another qualified health professional before changing your diet, exercise or health routine, especially if you have a medical condition or take medication.

  • How to Stop Nighttime Snacking When You’re Not Hungry

    How to Stop Nighttime Snacking When You’re Not Hungry

    You finish dinner, clean the kitchen, and settle in for the evening. An hour later you are back in front of the fridge or pantry, not because your stomach is growling but because the habit feels automatic. This section is for anyone who recognizes that pattern — whether it shows up while scrolling on the couch, during a late work session, or in the quiet moments before bed — and wants practical ways to interrupt it without relying on willpower alone.

    After reading, you will be able to:

    • Spot the specific cues that launch your nighttime eating episodes
    • Redesign your evening routine so the snacking loop has nowhere to hide
    • Front-load nutrition earlier in the day so physical hunger isn’t masquerading as a craving
    • Set up your kitchen and environment to make the unwanted choice harder and the better choice easier
    • Use a simple pause technique when an urge hits so you can choose your response instead of reacting
    • Address the emotions that often hide behind the reach for food
    • Align sleep timing and light exposure to quiet the biological signals that mimic hunger

    If an underlying medical condition or medication side effect could be driving appetite changes, check with your doctor before making major shifts.

    Identify Your Nighttime Eating Triggers Beyond Physical Hunger

    Start by treating the urge to snack after dinner as data, not a failure. For the next three to five evenings, keep a simple log on your phone or a notepad. Note the time, what you were doing, what you felt physically, and what you felt emotionally in the ten minutes before the craving hit. You are looking for patterns that have nothing to do with an empty stomach.

    Common triggers hide in plain sight. Many people find they reach for food during specific transitions: closing the laptop, putting kids to bed, or starting a show. Others notice a pull toward the kitchen when they feel anxious about tomorrow’s to-do list, bored while scrolling, or lonely in a quiet house. Physical cues like dehydration or fatigue often masquerade as hunger. Write the context down without judgment.

    • What activity were you doing? (watching TV, working, scrolling, reading)
    • What emotion was present? (stress, boredom, loneliness, excitement, fatigue)
    • What physical sensation did you notice? (tight chest, heavy eyelids, dry mouth, low energy)
    • Where were you? (couch, desk, standing at the counter)
    • What time was it?

    After a few nights, review the log. Circle the two or three scenarios that show up most often. That shortlist becomes your target list for the strategies in the next sections. If you notice you only snack when you stay up past a certain hour or when you skip an afternoon snack, you have actionable information. If the log reveals you are eating large amounts rapidly, feeling out of control, or eating to numb intense distress, consider mentioning the pattern to a healthcare provider to rule out binge eating disorder or other medical factors.

    Restructure Your Evening Routine to Break the Snacking Habit Loop

    The habit loop of nighttime snacking usually follows a predictable cue: finishing dinner, settling on the couch, turning on a show, and reaching for food. To break it, you need a new routine that delivers a similar reward — relaxation or transition — without eating. Start by defining a clear "kitchen closed" ritual. After your last bite, put leftovers away, wash the dishes, wipe the counters, and turn off the kitchen light. This physical sequence signals to your brain that eating is done for the day.

    Next, insert a deliberate buffer activity between the kitchen and the couch. Many people find that five to ten minutes of gentle stretching, a warm shower, or writing a quick to-do list for tomorrow creates enough separation to weaken the automatic urge to snack. If you typically watch TV, change your seat or your posture; sit on the floor with a cushion, use a blanket, or keep your hands busy with a fidget toy, knitting, or a puzzle app. The goal is to disrupt the motor memory of hand-to-mouth motion.

    Set a specific "wind-down" alarm on your phone for 30 minutes before bed. When it goes off, dim the lights, put screens away, and do one calming thing: read a physical book, listen to a podcast, or practice box breathing. Consistency matters more than perfection. If you slip and snack one night, treat the next morning as a reset — drink a glass of water, eat a protein-rich breakfast, and recommit to the routine that evening.

    Eat Balanced, Satisfying Meals During the Day to Prevent Night Cravings

    Skipping meals or eating too little earlier in the day is one of the most common reasons cravings take over after dinner. When your body hasn’t received enough fuel — or the right mix of nutrients — it ramps up hunger signals in the evening to make up the deficit. Many people find that eating three balanced meals spaced roughly four to five hours apart keeps blood sugar steadier and reduces the urge to graze at night.

    Aim to include protein, fiber, and healthy fat at each meal. Protein (eggs, Greek yogurt, tofu, chicken, beans) and fat (avocado, nuts, olive oil) slow digestion and increase satiety. Fiber from vegetables, fruit, whole grains, and legumes adds physical fullness and steadies glucose. A lunch of grilled salmon, quinoa, roasted broccoli, and a drizzle of tahini will likely keep you satisfied longer than a plain salad with low-fat dressing.

    If you go more than five hours between meals, plan a purposeful snack — something with protein and fiber — rather than waiting until you’re ravenous. Examples: – Apple slices with two tablespoons of peanut butter – A hard-boiled egg and a handful of baby carrots – Plain cottage cheese with berries

    Hydration matters too. Thirst can masquerade as hunger, so sip water throughout the day and have a glass with each meal. If you’ve been restricting calories aggressively, consider whether your intake is actually adequate for your activity level; many people find that a modest increase at breakfast and lunch eliminates nighttime urges entirely. If you have a medical condition that affects appetite or blood sugar, check with your doctor before making significant changes to your meal pattern.

    Use Environmental Design to Make Nighttime Snacking Inconvenient

    If you have to walk to the kitchen, open a cabinet, and unwrap something to snack, you have already made a series of small decisions that support the habit. Environmental design flips that script by adding friction to the unwanted behavior and removing friction from the alternative. Start with a quick audit: move trigger foods — chips, cookies, chocolate — to a high shelf, an opaque container in the back of the pantry, or out of the house entirely. Keep a bowl of washed fruit or pre-portioned nuts at eye level in the fridge instead. Many people find that simply not seeing the package reduces the urge before it starts.

    Close the kitchen after dinner like a restaurant. Turn off the lights, push in the chairs, and put a physical barrier in place — a baby gate, a closed door, or even a "kitchen closed" sign on the counter. Brush your teeth immediately after your last bite; the mint flavor signals "done eating" to your brain and makes food taste less appealing. If you tend to graze while scrolling on the couch, charge your phone across the room and keep a book, knitting, or a puzzle where you usually sit. The goal is to make the old cue (couch + phone + hand free) lead to a new routine.

    • Store tempting foods in opaque containers on high shelves or in a garage fridge
    • Pre-portion allowed snacks into single servings so you cannot mindlessly eat the whole bag
    • Keep a glass water bottle or herbal tea thermos on your nightstand to replace the hand-to-mouth motion
    • Use a kitchen timer: set it for 20 minutes when a craving hits; often the urge passes while you wait
    • Replace the snack bowl with a fidget object — stress ball, smooth stone, pen — during TV time

    If you slip and eat anyway, note the specific cue (boredom at 9 p.m., leftovers visible on the counter) and adjust one barrier tomorrow. Small environmental tweaks compound over weeks.

    If you want this in more depth, our book Healthy Snacking: Practical Choices for Everyday Nutrition covers it step by step.

    Apply Urge Surfing and Mindful Pause Techniques When Cravings Hit

    When a craving hits after dinner, the urge often feels like a command you must obey. Urge surfing changes that dynamic by treating the craving as a temporary wave you can watch rise and fall without acting on it. Start by noticing the physical sensation: tightness in your chest, a restless feeling in your hands, or a mental tug toward the kitchen. Name it silently — "urge present" — and set a timer for five minutes. During that window, stay where you are and breathe slowly, tracking the sensation as it shifts. Many people find the peak intensity passes well before the timer ends.

    If five minutes feels too long, use a micro-pause instead. Put down your phone or remote, plant both feet on the floor, and take three deliberate breaths. Ask yourself, "What do I actually need right now?" The answer might be thirst, fatigue, or a need to transition out of work mode. Keep a glass of water or herbal tea within reach so hydration becomes the default first response.

    • Notice the sensation without judgment
    • Set a short timer or take three breaths
    • Identify the underlying need
    • Choose a non-food response: stretch, text a friend, write a quick to-do list for tomorrow

    If you do snack after pausing, skip the guilt loop. Note what happened — "I ate while scrolling" — and use that data to adjust your environment or routine tomorrow. Consistency with the pause builds the muscle; perfection is not required. If nighttime eating feels compulsive or distressing, consider speaking with a healthcare provider or therapist who specializes in eating behaviors.

    Address Emotional Drivers Like Stress, Boredom, and Loneliness Directly

    Emotional eating at night often has little to do with food. When the day quiets down, unprocessed feelings — stress from work, the flatness of boredom, or the ache of loneliness — can surface quickly. Food becomes a reliable, immediate way to soothe or distract. The first step is naming the specific emotion before you reach for something to eat. Pause and ask: "What am I feeling right now?" If you can label it — "I'm anxious about tomorrow's meeting" or "I feel disconnected" — you create a gap between the urge and the action.

    Build a small menu of non-food responses matched to each common driver. – For stress: a five-minute body scan, writing a quick priority list for tomorrow, or stepping outside for cold air. – For boredom: a puzzle app, a chapter of a book, stretching while listening to a podcast, or prepping clothes for the next day. – For loneliness: a voice note to a friend, writing a short journal entry, or playing a playlist that feels comforting.

    Keep this list visible — on the fridge or your phone lock screen — so it’s easier to grab than a snack. Practice the alternative for just two minutes. Often the wave of urgency passes once you engage a different sensory channel.

    If you still eat, skip the guilt spiral. Note what happened: "I felt lonely at 9:30 p.m. and ate cookies. Next time I’ll try the voice note first." Data beats shame. If emotional eating feels frequent, intense, or tied to past trauma, consider speaking with a therapist or your doctor; they can help you build deeper coping tools that food never could.

    Align Sleep Hygiene and Circadian Rhythms to Reduce Late-Night Hunger Signals

    Your body’s internal clock drives hunger hormones on a predictable rhythm, and when sleep timing drifts, those signals often show up as late‑night cravings rather than true energy needs. Aim to go to bed and wake up within the same 30‑minute window every day, even on weekends. This consistency keeps ghrelin and leptin — the hormones that tell you to eat and stop eating — on a steadier cycle, so the urge to snack after dinner may fade naturally.

    Light exposure is the strongest cue for that clock. Get 10 to 15 minutes of bright outdoor light within an hour of waking; it anchors your circadian phase and supports melatonin release later. In the evening, dim overhead lights and switch screens to warm‑color modes at least 60 minutes before bed. If you must use a device, blue‑light‑blocking glasses can help, but the simplest fix is to put the phone in another room.

    A wind‑down routine signals to your brain that eating time is over. Try a consistent sequence: herbal tea, gentle stretching or breathing, then reading a physical book under low light. Keep the bedroom cool (around 65‑68°F) and dark; blackout curtains or a sleep mask work well. Avoid caffeine after early afternoon and limit alcohol, since both fragment sleep and can trigger rebound hunger.

    If you still wake hungry, a small protein‑rich bite — like a few almonds or a spoonful of Greek yogurt — can settle the stomach without derailing the routine. Persistent nighttime hunger despite these habits may warrant a conversation with a healthcare provider to rule out medical factors.

    Putting It Together

    Start with one small change each evening rather than overhauling everything at once. On night one, pick a consistent kitchen closing time and stick to it for seven days; brush your teeth right after to signal the shift. Night two, add a five-minute wind-down ritual — stretching, journaling, or a warm shower — before you sit on the couch. Night three, prep a balanced dinner with protein, fiber, and fat so you finish satisfied, not stuffed. Night four, move trigger foods to a high shelf or opaque container and place a glass water bottle at eye level. Night five, practice the pause: when an urge rises, set a timer for two minutes, notice the sensation, and decide whether you still want the snack. Night six, name the feeling underneath the craving — boredom, stress, loneliness — and try one non-food response: a short walk, a text to a friend, a few breaths. Night seven, review what felt doable and what didn’t, then keep the two or three habits that clicked. Progress is uneven; some nights you’ll snack anyway. That’s data, not failure. If sleep or mood stays disrupted, check in with a healthcare provider.

    More from the blog

    From FitLife Solutions

    Our book Healthy Snacking: Practical Choices for Everyday Nutrition goes further, as a digital eBook (PDF and EPUB) you can read on any device.

    Browse all our practical health and fitness guides at fitlifesolutions.site.

    New practical health guides and articles on WhatsApp: follow our channel.

    About the author

    Ahumuza Mark is the founder of FitLife Solutions in Luwero, Uganda. He publishes practical, plain-language guides on everyday health, fitness and habits, and approves every article before it goes online. He is not a doctor: our articles are general information, so please read our Health Disclaimer and talk to a health professional about your own situation. Questions or corrections? Contact us.

    This article is for general information only and is not a substitute for professional medical advice. Talk to your doctor or another qualified health professional before changing your diet, exercise or health routine, especially if you have a medical condition or take medication.